Recently in Creative Output

  Page 2 of 3 in Creative Output  

Editor's Note -- Recently I was corresponding with TDS member Brian F Wilkie about a project he was working on. Brian had figured out how to create a unique type of photo album where he output pages with snapshots printed on them, then bound these pages together in a binder. I loved this idea and asked Brian to write a short article for us, which he kindly did. So, in his own words, here's how Brian Wilkie creates his unique output, complete with Lightroom templates so you can do the same. Thanks Brian!

Using Lightroom 2.4, a Canon Pixma Pro 9000 printer, and Red River Paper's excellent Premium Gloss DUO 8.5" by 11" letter-sized stock, I'm able to  create a handsome looseleaf bound album quickly, and fairly easily.

In Lightroom, I start with a  grid filter which gathers all images taken in a  particular year with a rating of 1 star or above. The choice of rating will vary with how hard you are on yourself and whether you want to include family snapshots as well as fine art images.  Select all of the pictures (command A), then create a collection called Album 20XX (filling in the appropriate year). Now, you can use delete to remove any images which are repetitive, virtual copies you made for different print sizes, or black and white versions. By the end of the process you will have a good idea of how big a printing task you have undertaken.

Printing

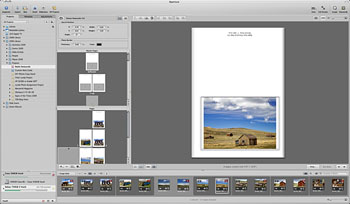
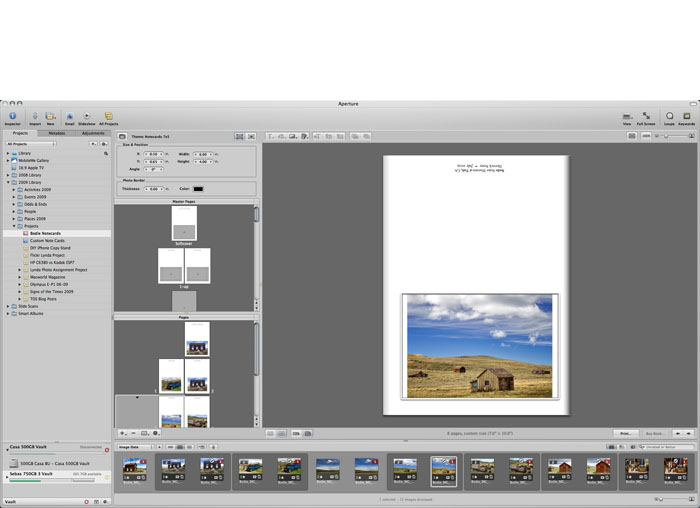
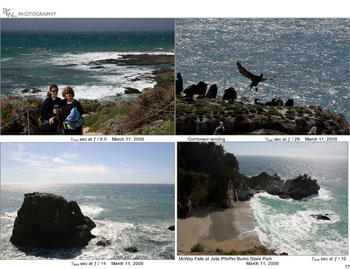
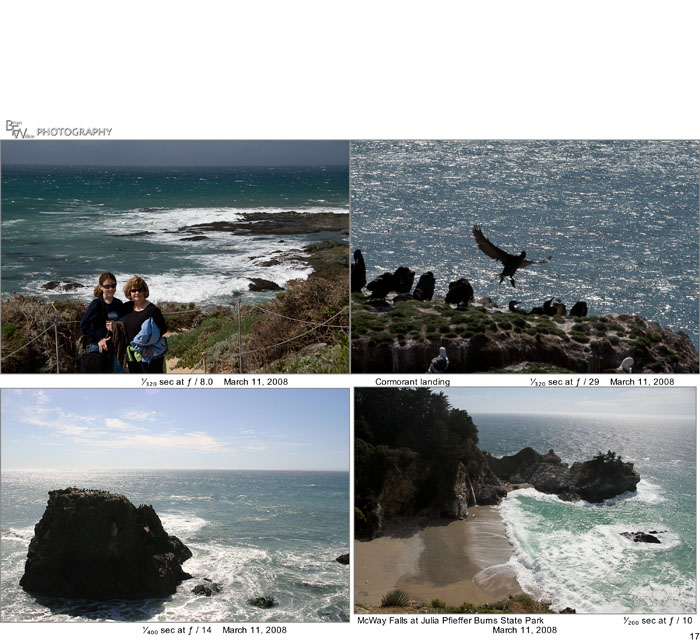
You can download a pair of print templates that make good use of the real estate on a US letter page, as long as you have a printer that can handle borderless printing. These templates provide 4 prints up at 5.5" inches by 3.67" inches on a page. I use the "rotate to fit" option so that portrait mode images are printed as large as possible, although this means that on some pages viewers will need to turn the binder on its side to see the pictures oriented correctly. I also enable Page Number under Page Options to help keep track during printing, and the Identity Plate option for my Logo. Finally, the Photo Info option is enabled using Capture Exposure Date as a template. Be careful not to be too wordy in captions or the text will wrap around and the photo size may be restricted.

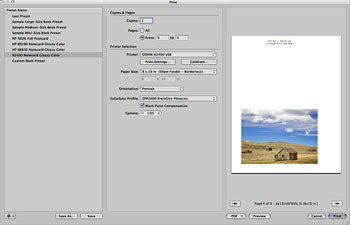
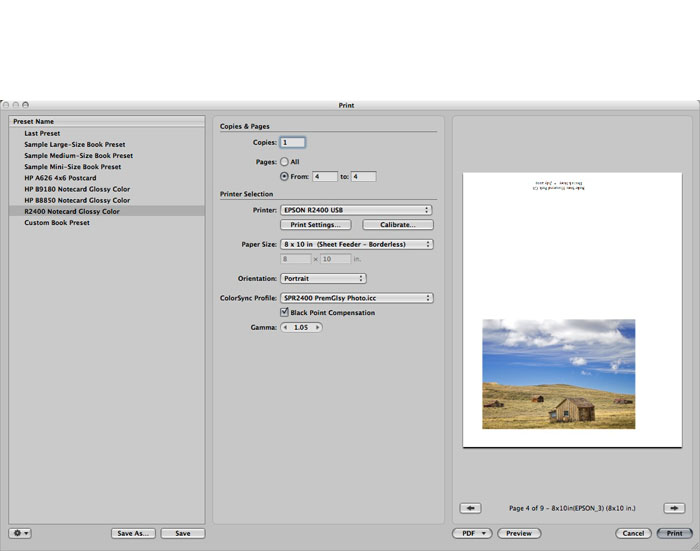
Printing is done using the appropriate ICC profile downloaded from Red River Paper with Print Sharpening set to "High" and Media type to "Glossy".

The printing itself is completed in two passes. First, the User Template "4up letter+data Odd" is selected, then Print is clicked. At this point, settings options become printer and computer operating system specific. As I mentioned before, I use a Canon Pro9000 on a Mac running OS 10.5. In the print dialog box under Paper Handling, I select Pages to Print - Odd Only. I also select Page Order - Normal. Under Quality and Media I select Media Type - Glossy Photo Paper and Print Quality - High. Under Borderless Printing, I select Amount of Extension - Min. This allows the page number to be visible on the final print since Lightroom puts this in the extreme lower right corner of the page.

After the first pass, carefully flip over the set of odd pages and put them into the paper feed. The top sheet should now be the back side of page one, but careful experimentation is called for here. Select the user template "4up letter+data Even" and click Print. Now under Paper Handling change  to Pages to Print - Even Only.

All you need now is a good quality 3-hole punch. Remember, this is heavy paper stock. Then put the pages in to a quality 3-hole binder.  I use a nice leather one from the local office supply store. The end result is a good looking, well printed, and durable album. By my calculation the cost is around 28¢ per image, less if you shop around for discounted Canon ink.

You can make photo art notecards that won't be just good; they'll be professional too. And I'll show you how. This workflow uses Aperture software, an Epson printer, and Red River paper. It's fast, efficient, and archival. Once you're set up, you can print just a few cards whenever you need them, or for larger runs, spend a rainy afternoon creating entire sets of cards to sell or give as presents. Of course you can make substitutions to this workflow, but if you have the tools listed here, that's where I'd start.

Equipment

  • Quality ink jet printer. I'm using the Epson R2400 for this project.
  • Red River notecard stock. For glossy surface, use 60lb. Pecos River Gloss (#8451) and for matt surface, I recommend Premium Matte C2S (#1567). Both stocks are 7" x 10" and fold down to a 7" x 5" note card.
  • Photo software. I highly recommend Aperture 2 (or later) for this project. Why? Because I create the notecards using Aperture's book making tool. This allows me to design everything precisely as I like, and then it remembers all my settings so I can revisit the project at any time and print more cards that look *exactly* like the original set.
  • Envelopes. You can use what ever you want here, I found Darice 5" x 7" envelopes at the craft store for about 10 cents each.

Designing Your Card

Since I'm using Aperture, all of my images were already organized. I decided to make a themed set of cards featuring my recent shoot at Bodie State Historical Park in Northern California. I highlighted half a dozen shots for this project, then clicked on File > New from Selection > Book. This is the first step to opening the layout tool. Next, in the following dialog box, choose "Custom" from the "Book Type" popup menu. We won't be using any predesigned templates for this project. Click the New Theme button, give it a name, such as "5 x 7 Notecard," and enter the following information:

Page Size - Width: 7", Height: 10", Margins - Top: 5.5", Bottom: 0.5", Inside: 0.5", Outside: 0.5". Then click OK.


The Aperture layout tool. It was originally designed for books, but it's great for notecards too. Click to enlarge image.


Your selected images will be added to the new project you just created, and you'll be greeted with the layout tool interface. Open up Master Pages (Gear icon > Show Master Pages), and click on the 1-up template. Go back to the Gear icon and choose "Show Layout Options." You'll see new dialog boxes appear above the Master pages that allow you to specify settings.

Go back to the Gear menu, choose Add > Photo Box. A placeholder box will appear on your 1-Up Master page. Click on it to select, then add these numbers to the Size & Position box that's above the Master Pages box:

X: 0.50, Y: 0.65, Width: 6.00", Height 4.00", Angle: 0°. You can adjust these settings later to your particular tastes, but this will get you started. Then right-click on the photo placeholder and choose from the popup menu: Photo Box Alignment > Scale to Fit Centered. You've now set up your template. You can add text by choosing Gear > Add > Text box. Type your text in it, then click on the "T" at the top of the interface to format it. You'll probably have to rotate it 180° if you want it to print correctly on the back of the card.

Now go to the Pages box (below Master Pages) click on the 1-Up thumbnail, and drag a photo from the Filmstrip to the empty placeholder in the big browser window. To make sure your Master Page settings are honored, I recommend going back to the Gear icon and choosing: Reapply Master. You've now designed your first notecard. You can add more notecards by going to the + icon and selecting "Add New Page" from its popup menu. I created eight of these 1-Up pages for my Bodie notecard set.

Get Ready to Print

As with any big printing project, make sure your screen is calibrated and your printer is full of ink and ready to go. I choose the R2400 for this project because it handles card stock easily, plus it seems to like Red River paper. To avoid paper feed problems however, I only load one sheet at a time for notecards.

For notecards using the 60lb. Pecos River Gloss, use the following settings in Aperture.


The Aperture Print Dialog. You can save your settings as presets so it's easy to print the job later on. Click to enlarge image.


Select the notecard you want to print, then click the "Print" button in the lower right corner of the Aperture interface. A dialog box will appear with "Custom Book Preset" selected in the left hand column. Make a test printing one card, so I recommend that you use the "From X to X" setting instead of Print All. Next, select your printer from the popup menu. And for paper size, I've had great luck with 8" x 10" sheet fed (even though the paper is really 7" x 10"). I set the ColorSync profile for Epson glossy paper (in this case, SPR2400 PremGlsy Photo.icc), then click the Save As button in the lower left corner to save this preset. Give the preset a descriptive name, such as "R2400 7x10 Notecard Glossy," click OK, then print. Aperture will remember this preset, and you can use over and over again.


Sample notecard before folding. Red River paper is scored in the middle so it's easy to fold and get a professional looking card. Click to enlarge image.

You have other options in this dialog box too, such as setting Black Point (which opens up the shadow areas) or increasing gamma (which brightens up midtones). The nice thing about these adjustments is that you can tweak your output without having to mess with the picture itself. If I do make print adjustments, I note those settings in the description area of the photo so I can use them again next time.

To print matte surfaced cards, I swap out the black cartridges in the R2400, then create a new preset in the Aperture Print dialog box that uses the Enhanced Matte Paper ICC profile. I then load up a sheet of Premium Matte C2S and make a test print. If I'm not satisfied with the initial output, such as the shadow areas rendering just a little too dark, I make a "New Version from Version" by right-clicking on the image. Now I can adjust the image for the matte surface and try another print.

lynda_aperture.png

Since all of my print settings are saved as presets, and my card layouts are saved as templates, I can come back to this project when ever I want to print additional cards. If you use Aperture's Vault, it will save your settings to a backup drive.

Final Touches

Once all the printing was done, it was fun to spread out the cards and choose my favorites. Some images looked better with the glossy surface while others were really nice on matte. I carefully folded the cards along the score, then bundled each one with its matching envelope. I even found 5" x 7" cardboard boxes at the craft store that I could use for packaging sets of notecards.

Obviously there are variations to just about every step in this process. You can use other photo applications or printers. The tools I chose were the result of testing, with these being the easiest and most efficient.

And I have to say, now that the project is over, making custom notecards from my own pictures is very satisfying.


twitter.jpg Follow me on Twitter

-


Technorati Tags: , , , , , , , , ,

Our own Stephanie Scheetz attended the CHA Summer Convention and Tradeshow in Orlando, Florida, and sits down with Derrick to report on interesting things there for photographers and creatives looking for new opportunities. We talk about trends, specific products, and business endeavors that you might be interested in.

Listen to the Podcast

You can also download the podcast here (25 minutes). Or better yet, subscribe to the podcast in iTunes.

Monthly Photo Assignment

Transport is the August 2009 Photo Assignment. Think both literally (car, bike, bus, etc) and figuratively. You can read more about how to submit on our Member Participation page. Deadline for entry is August 31, 2009.

More Ways to Participate

Want to share photos and talk with other members in our virtual camera club? Check out our Flickr Public Group. It's a blast!


twitter.jpg Follow me on Twitter

-


Podcast Sponsors

SiteGrinder lets you take ownership of your websites. Effortlessly output pages right from Photoshop.

Red River Paper -- Try the $7.99 Sample Kit.

Add Magic to Your Slideshows -- FotoMagico presentations are so amazing that your audience will be asking how you did it.


Technorati Tags: , , , , ,

Shrink Plastic Charms

Remember the awe and amazement you had the first time you played with Shrinky Dinks? Watching a piece of plastic curl and shrink into a small, hard charm was like watching a magic show in the oven. Grafix makes it easy to relive those moments with their shrink plastic sheets.

The process is easy. Print your favorite pictures (don't forgot the old family photos) onto one of their sheets and cut around the designs. Lay the cut-outs onto a metal baking sheet and follow the manufacturer's heating instructions. Soon your images will be transformed into plastic pieces that are 20% of their original size. In no time you'll be making your own memory bracelets, mini art books, and more! It's a perfect product for any artist who's still a kid at heart.

Other Creative Output Projects with Stephanie

Stephanie has many more creative output projects waiting for you. Just visit our Creative Output section, right here on The Digital Story. Some examples are:

Stencil Art from Photos (Video Tutortial)

Make a Custom Notebook Using Your Images (Video Tutorial)

Make a Custom Photo Gift Bag (Video Tutorial)

Buckle-Up Frame Present for Dad on Father's Day

A Time to Remember - Make Your Own Photo Clock

Packing Tape Transparencies

Painting without a brush. Artist Tim Mancusi joins Stephanie Scheetz and demonstrates how you can transform your photographs into beautiful works of art. Tim begins with a photograph, then creates a stencil from it using a simple craft knife. He spray paints over the stencil on to art paper to render his unique portraits. It's a great technique for photographers who always wanted to paint, but never mastered working with a brush.

Tim shows you everything you need to know, step by step. Start with one of your photographs, cut out areas with a craft knife, tack the stencil to your blank paper, then spray paint. The finished product is truly artwork, and you are the sole creator of every element.

Other Creative Output Projects with Stephanie

Stephanie has many more creative output projects waiting for you. Just visit our Creative Output section, right here on The Digital Story. Some examples are:

Make a Custom Notebook Using Your Images (Video Tutorial)

Make a Custom Photo Gift Bag (Video Tutorial)

Buckle-Up Frame Present for Dad on Father's Day

A Time to Remember - Make Your Own Photo Clock

Packing Tape Transparencies

Technorati Tags: , , , , , , , , ,

Make Your Own Gift Wrapping Paper

You put a lot of thought into finding that perfect present. So why not put a little extra time into how it's wrapped and really impress the recipient?

A great way to personalize gift wrap is to use a plain paper printout of one of your pictures. It could be a portrait, a sentimental vacation shot... just about anything that has special meaning. Another creative twist is to take close-up shots of textured surfaces. Now you can make your gifts purr with fur, or go rough and rugged with an image of tree bark.

The size of your finished gift wrap will be determined by the maximum paper size your printer can accommodate. Print the image so it fills the entire sheet of paper or just the center of it.

Imagine the surprised look on your friend's face when you give them your wonderfully wrapped gift... and that's before they even open it!

More Great Creative Output Projects

Stephanie has many more creative output projects waiting for you. Just visit our Creative Output section, right here on The Digital Story.

Create Artistic Pet Silhouettes from Your Photos

groomer_has_it_web_sm.jpg

Sometimes you just don't know when you'll find inspiration for your next craft project. One of my favorite TV shows, Groomer Has It put a clever spin on the classic art form of black paper silhouettes. In many scenes, the interior walls were decorated with these cute pet profiles, so I was inspired to make one, too.

Take a frontal or profile picture of your pet. Print the image onto an 8.5" x 11" sheet of copy paper. Place your "photocopy" over a piece of black paper and staple the corners to secure the papers together. Use a sharp pair of scissors to cut around the details. Here's cutting a tip: if you move the paper and not the scissors, you'll get a cleaner edges on your silhouette.

When you're done trimming, adhere your cutout to a bright colored, patterned, or neutral background paper using a spray adhesive. Finally, frame Fluffy or Fido, and your artwork is complete!

Illustration from the Groomer Has It show on Animal Planet.

More Creative Output Projects

Be sure to visit our Creative Output studio for more great project ideas.

The new Creative Output section of The Digital Story was created to inspire photographers to find new ways to share their images with others. I sometimes refer to this process as, "going beyond the print."

I brought in a true expert in this field, Stephanie Scheetz, to oversee this endeavor. Stephanie has been a craft designer and instructor for major craft companies for more than 15 years. She has taught classes throughout the U.S. and Asia, and has appeared on TV craft shows and home shopping programs in the U.S. and U.K. Her work can be found in craft industry and consumer magazines, in addition to, catalogs, advertisements, and books. In addition to that, Stephanie is an engaging personality.

So she and I sat down in front of the microphone this week to talk about her views on Creative Output and to give you a preview of the types of projects she's working on. You'll come away from the show with great ideas, and hopefully get to know Stephanie a little better.

Monthly Photo Assignment

Splash is the June 2009 Photo Assignment. You can capture anything from a child jumping in a pool to an olive dropping into a martini. You can read more about how to submit on our Submissions page. Deadline for entry is June 30, 2009.

Listen to the Podcast

You can also download the podcast here (26 minutes). Or better yet, subscribe to the podcast in iTunes.

Other Creative Output Projects with Stephanie

Make a Custom Photo Gift Bag (Video Tutorial)

Buckle-Up Frame

A Time to Remember - Make Your Own Photo Clock

Packing Tape Transparencies

Want to share photos and talk with other members in our virtual camera club? Check out our new Flickr Public Group. It's a blast!


twitter.jpg Follow me on Twitter

-


Podcast Sponsors

SiteGrinder lets you take ownership of your websites. Effortlessly output pages right from Photoshop.

Red River Paper -- Try the $7.99 Sample Kit.

Add Magic to Your Slideshows -- FotoMagico presentations are so amazing that your audience will be asking how you did it.


Technorati Tags: , , , , ,

Photo Displays in a Pinch

Sometimes creative photo displays are right in front of you. Paper clamps aren't just for holding a stack of unpaid bills. Believe it or not, they're also suitable for holding a photo of your Aunt Jane and her kids.

Position the arms of the clamp upward so they touch. Place your photo in between the arms and your display is complete! Another option is to decorate the clamp base and arms using paper and ribbon.

Paper clamps come in various sizes and can easily be found in office supply stores. It's important to select a photo that's appropriate for the paper clamp size. If your photo is too large, the display might be top heavy and not stay upright.

And there you have it, a new way of using an ordinary item. Who says creativity has to be time consuming and costly?

Stephanie Scheetz is a talented artist, engaging personality, and oversees the new Creative Output section on The Digital Story. Her latest video, Make a Custom Notebook Using Your Images shows you how to transform a 99-cent paper notebook into an artistic gift that features your imagery.

In case you've missed it, Stephanie has been busy showing you other great projects that you can easily make at home with your photography. A few examples include:

Make a Custom Photo Gift Bag (Video Tutorial)

Buckle-Up Frame Present for Dad on Father's Day

A Time to Remember - Make Your Own Photo Clock

Packing Tape Transparencies

So, if you haven't met Stephanie yet, please check out her work. And she'd love it if you left her a comment too. The Digital Story isn't just about making great pictures, we want to give you ideas on how to share them with the world.