Recently in Photography

  Page 109 of 381 in Photography  

Panasonic-DMC-GX85.jpg

Panasonic just announced the DMC-GX85 mirrorless camera ($799 with 12-32mm f/3.5-5.6 lens) that features new 5-Axis Dual I.S. (Image Stabilizer).

They write: "The LUMIX GX85 incorporates the new 5-axis Dual I.S.(Image Stabilizer) for more effective suppression of blur. Combining an O.I.S. (Optical Image Stabilizer, 2-axis) and a B.I.S.(Body Image Stabilizer, 5-axis), the 5-axis Dual I.S. compensates for larger movement which was conventionally uncontrollable, making it possible to use 4-step slower shutter speed. By making the most of both O.I.S and B.I.S., it is highly beneficial not only in wide angle but also in telephoto and in the adverse situations such as at nighttime or with one-hand shooting."

"The 5-axis Dual I.S. works in both photo and motion picture recording including 4K video. Panasonic LUMIX G DSLM (Digital Single Lens Mirrorless) Cameras offer a wide variety of digital interchangeable lenses and most of them will comply with this 5-axis dual I.S. in LUMIX GX85 and the B.I.S. compensates for the camera movement even when a lens without O.I.S. is used."

Other highlights include:

  • 16MP Live MOS Sensor
  • 2.76m-Dot 0.7x Electronic Viewfinder
  • 3.0" 1.04m-Dot Tilting Touchscreen LCD
  • UHD 4K Video Recording at 30/24 fps
  • Built-In Wi-Fi Connectivity
  • ISO 25600 and 10 fps Shooting with AF-S
  • DFD AF System, 4K Photo Modes

All of this tech is packed into a handsome, compact package. Personally, I like that Panasonic is offering dual-image stabilization more often these days. I think it's an excellent option, and it allows us to more easily use both our Panasonic and our Olympus lenses.

The Lumix DMC-GX85 will go on sale at the end of May for $799.99 with a 12-32mm F3.5-5.6 collapsible kit zoom.


Nimble Photographer Logo

The Lumix DMC-GX85 has a high Nimbleosity Rating. What does that mean? You can learn about Nimbleosity and more by visiting TheNimblePhotographer.com.

Want to Comment on this Post?

You can share your thoughts at the TDS Facebook page, where I'll post this story for discussion.

This is The Digital Story Podcast #526, April 5, 2016. Today's theme is "Is Aperture Priority the Ultimate Exposure Mode?" I'm Derrick Story.

Opening Monologue

Of all the exposure modes, I think Aperture Priority offers the best convergence of control and convenience. I like it because it keeps my head in the composition game without killing my creativity. In fact, I'm a far more expressive photographer in Aperture Priority mode. We lead off today's show with a closer look why.

Is Aperture Priority the Ultimate Exposure Mode?

Practically every camera offers Aperture Priority. You set the f/top and the camera sets the shutter speed. It's so simple, yet shooting in this mode is bound to improve your pictures. Here are some reasons why.

Austin-PEN_F-P1250023.jpg

  • Controlling Depth of Field. This is the biggie. Not every composition should have a soft background, nor should it be sharp from front to back. What works best for your subject?
  • Lens Performance. Most of my SLR optics are best at 5.8 to 11. But my Micro Four Thirds lenses are ideal at f/4 and not stopped down.
  • Keeps You In Touch with Your Camera. Have you ever drifted off while shooting without any idea of what's going on with your camera?
  • Natural Vignetting. Many lenses, especially those without in-camera correction, will vignette slightly wide open. You can use this to your advantage for portraits.
  • Motivates You to Shoot With Primes. As you get more hooked on Aperture Priority shooting, primes become more desirable because of their wider latitude of exposure settings.

In the News

Fujifilm releases several camera and lens firmware updates - covered by DP Review.

In addition to the X-Pro2 firmware update we reported on last week, Fujifilm has released a number of firmware updates for several lenses and camera bodies: the X-Pro1, X-Pro2, X-M1, X-E1, X-A1, and X-A2, as well as the XF 50-140mm F2.8 and XF 100-400mm F4.5-5.6 R LM OIS WR lenses. Changes and firmware versions vary based on model, but most camera body updates simply add support for a focus limiter function on the XF 100-400mm F4.5-5.6.

Member Quotes of the Week

Intelligent comments culled from The Digital Story Facebook page.

In regard to last week's Facebook Post: "Choosing to Go It Alone," we had some terrific comments, and I want to share them with you now.

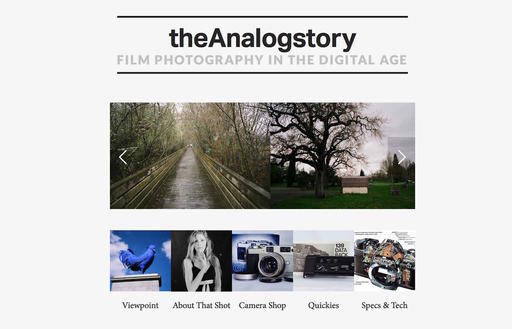
Charles wrote: "Good for you Derrick and the best of luck. Although I switched to digital about a dozen or so years ago, I spent more years as a film photographer (Kodachrome 25, 64, and the 'high speed' 200) and will happily follow the analogue story."

Chris added: "I'm now in a position to start scanning my slides they're from back in 1981 onwards my latest love is a 1950s Mamiya 6 folder - film photography is FAR from gone! Bring it on Big D."

John kicked in: "I recently had my Nikon FE2 refurbished. My first camera was an oatmeal box pinhole. I miss the smell of chemicals and the feel of working under a red tinged light. Looking forward to seeing what you create!"

And finally Andrew wrapped it all up by commenting: "Good luck with this new venture. My film camera collection keeps growing. Your new site is probably going to do nothing to stop that trend."

Post your thoughts on our Facebook page. Believe me, I read them. Also, we have a question going on Facebook right now: "If you had to pick one film camera from the past, that you craved, but couldn't afford, what would it be?"

Editing Extensions Update

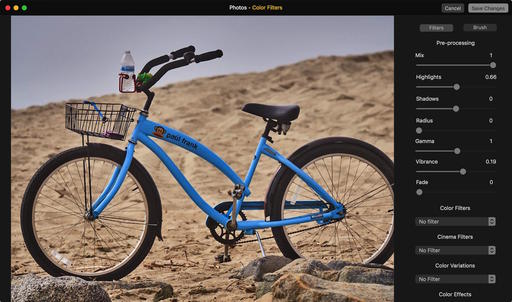
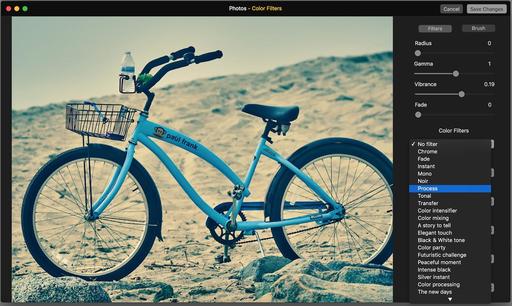
There's been another rush of editing extensions recently added to the Mac App Store. If you haven't checked lately, just enter "Editing Extension" in the search field. My current count of legitimate extensions is about a dozen. I just reviewed Color Filters on TDS. I really like it a lot. And don't forget about my lynda.com training, Photos for OS X Essential Training.

Updates and Such

In Aperture Exile? Easing the change to Capture One, with guest Derrick Story - I'll be the special guest on an upcoming Capture One Pro webinar on April 13 at 9:00 AM PDT. The webinar is free, and you can sign up here.

Eastern Sierra Reservation Forms Went Out - I sent out the workshop reservation forms to the Reserve List this weekend. If you were on the list and didn't get a form, please send me an email. The Eastern Sierra photography workshop begins Thursday evening, Oct. 20 and runs through Sunday, Oct. 23rd. If you want to get on the next round reserve list, then go to the TDS Workshops page and use the Send Me Info form to get on the list.

And finally, be sure to visit our friends at Red River Paper for all of your inkjet supply needs.

See you next week!

More Ways to Participate

Want to share photos and talk with other members in our virtual camera club? Check out our Flickr Public Group. And from those images, I choose the TDS Member Photo of the Day.

Podcast Sponsors

Red River Paper - Keep up with the world of inkjet printing, and win free paper, by liking Red River Paper on Facebook.

ImageFramer Take your photos to the next level with ImageFramer. Visit www.apparentsoft.com today.

MacPaw Creators of CleanMyMac 3 and other great software for Apple computers. Visit www.macpaw.com today.

The Nimbleosity Report

Do you want to keep up with the best content from The Digital Story and The Nimble Photographer? Sign up for The Nimbleosity Report, and receive highlights twice-a-month in a single page newsletter. Be a part of our community!

Want to Comment on this Post?

You can share your thoughts at the TDS Facebook page, where I'll post this story for discussion.

For only $5, you can add an exhaustive (but easy to use) collection of filters to your Photos for OS X app. The editing extension is called Color Filters for Photos, and it's worth a look.

pre-process.jpg

Like any Editing Extension, the easiest route is to purchase and download from the Mac App Store. In this case, Colors will only set you back $4.99. Once the download is complete, go to System Preferences > Extensions > Photos and turn on Color Filters. Now you're ready to have fun.

Open an image in Photos for OS X, then press the Return key to go to editing mode. At the bottom of the list on the right side, click on Extensions, and choose Color Filters from the popup menu.

color-filter-applied.jpg

In the Color Filters interface, you're presented with some nice pre-processing adjustments, such as highlights and shadows. Then you can move down to the filters themselves. There are six different sets, each with a healthy list of options. Just mouse over the different items on the list, and you'll see your image temporarily transformed with the filter. Find one you like, and click on it. The filter is applied. Click the Save Changes button to return to Photos.

Just like anything else in Photos, this process is totally non-destructive. While in Edit mode, you can press the M key to see the unedited version of the image, or choose Revert to Original to remove the effect altogether.

Color Filters is a well-coded, well-designed application. The performance is snappy, and the effects are terrific. Seems like a must-have investment for any Photos for OS X photographer.

Master Photos for OS X

(It's More Powerful than You Think)

For hands-on tutorials, be sure to take a look at Photos for OS X Essential Training on lynda.com. I cover everything you need to know to get the most from this surprisingly powerful image management application.

More Help and Insights on Photos for OS X

Don't forget about the Photos for OS X Special Feature Section on The Digital Story. It's a roundup of tutorials, videos, and articles focused on helping you master Apple's latest photo management software. You can also find it under Photography in the top nav bar.

Want to Comment on this Post?

You can share your thoughts at the TDS Facebook page, where I'll post this story for discussion.

One of my favorite modes of transportation for photography is cycling. (To be honest, it's my favorite mode for just about everything.) I recently received shipment of the new Priority Eight by Priority Bicycles ($799 online). And if you're considering a new set of wheels, or your first set, read on.

new-priority-eight.jpg Newly assembled Priority Eight bike. It took about 30 minutes to unpack and prepare for riding. Photo by Derrick Story.

The Priority Eight falls somewhere in-between a comfort bike and one designed for speed. Its geometry positions you slightly forward, but not so much that your hands begin to tingle after a mile or two on the road. The pedals are wide with protruding studs to provide secure traction with any type of shoe. (Priority also sells accessory straps for an even more secure fit.)

The seat is well-designed, but it's a bit more racing style than for pure comfort. Depending on your vision for the Priority Eight, you may want a different type with more padding. This is really my only quibble with the bike. And to be honest, it comes down to riding style. I'm sticking with the original for now. We'll see how I feel after a few more rides.

The power train is the excellent Gates Carbon Drive that features a carbon-fiber belt (instead of an oily chain) that meshes with the internally geared rear hub. This is my first belt drive, and I love it! Paired with the Shimano Nexus 8 Twist on the right handle bar grip, I can quickly and quietly shift through all eight gears. The readout on the Twist keeps me informed of which gear I'm currently using.

gates-carbon-drive.jpg

I like wider tires, and Priority knocked it out of the park by choosing Continental Puncture Resistant 700 x 32s. They look great, especially paired with the matching fenders. And for secure stopping, Priority chose Tektro HD-M330 Hydraulic Disc Dual Piston brakes. I like them.

The bike arrives securely packed, requiring only a few finishing touches by its new owner. They recommend that you have a professional complete the assembly - not a bad idea if you're new to cycling. But experienced riders won't have a problem getting the Eight prepped for the road. The necessary tools are even included in the box. Nice touch.

After about a half an hour of assembly, I spent another hour making minor adjustments during shake down rides. I'm probably more picky than some when it comes to final tweaks. But it's time well spent as far as I'm concerned.

On the Road

After adjusting the seat height, handlebar position, brakes and drive train, the Priority Eight was ready for its first tour. I rode for eight miles (of course!) then returned to the studio, made a few more tweaks, then rode again. Shifting and braking was smooth, my hands felt great, and even the skinny seat was fine.

The Ultralite 6061 T6 Aluminum frame is solid and not too heavy (entire bike weighs in at about 26 pounds). I didn't have a problem carrying it up steps or hanging it on its rack. I did notice some chirping on bumpy roads. It didn't bother me, but I'm going to track it down. Not sure if it's the frame or the fenders. But considering that I'm 6'7" and over 200 pounds, performance was excellent. BTW: the Priority Eight is available in 3 sizes. I have the XL model.

In terms of acceleration, the Gates Carbon Drive combined with the bike's geometry makes for plenty of getup and go. I didn't feel like I was going that fast, but my route times have been logging in about 10 percent faster than compared to the same rides with my Cannondale Bad Boy, which is no slouch on the road.

priority-eight-side-view.jpg

Bottom Line

The Priority Eight is a well-designed urban bike that incorporates quality components with good design. It's particularly well-suited for urban riders and backroad explorers who want a great set of wheels at an affordable price.

I'm using it for running errands around town and for local shoots. Plus I like having a bike that doesn't look like all the others chained up outside the store. Santa Rosa is a popular cycling town. People notice it when you have a great-looking set of wheels. The Priority Eight handsomely fits that bill too.

The Nimbleosity Report

Do you want to keep up with the best content from The Digital Story and The Nimble Photographer? Sign up for The Nimbleosity Report, and receive highlights twice-a-month in a single page newsletter. Be a part of our community!

Want to Comment on this Post?

You can share your thoughts at the TDS Facebook page, where I'll post this story for discussion.

This is The Digital Story Podcast #525, March 29, 2016. Today's theme is "Becoming Software Independent." I'm Derrick Story.

Opening Monologue

Aperture, iPhoto, Carousel, and a slew of online apps that are too many to mention: they will not be moving forward into our futures. So how does a photographer protect oneself from the seemingly capricious actions of software providers? I'll address that in today's top story.

Becoming Software Independent

This is a phenomenon new to the digital age. With film, you get it developed, store it in a safe place, and retrieve the images as needed. But with software, the game has changed. You can invest time and money into an application that may be gone tomorrow. How should you address this issue?

  • Don't Give Up. Nobody likes disruptive change. But the potential of it shouldn't dissuade you from using the best software available at the time.
  • Create a system independent of the application itself. For example, I do like the managed library approach in Capture One Pro. But during import I can also backup those original files to a separate hard drive. Lightroom and Aperture provide for this too. Think about how you can take advantage of this functionality.
  • Create 4 Star Smart Albums and export those images as Tiffs. Catalog them using a simple folder system.
  • Create an Universal Referenced File System. Using a referenced file system with Lightroom, Capture One, and Aperture allows your masters to be organized and available for other apps up the road.
  • To DNG or Note. Personally, I don't convert my RAW files to DNG. But you may feel differently.
  • Create a robust backup and archiving system.

The best approach is to stay ahead of the curve if you can. You may have to dedicate a computer to the transition process while in-between applications.

In the News

Nik Collection Now Free from Google - covered by The Digital Story.

The Nik Collection is comprised of seven desktop plug-ins that provide a powerful range of photo editing capabilities - from filter applications that improve color correction, to retouching and creative effects, to image sharpening that brings out all the hidden details, to the ability to make adjustments to the color and tonality of images. And you now can download them for free.

silver-efex-pro.jpg

Member Quotes of the Week

Intelligent comments culled from The Digital Story Facebook page.

In regard to last week's Facebook Post: "Nik Collection Now Free from Google" we had some terrific comments, and I want to share them with you now.

Jerry wrote: "Great news, but sadly if you don't use Adobe software, you're limited to using it with the unsupported Aperture on a Mac. It would be nice if they came either as standalone apps or Extensions for the Photos App, and personally I don't see that happening, as Google's got such a reputation for killing good software."

Bud added: "This is bad news. In typical Google fashion, I expect the product to die a slow death with non-development and will ultimately be just another example of a failed Google project, like other software companies they have purchased. It's a shame as I own the whole suite of NIK products and their U-point technology is awesome."

And Bill wrapped up: "I think that, ultimately, this may be bad news. you have to wonder if development will cease."

Post your thoughts on our Facebook page. Believe me, I read them. Also, we have a question going on Facebook right now: "If you had to pick one film camera from the past, that you craved, but couldn't afford, what would it be?"

Ready to Photograph Cuba?

If you're contemplating a trip, I have some excellent resources for you.

Updates and Such

In Aperture Exile? Easing the change to Capture One, with guest Derrick Story - I'll be the special guest on an upcoming Capture One Pro webinar on April 13 at 9:00 AM PDT. The webinar is free, and you can sign up here.

Eastern Sierra Reservation Forms Went Out - I sent out the workshop reservation forms to the Reserve List this weekend. If you were on the list and didn't get a form, please send me an email. The Eastern Sierra photography workshop begins Thursday evening, Oct. 20 and runs through Sunday, Oct. 23rd. If you want to get on the next round reserve list, then go to the TDS Workshops page and use the Send Me Info form to get on the list.

And finally, be sure to visit our friends at Red River Paper for all of your inkjet supply needs.

See you next week!

More Ways to Participate

Want to share photos and talk with other members in our virtual camera club? Check out our Flickr Public Group. And from those images, I choose the TDS Member Photo of the Day.

Podcast Sponsors

Red River Paper - Keep up with the world of inkjet printing, and win free paper, by liking Red River Paper on Facebook.

ImageFramer Take your photos to the next level with ImageFramer. Visit www.apparentsoft.com today.

MacPaw Creators of CleanMyMac 3 and other great software for Apple computers. Visit www.macpaw.com today.

The Nimbleosity Report

Do you want to keep up with the best content from The Digital Story and The Nimble Photographer? Sign up for The Nimbleosity Report, and receive highlights twice-a-month in a single page newsletter. Be a part of our community!

Want to Comment on this Post?

You can share your thoughts at the TDS Facebook page, where I'll post this story for discussion.

One of the most handsome contact sheet tools I've ever seen was right beneath my nose in Capture One Pro. There are a variety of styles to choose from, and the functionality is smooth and professional looking.

In this short video, I show you exactly how it works and how good looking the final product is.

There are a variety of applications for this tool, including publishing on your web site, creating smart-looking Flash drive galleries, or for client presentations on your laptop. Plus, you can include clickable links to your website and brand the galleries specifically for your business. And they won't look like the stuff that everyone else is creating.

lynda-web-contact-sheet.jpg

More Capture One Pro Tips and Techniques

Improve your skills by watching Capture One Pro Essential Training now available on lynda.com. More than 5 hours of tips, tricks, and techniques. Plus many free movies using advanced techniques.

I've also created a dedicated Capture One Pro Training page on The Digital Story. You can follow all of the tips and techniques that I publish in one convenient place.

Thinking About Making the Transition from Aperture or Lightroom? - Download my free eBook titled, Rocky Nook's Guide to Moving to Capture One Pro. I show you the steps to create a test library, then build the foundation for a smooth transition to Capture One Pro.

Want to Comment on this Post?

You can share your thoughts at the TDS Facebook page, where I'll post this story for discussion.

Nik Collection Now Free from Google

The Nik Collection is comprised of seven desktop plug-ins that provide a powerful range of photo editing capabilities - from filter applications that improve color correction, to retouching and creative effects, to image sharpening that brings out all the hidden details, to the ability to make adjustments to the color and tonality of images. And you now can download them for free.

google-free.jpg

The system requirements and compatibility for Mac and Windows platforms are as follows.

  • Mac OS X 10.7.5 through 10.10
  • Adobe Photoshop CS4 (CS5 for HDR Efex Pro 2) through CC 2015
  • Adobe Photoshop Elements 9 through 13 (apart from HDR Efex Pro 2, which is not compatible with Photoshop Elements)
  • Adobe Photoshop Lightroom 3 through 6/CC
  • Apple Aperture 3.1 or later
  • Windows Vista, Windows 7, Windows 8
  • Adobe Photoshop CS4 through CC 2015
  • Adobe Photoshop Elements 9 through 13 (apart from HDR Efex Pro 2, which is not compatible with Photoshop Elements)
  • Adobe Photoshop Lightroom 3 through 6/CC

This is great software that I've used for years. But there is some question that this might signal the end of cycle for the Nik suite. We'll know when we know. But for now, enjoy the download.

Want to Comment on this Post?

You can share your thoughts at the TDS Facebook page, where I'll post this story for discussion.

Review: 3Pod Orbit Aluminum Tripod

I've always been fascinated by tripods where the shaft can rotate outward from the legs providing for additional shooting angles. The 3Pod Orbit 3-Section Aluminum Tripod is my first hands-on experience with this type, and I must admit, I like the options it presents.

GM5-P1000302.jpg

I've been testing the Orbit in the studio, primarily for product shots. It's ideal for this situation because of all the odd angles I need to use. By pulling the center shaft all the way to its maximum height, I can then change its angle from straight up and down to a variety of horizontal configurations. I think this ability would also be very handy for macro and close up photography in nature.

Combined with the 3 different leg positions - 85, 60, and 35 degree angles - and the retractable foot spikes, this set of sticks seems equally useful indoors and out. Other features include:

  • Quick adjustment flip locks
  • Padded grip on one leg for cold weather work
  • Reversible 3/8 and 1/4-20 mounting screw
  • Bubble level on top plate
  • Maximum height of 69.15", collapsable to 28.45", weighs in at 5.71 pounds (without head)

You can purchase the tripod without head for $139.95 that includes a carrying case and wrench set. The case is fine, but it doesn't allow room for the tripod with a head mounted on it, so you might need something different up the road. Kits with a variety of heads are also available ranging from $149 to $289. I haven't tested any of those, so I don't know about the heads or the cases included in those configurations.

GM5-P1000305.jpg

Overall, the 3Pod Orbit is a good value at $139. The components work well together, and it has good looks with the red metallic trim at the top of the legs. But the real selling point is the Overhead Shot System that allows the shaft to pivot away from the tripod body. With it, low angle, overhead, and close-up shots are easier than with traditional tripods. Plus, the shaft can be rotated independent of the tripod head, which could be handy for video work and panoramas.

If you've been interested in this style of tripod, I think the 3Pod Orbit deserves a place on your list of top candidates.

Want to Comment on this Post?

You can share your thoughts at the TDS Facebook page, where I'll post this story for discussion.

Ready to Photograph Cuba?

Traveling to Cuba is becoming much easier this year. And if you're considering a trip, I have some excellent resources for you.

cuba-tourists.jpg

A Photographer in Cuba - lynda.com

After my assignment in January of 2015, I came home and finished the lynda.com title, A Photographer in Cuba. With lots of footage and images from Havana, Santa Clara, Trinidad, and more, I share tips for safely exploring and photographing this beautiful country.

You'll learn how to effectively pack your gear, interact with locals, understand the monetary system, find great images, and learn about the recent history of Cuba. Once you depart for your own adventure, you'll be prepared for the trip of a lifetime.

red-car-cuba.jpg

Rocky Nook's Guide to Photographing Cuba!

You can also download my free eBook, Rocky Nook's Guide to Photographing Cuba!. Brimming with photographs and tips from the January 2015 trip, this guide fits nicely on a tablet or smartphone. So you can enjoy now and while on the go. Lots of great resources to help you make the most of your photography adventure.

The Nimbleosity Report

Do you want to keep up with the best content from The Digital Story and The Nimble Photographer? Sign up for The Nimbleosity Report, and receive highlights twice-a-month in a single page newsletter. Be a part of our community!

Want to Comment on this Post?

You can share your thoughts at the TDS Facebook page, where I'll post this story for discussion.

This is The Digital Story Podcast #524, March 22, 2016. Today's theme is "The HDR Dilemma." I'm Derrick Story.

Opening Monologue

The biggest frustration I've had with photography has been the disconnect between what I see with my eyes and what the camera records. Even with today's technologically advanced machines, my pictures don't always turn out as I envisioned. So what are the techniques we can use to tip the scales in our favor? RAW capture is certainly a good start. But High Dynamic Range photography elevates the possibilities to a new height. And that's the first topic of today's show.

The HDR Dilemma

I call this the HDR Dilemma for good reason. Because it seems like every time I consider this shooting technique, I have an internal conversation about the pros and cons.

Marina-at-Dusk-web.jpg

On the plus side, HDR photography can capture the images we envision in our minds: shadowy textures and highlight details coexisting in one image. So what's not to like? Well, not everything is in the plus column here. For example:

  • More post processing than with other images. I've been using Aurora HDR Pro lately, and I like it. But I find myself investing a sizable amount of time editing the image, before I even know if I'm going to like it. And half the time, I don't.
  • Finding the right HDR processor. There is a wide spectrum spanning from Lightroom's built-in HDR editor to Aurora's wild ride. It takes time, and sometimes money, to find the right fit.
  • Knowing when to stop. HDR creates the classic trap that if a little is good, a lot is better. Showing some discipline with HDR editing is often easier said than done.
  • Avoiding the HDR stigma. Seems to me that if others know that you used HDR processing, they instantly discount your work as amateur. No serious photography would stoop to this, right?
  • Fighting laziness. I could spend the mental and creative energy trying to figure out how to best capture this landscape, or I could simply record it as an HDR and let the software figure it out later.

All of that being said, I still like High Dynamic Range photography. When I do properly analyze the scene and show restraint in its production on the computer, I can do things never imagined before. And those pictures can be artistic and respectable.

So how do you handle the HDR Dilemma?

In the News

Apple Announces New 9.7" iPad Pro - covered by The Digital Story.

The 9.7 inch iPad Pro will be available March 31 in 3 configurations: 32GB@$599, 128GB@$749, and 256GB@$899 and 4 different colors including Rose Gold.

This is a powerful tool for nimble photographers, especially the 256GB model combined with an SD card reader and Apple Pencil. The ability to work practically anywhere without the bulk of a computer can lighten the load, improve productivity, and add a dash of fun to the photography experience. And for those using the Photos ecosystem (Photos for iOS and Photos for OS X), the imaging pipeline from camera to editing to output will be extremely smooth.

Autumn in The Eastern Sierra - Oct. 21-23, 2016

Within the next week, I'll be sending invitations to the TDS Autumn in The Eastern Sierra photography workshop that begins Thursday evening, Oct. 20 and runs through Sunday, Oct. 23rd. If you want to get on the reservation list, then go to the TDS Workshops page and use the Send Me Info form to get on the list.

Tell Us Your Film Story

Within the next month, I'm going to launch www.theanalogstory.com featuring images, articles, tips, workflows, and a used camera store. I know that many members of our TDS community already shoot film. If you'd like to share your story describing why you like analog photography and the gear you use, send me 500 words or less (and no more!) plus a half dozen images. Send your content to theAnalogStory@gmail.com

Updates and Such

In Aperture Exile? Easing the change to Capture One, with guest Derrick Story - I'll be the special guest on an upcoming Capture One Pro webinar on April 13 at 9:00 AM PDT. The webinar is free, and you can sign up here.

Out of Chicago Update - The debut of The Nimble Photographer Workshop sold out on Friday, June 24. Because there is a wait list, we've added a second workshop on Thursday June 23. I hope you can join me in Chicago this coming June. There's still time for Early Bird pricing.

And finally, be sure to visit our friends at Red River Paper for all of your inkjet supply needs.

See you next week!

More Ways to Participate

Want to share photos and talk with other members in our virtual camera club? Check out our Flickr Public Group. And from those images, I choose the TDS Member Photo of the Day.

Podcast Sponsors

Red River Paper - Keep up with the world of inkjet printing, and win free paper, by liking Red River Paper on Facebook.

ImageFramer Take your photos to the next level with ImageFramer. Visit www.apparentsoft.com today.

MacPaw Creators of CleanMyMac 3 and other great software for Apple computers. Visit www.macpaw.com today.

The Nimbleosity Report

Do you want to keep up with the best content from The Digital Story and The Nimble Photographer? Sign up for The Nimbleosity Report, and receive highlights twice-a-month in a single page newsletter. Be a part of our community!

Want to Comment on this Post?

You can share your thoughts at the TDS Facebook page, where I'll post this story for discussion.