Recently in Photography

  Page 112 of 382 in Photography  

Sigma just announced its first mirrorless body, the Sigma sd Quattro H Mirrorless Digital Camera.

Sigma sd Quattro H Mirrorless.jpg

The specs are rather impressive for the high resolution model (there will also be a standard resolution version).

  • 45MP APS-H Foveon X3 Quattro CMOS Sensor
  • Dual TRUE III Imaging Processing Engine
  • Sigma SA Lens Mount
  • 2.36m-Dot Electronic Viewfinder
  • 3.0" 1.62m-Dot Main LCD & Sub Monitor
  • Phase & Contrast-Detect Hybrid AF System
  • Super-Fine Detail Exposure Mode
  • ISO 6400 and 3.8 fps Continuous Shooting
  • Quick Set Button; Lock Switch
  • Focus Peaking; Lossless Compressed Raw

The thing that really jumps out at me is that you can use the entire Sigma SA line of lenses with the Quattro H (specs above) and the entry level Quattro. Given that the optics they've been producing lately are so good, this could be a stunning, compact package. No release date or price yet, but I'll be following the story.

The Nimbleosity Report

Do you want to keep up with the best content from The Digital Story and The Nimble Photographer? Sign up for The Nimbleosity Report, and receive highlights twice-a-month in a single page newsletter. Be a part of our community!

Want to Comment on this Post?

You can share your thoughts at the TDS Facebook page, where I'll post this story for discussion.

This is The Digital Story Podcast #520, Feb. 23, 2016. Today's theme is "The Reluctant Portrait Photographer." I'm Derrick Story.

Opening Monologue

As the world sees it, every photographer is a portrait photographer. You can tell people that you only shoot landscapes or pets, and they will nod their heads, then ask you to shoot their daughter's wedding. That's just the way it is. So in that spirit, I'm dedicating today's show to all of those reluctant portrait photographers out there. I will not only help you survive, but thrive the next time you're pressed into duty to photograph a friend, family member, or coworker.

The Reluctant Portrait Photographer

Portrait photography is about comfort, both for you and the subject. The path to that goal for you is having a clear idea on how you're going to photograph your subject, and for them to believe that you know what you're doing. Here's how to achieve that.

Crystal-300mm-P2160828.jpg

  • Keep it simple. I recommend outdoor shoots in the morning of late afternoon hours. This eliminates many of the headaches associated with indoor sessions.
  • Scout your location ahead of time. Have a clear idea of specific spots that have favorable light the time of day that you're there. Look for restrooms and other facilities that might come in handy. Know where to park, if there are any fees, and if you need a permit. It's like practicing law; you don't want any surprises.
  • Line up an assistant. It can be a friend of yours or the subject's. But you want an extra set of hands and eyes. The hands to hold reflectors, and the eyes to spot wardrobe malfunctions and stray hair. Plus it makes conversation easier.
  • Use fill light. I prefer reflectors, but have fill flash ready too. Practice your settings. Be comfortable with your lighting schemes.
  • Keep the conversation going. Don't clam up on the person. Nobody likes the silent treatment, especially photo subjects. It's lonely in front of the camera.
  • Show them a good picture as soon as possible. Once you have a shot that is flattering, show it to the subject on the back of the camera's LCD. They will immediately relax.
  • Don't be creepy. I think complements are great during a shoot, but know where the line is. Keep your praise confined to pretty eyes, shining hair, and attractive wardrobe. Do not head south of the neck for your comments.
  • Work quickly. If you're constantly fiddling with your camera and equipment, you'll convey a sense of incompetence. The shoot will go downhill from there.
  • Be professional. You know what that means. Do it.

In the News

Tamron releases stabilized 85mm F1.8 and 90mm F2.8 macro full-frame lenses - covered by DP Review

Third party lens-maker Tamron has released a pair of new full-frame, stabilized primes.
First is an 85mm F1.8 Di VC USD which has LD and XLD elements to reduce flare and ghosting, 9 circular aperture blades for 'attractive' bokeh, a fluorine coating to keep moisture and fingerprints off of the front element and 3.5 stops of shake reduction (tested to CIPA standards). It uses a ring-type ultrasonic motor that Tamron says will be precise and responsive. Pricing and availability have not been announced.
Lens number two is a 90mm F2.8 Di VC USD 1:1 Macro, which is an updated version of a lens of the same name from 2012. It too has LD and XLD lenses, a 9-blade aperture, fluorine coating, and USM motor. It can take life-size close-ups at a minimum distance of 13.9cm/5.5in and a 'quick-shift' feature lets the photographer take over focusing without having to press a button. The 90mm macro will begin shipping in March for $649.
Both lenses are weather-sealed and support Tamron's new TAP-in Console. They'll be available for Canon, Nikon and (eventually) Sony Alpha mounts.

Foam Can Coolers Make Excellent Lens Cases

If you like to travel lightly with just a shoulder bag, you can keep your spare lenses in closed-cell can coolers. They're light, about the right size, and offer excellent protection.

Member Quotes of the Week

Intelligent comments culled from The Digital Story Facebook page.

In regard to last week's Facebook Post: "Become the Master of Your Capture One Library" we had some terrific comments, and I want to share one with you now.

Michel wrote: "I feel really fortunate that I can follow along as you make the transition from Aperture to Capture One. I'm hoping this is the last transition I have to make. To that end do you know what percentage of business C1 represents for Phase One? I feel that if it's significant it's less likely to abandon it (as was the case for Apple/Aperture)."

Post your thoughts on our Facebook page. Believe me, I read them.

Report on the Olympus 300mm f/4.0 Telephoto

I spent a week with this lens and loved it. I go into detail about it during this segment of the show.

Updates and Such

Pt. Reyes Photography Workshop - We have two rooms open at the Pt. Reyes Photography Workshop, Aug. 19-21 2016. If you want to hang out with us at Straus Ranch House and explore some of the most beautiful coastline in the world, visit the TDS Workshops page and put yourself on the reserve list.

Out of Chicago Update - The debut of The Nimble Photographer Workshop sold out on Friday, June 24. Because there is a wait list, we've added a second workshop on Thursday June 23. I hope you can join me in Chicago this coming June. There's still time for Early Bird pricing.

And finally, be sure to visit our friends at Red River Paper for all of your inkjet supply needs.

See you next week!

More Ways to Participate

Want to share photos and talk with other members in our virtual camera club? Check out our Flickr Public Group. And from those images, I choose the TDS Member Photo of the Day.

Podcast Sponsors

Red River Paper - Keep up with the world of inkjet printing, and win free paper, by liking Red River Paper on Facebook.

ImageFramer Take your photos to the next level with ImageFramer. Visit www.apparentsoft.com today.

MacPaw Creators of CleanMyMac 3 and other great software for Apple computers. Visit www.macpaw.com today.

The Nimbleosity Report

Do you want to keep up with the best content from The Digital Story and The Nimble Photographer? Sign up for The Nimbleosity Report, and receive highlights twice-a-month in a single page newsletter. Be a part of our community!

Want to Comment on this Post?

You can share your thoughts at the TDS Facebook page, where I'll post this story for discussion.

After having spent a week reviewing all of the editing extensions for Photos for OS X, I have a clear favorite: Tonality by Macphun.

tonality-extension.jpg

I bought my version from the Mac App Store for $19.99, which includes the standalone version. But I only use it as an editing extension for Photos for OS X. Personality, I like the integrated workflow.

This app combines two things that appeal to me: an extensive selection of high quality presets, with plenty of controls to fine tune the final image. The preset categories include: Basic, Architecture, Portrait, Dramatic, Outdoor, Street, Vintage, Film Emulation, Toning, and HDR, each with many options within. And for the most part, you could stop right there. However, if you like to tinker, take a look at the tools in the right side adjustments panel.

tonality-adjustments-web.jpg

Once you've finished working with the shot in Tonality, click on Save Changes to return to Photos for OS X. You can press the M key to see the original shot, even though you've left Tonality, and even Revert to Original if you wish.

Chances are, however, that you'll want to share the edited picture using any of Photos extensive publishing tools. Bottom line here: I think Tonality helps me be more creative in my post production work.

Master Photos for OS X

(It's More Powerful than You Think)

For hands-on tutorials, be sure to take a look at Photos for OS X Essential Training on lynda.com. I cover everything you need to know to get the most from this surprisingly powerful image management application.

More Help and Insights on Photos for OS X

Don't forget about the Photos for OS X Special Feature Section on The Digital Story. It's a roundup of tutorials, videos, and articles focused on helping you master Apple's latest photo management software. You can also find it under Photography in the top nav bar.

Want to Comment on this Post?

You can share your thoughts at the TDS Facebook page, where I'll post this story for discussion.

External Editors is one of the most affordable, and exciting, editing extensions for Photos for OS X. It's available in the Mac App Store for 99 cents.

external-editors-photos.jpg

It allows you to connect practically any image editor to your Photos library. I tested it with two of my favorites: Photoshop CC and Alien Skin Exposure X. It worked perfectly on both counts.

The workflow is simple. Open your image in Edit mode in Photos for OS X. Choose External Editors from the list of editing extensions you have loaded. Editors will open your image and present you with all the available editing apps on your Mac. Choose the one you want, then it takes you there for adjustments. After you've finished working on it, just click Save.

You're back in the External Editors interface. Choose Save Changes and your edited image is returned to Photos for OS X. And here's the kicker, if you press the M key, you can see the original version of your shot. And if you want, you can Revert to Original.

As some readers have pointed out, this workflow doesn't work when you send RAW files to Photoshop. So this doesn't sound like a solution for RAW shooters, or for artists who add layers while in Photoshop. So if you fall into these categories, then you might want to save your 99 cents. (Thanks John for the heads up!)

But for Jpeg shooters, this workflow is far better than the old style of roundtripping, because even though you're using an outside app, the workflow remains non-destructive. And in that case, I can't think of a better way to spend a buck.

Master Photos for OS X

(It's More Powerful than You Think)

For hands-on tutorials, be sure to take a look at Photos for OS X Essential Training on lynda.com. I cover everything you need to know to get the most from this surprisingly powerful image management application.

More Help and Insights on Photos for OS X

Don't forget about the Photos for OS X Special Feature Section on The Digital Story. It's a roundup of tutorials, videos, and articles focused on helping you master Apple's latest photo management software. You can also find it under Photography in the top nav bar.

Want to Comment on this Post?

You can share your thoughts at the TDS Facebook page, where I'll post this story for discussion.

One of the best feelings a photographer can experience is to fire up the computer and quickly find an image from the past. Knowing that you are the master of your image library builds confidence and efficiency.

tina-library-organized.jpg

The first step in Capture One Pro is understanding the difference among the three major sections in the Library pane: Catalog Collections, User Collections, and Folders. Here's a brief explanation of each:

  • Catalog Collections - Controlled by the application using pre-defined filters such as All Images and Recent Imports. This is where your pictures enter the database when imported from a memory card.
  • User Collections - Controlled by you, providing the tools to build a library structure that's consistent with your sense of organization. You can create Groups (that act like folders in Aperture), Projects, and Albums.
  • Folders - Shows the location of your masters, whether they're in the C1 catalog container, or outside the application set up as a referenced catalog.

I've published a short tutorial for organizing the User Collections area of your library. Take a look at One Way to Set Up Your Capture One Library. Following those simple techniques will help you add the structure that you crave for your image library.

Capture One Pro Essential Training on lynda.com

Later this month, my new video training titled, Capture One Pro Essential Training will be live on lynda.com. Keep your eyes peeled for my announcement. More than 100 movies that show you the easiest way to master your library, edit files, and output them in a variety of ways.

Thinking About Making the Transition from Aperture or Lightroom? - Download my free eBook titled, Rocky Nook's Guide to Moving to Capture One Pro. I show you the steps to create a test library, then build the foundation for a smooth transition to Capture One Pro.

Want to Comment on this Post?

You can share your thoughts at the TDS Facebook page, where I'll post this story for discussion.

Olympus 300mm f/4 IS PRO Lens Review

The Olympus 300mm f/4 IS PRO telephoto does ship with a tripod collar. But after shooting with it for a week, I can tell you that you don't need it. Thanks to its incredible dual image stabilization system, you can handhold this super tele at shutter speeds never before dreamed of at this magnification.

Olympus-300mm.jpg

Before I get into my shooting experience with the 300mm PRO, here are the highlight features:

  • Micro Four Thirds mount (Olympus and Pansonic mirrorless)
  • 35mm equivalent of 600mm
  • Lens IS and in-body stabilization for select MFT cameras, such as the OM-D E-M1 and E-M5 Mark II, offering sync IS technology to provide an astounding 6 stops of shake compensation
  • Minimum focus distance: 4.6'
  • Splash, dust, and freeze-proof construction
  • Manual focus clutch and L-Fn button
  • ZERO Coating to minimize flare, ghosting, and reflections
  • Compatible with OM-D Silent Shutter setting for discreet telephoto shooting
  • Supplied decoration ring can be used in place of tripod collar to maintain clean, svelte form factor for dedicated handheld shooting.

Crystal-300mm-P2160965-web.jpg Crystal in Green Dress. Olympus E-M5 Mark II with 300mm PRO, ISO 200, 1/320th, f/4.0, handheld. Photos by Derrick Story. Model is Crystal McMullen (she's on Model Mayhem).

Crystal-300mm-P2160934-web.jpg

Camera Body and Firmware

The 300mm PRO will work with all Micro Four Thirds bodies, but it is particularly well-suited for the OM-D E-M1 and E-M5 Mark II with the latest firmware. When paired with these cameras, you can take advantage of the amazing sync IS technology that provides 6 stops of stabilization. And it works. I captured sharp portraits at 1/60th handheld.

Shooting Experience

The lens is remarkably light (52 ounces) for such powerful magnification at a wide aperture of f/4.0. I removed the tripod collar and used the included decoration ring for my handheld work. I did notice some compositional drift during sequences. My fault, not the lens. But it does take some practice shooting with an effective focal length of 600mms.

Crystal-300mm-P2160765-web.jpg

On the left side of the barrel there's the function button, IS switch, and distant settings (to speed up focus). The ergonomics are comfortable. Focusing is very fast and accurate. I held the lens barrel in my left hand and the E-M5 Mark II in my right. I didn't experience any fatigue during hours of shooting.

Image Quality

You can download full sized Jpegs from my Flickr photostream that will be better for evaluating the images than here in the blog. I actually pulled down the clarity for all the shots because there was too much detail in the skin.

The lens handled all types of lighting very well, including strong backlight as illustrated in the portrait above. Color rendition, sharpness, and background softness are excellent with this optic.

Bottom Line

The Olympus 300mm f/4 IS PRO telephoto lists for $2,499, and I think that's a superb value. Its professional build, ergonomics, performance, image quality, and outstanding image stabilization technology rivals DSLR competitors that cost considerably more. And to be honest, I don't think you'll find this level of image stabilization on any lens at any price. Highly recommended.

Want to Comment on this Post?

You can share your thoughts at the TDS Facebook page, where I'll post this story for discussion.

This is The Digital Story Podcast #519, Feb. 16, 2016. Today's theme is "Just 5 Frames." I'm Derrick Story.

Opening Monologue

One of the interesting things that's emerged from The Film Project is the idea of shooting fewer pictures for any given subject. For a roll of 36 exposures, for example, I usually like to have 7 different topics. So I've been limiting myself to 5 frames at a time. I decided to move this concept over to digital too, and it's interesting the effect it's having on my photography. And that's the topic for today's show.

Just 5 Frames

When I get a roll of film back from the lab, one of the things I'm looking for is variety. What I don't want to see is an entire contact shoot of variations of the same subject. 35 frames of the same subject is something that I can easily do with my digital camera. And I don't think I always shot that way.

just-5-frames.jpg

So, over the last few weeks, I've decided that for some of my subjects, I'll limit myself to 5 frames. Obviously this won't work for everything. But quite honestly, I sometimes just take too many pictures. I explore this idea in today's top story.

In the News

Ricoh celebrates 80th anniversary with limited edition silver GR II - covered by DP Review

If the stealth-black GR II isn't quite showy enough for you, then you may be interested in Ricoh's new 'Silver Edition' camera, which it created to celebrate its 80th anniversary. In addition to its new color, Ricoh has also diamond-engraved the lens' specs onto its front ring, added a custom on/off 'termination' screen and bundled a leather carrying case. Only 3200 of the Silver Edition GR II cameras will be sold worldwide, so get your order in soon. The compact GR II features a 16MP APS-C-size CMOS sensor, 28mm equivalent F2.8 lens, 1080/30p video and Wi-Fi with NFC. The GR II Silver Edition is priced at $699.

Night Photography Tip

I often switch my white balance setting to Tungsten for urban night photography to help offset the overly warm city lights. I can do this during capture, or play with the white balance during post. By doing so, I've discovered some wonderful shades of blue that look great and feel more appropriate for these subjects.

Member Quotes of the Week

Intelligent comments culled from The Digital Story Facebook page.

In regard to last week's Facebook Post: "Going from Lightroom or Aperture to Capture One Pro" we had some terrific comments that I want to share it with you now.

Michael wrote: "This podcast is (once again!) a model of clarity on a complex topic, thanks Derrick! It's hard to imagine how you could have done more to facilitate the transition for Aperture users.Do you have any thoughts on the stability or longevity of Capture One or its owner Phase One? While making predictions is dangerous (especially about the future, as Oscar Wilde warned us), it seems worth considering this before making the significant investment of time and energy that this transition will require. Keep up the great work."

And Mac added: "Another great show. I switched to Capture One in december. Since I usually run annual catalogues in Lightroom, it was easy. Just setup a new catalogue in Capture One, and done. The info you provided about importing old libraries to C1 is invaluable. Since I started with C1, it's a learning adventure. It works a little different than LR, which I had since v1. So I stumble through it. I can't wait for your Lynda.com course on it!!!"
And then I had to add this fun tweet from E74 Photo: "When is your Capture 1 course coming out? Assuming installer doesn't delete root folders..."

Post your thoughts on our Facebook page. Believe me, I read them.

Updates and Such

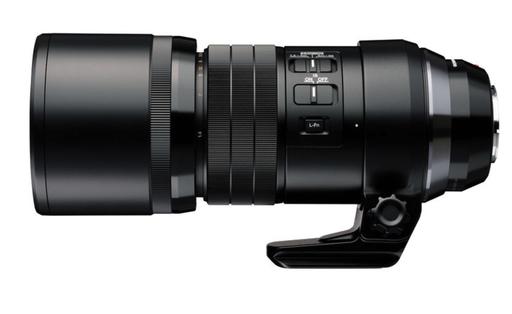
I'm testing the Olympus 300mm f/4 PRO lens this week, and I have to tell you, this thing is insane. It uses both optical image stabilization and sensor based at the same time. I shot a series of couples portraits at 1/60th outside, and they are sharp. The equivalent of 600mms at 1/60th. Think about it! More to report next week.

Pt. Reyes Photography Workshop - We have two rooms open at the Pt. Reyes Photography Workshop, Aug. 19-21 2016. If you want to hang out with us at Straus Ranch House and explore some of the most beautiful coastline in the world, visit the TDS Workshops page and put yourself on the reserve list.

Out of Chicago Update - The debut of The Nimble Photographer Workshop sold out on Friday, June 24. Because there is a wait list, we've added a second workshop on Thursday June 23. I hope you can join me in Chicago this coming June. There's still time for Early Bird pricing.

Gemini, the Duplicate Finder by MacPaw - Gemini's simple, fast, and safe to use, so make sure you give it a try. It's available at macpaw.com/gemini.

And finally, be sure to visit our friends at Red River Paper for all of your inkjet supply needs. And a big thanks ImageFramer for also supporting this podcast.

See you next week!

More Ways to Participate

Want to share photos and talk with other members in our virtual camera club? Check out our Flickr Public Group. And from those images, I choose the TDS Member Photo of the Day.

Podcast Sponsors

Red River Paper - Keep up with the world of inkjet printing, and win free paper, by liking Red River Paper on Facebook.

ImageFramer Take your photos to the next level with ImageFramer. Visit www.apparentsoft.com today.

MacPaw Creators of CleanMyMac 3 and other great software for Apple computers. Visit www.macpaw.com today.

The Nimbleosity Report

Do you want to keep up with the best content from The Digital Story and The Nimble Photographer? Sign up for The Nimbleosity Report, and receive highlights twice-a-month in a single page newsletter. Be a part of our community!

Want to Comment on this Post?

You can share your thoughts at the TDS Facebook page, where I'll post this story for discussion.

This is from a guy who previously would only use Silver Efex Pro for his black and white work, but I've come to appreciate the B&W Adjustment in Photos for OS X, and the optional plugin, Tonality by Macphun.

dibs-in-bw-3.jpg

Here's a shot that I'm using for my upcoming book on Photos for OS X. I made some exposure tweaks with the Light Adjustments, then finished it off with the B&W converter. If you're not familiar with what the four sliders do in B&W, this will help you:

bw-controls.jpg

  • Intensity - If you think about how saturation works for color, that's what the intensity slider does for B&W. As you move the marker to the right, Photos intensifies the tones in the image. If one cube of sugar makes your coffee sweet, two cubes makes it even sweeter. That's what intensity does.
  • Neutrals - This slider affects the gray areas of the image by lightening or darkening them. For this image, I thought that darkening the gray areas helped create a nice separation from the white markings of the cat, including her whiskers.
  • Tone - This adjustment could really be called contrast, because that's what it does. Moving the marker to the right increases contrast, and to the left flattens it.
  • Grain - To complete the film-like B&W effect, we can also add grain. Not only does this provide an analog feel to the image, it can make it appear a bit more crunchy.

Tip: Even though we're applying monochrome effects to our picture, it's still color inside. For example, you can still tweak the tones in your B&W by using the temperature and tint sliders in the White Balance panel. Try it. Photos provides an amazing amount of control for your B&W pictures.

For hands-on tutorials, be sure to take a look at Photos for OS X Essential Training on lynda.com. I cover everything you need to know to get the most from this surprisingly powerful image management application.

More Help and Insights on Photos for OS X

Don't forget about the Photos for OS X Special Feature Section on The Digital Story. It's a roundup of tutorials, videos, and articles focused on helping you master Apple's latest photo management software. You can also find it under Photography in the top nav bar.

Want to Comment on this Post?

You can share your thoughts at the TDS Facebook page, where I'll post this story for discussion.

One of my ToDo tasks was to update the firmware for my Olympus OM-D E-M5 Mark II to version 2.2, so it would be compatible with an Olympus lenses that have the built-in image stabilizing function. (Yes, I'm testing the new Olympus 300mm f4.0 PRO Lens. More on that later next week.)

First, I had to download the latest version of OLYMPUS Digital Camera Updater (V 1.2.1). Then connect my camera and follow the prompts. The updating instructions are here; I recommend reading them first.

firmware-update.jpg

Everything went smoothly. So since I had the updating set-up ready to go, I thought I would check my other cameras and lenses. To my surprise, I needed to update a total of 3 cameras and 5 lenses! Wow. And there were some solid fixes and upgrades in those updates.

So my question to you is... when is the last time you checked the firmware version on our mirrorless camera? You might want to brew a cup of coffee and take a look.

The Nimbleosity Report

Do you want to keep up with the best content from The Digital Story and The Nimble Photographer? Sign up for The Nimbleosity Report, and receive highlights twice-a-month in a single page newsletter. Be a part of our community!

Want to Comment on this Post?

You can share your thoughts at the TDS Facebook page, where I'll post this story for discussion.

In the Summer of 2000, Olympus released one of the most intriguing digital cameras of all time: the Olympus Camedia C-211 Zoom.

TFP007-P2090459-Olympus-c211 1.jpg

Not only did it include a 3X optical zoom, 2" LCD, and 2 megapixels of resolution, the C-211 had a built-in Polaroid printer that accepted Type 500 film. It was the best of both worlds. High quality digital files with the option to make a print at any time.

TFP007-P2090463-Olympus-c211 1.jpg

When you pressed the green print button on the back of the camera, it would think for just a second, then gears would grind and a print would emerge from the top of the camera. They weren't the most beautiful prints in the world, but they were cool.

We don't think of cameras from this era being particularly high quality. But take a look at this image of Dibs that I recorded today in macro mode with the C-211. It's not bad.

Dibs-C211-P2090020-Dibs-c211.jpg

Don't get me wrong... it's still a vintage digital camera. The LCD is practically unusable in bright daylight, the C-211 operates at a casual pace, and they don't even make the SmartMedia cards that it uses for memory. (Fortunately, I hung on to the USB card reader that allows me to upload the images to my Mac.)

But, those awful Polaroid prints just ooze with nostalgia. And the digital images can be quite good. So, I don't think I'll be getting rid of my C-211 anytime soon.


twitter.jpg Follow me on Twitter