Recently in Photography

  Page 113 of 382 in Photography  

Oddly enough, White Balance isn't part of the default set that appears in the Edit menu in Photos for OS X. And I say "oddly," because it's such a necessary tool, and the Photos version of it is very good.

To make sure it always shows up, open an image in Edit mode, click on Adjust in the righthand sidebar, click on Add, and choose White Balance from the popup menu. Then go back to Add and select "Save as Default." It will now automatically appear in your Adjust panel.

add-wb-1024.jpg

The adjustment itself is quite powerful and very much like the version we had in Aperture. Here's a short video on how to use it.

And for other hands-on tutorials, be sure to take a look at Photos for OS X Essential Training on lynda.com. I cover everything you need to know to get the most from this surprisingly powerful image management application.

More Help and Insights on Photos for OS X

Don't forget about the Photos for OS X Special Feature Section on The Digital Story. It's a roundup of tutorials, videos, and articles focused on helping you master Apple's latest photo management software. You can also find it under Photography in the top nav bar.

Want to Comment on this Post?

You can share your thoughts at the TDS Facebook page, where I'll post this story for discussion.

Of all the bags I've tested over the years, I've never had so many people approach me with complements as I have with the Lowepro StreetLine 140.

Austin-EM5-P1270409-streetline-1280px.jpg

"That looks really nice. Is it a camera bag, or did you modify it yourself?"

"Where did you get that? Does it hold camera gear too?"

Yes, it is a camera bag. It doesn't look like one, does it? And don't get wrong, but it certainly doesn't look like a Lowepro bag. Shouldn't it be, well, more foamy or something?

It is a Lowepro bag, and after using it on assignment in Austin, it's now my favorite Lowepro. The Streetline 140 can be worn as a sling or a shoulder bag, holds two mirrorless cameras plus spare lens and personal items, plus accommodates a laptop and/or a tablet. The specs state an 11" laptop, but my MacBook Pro 13" (non-optical drive model) fits like a glove in the dedicated sleeve (that keeps your laptop separate from other items inside).

Austin-EM5-P1270408-streetline-1280px.jpg

In Austin, I carried an Olympus OM-D E-M5 Mark II with 14-42mm EZ zoom and the new Olympus PEN-F with a 17mm f/1.8, plus the 75mm f/1.8, 9mm body cap fisheye, iPad mini, gloves, snacks, and shades. And I still had room for extra batteries, cards, and whatnot.

gear-P1250342-streetline-1280px.jpg

And here's the interesting part: the Streetline kept its slim profile and extreme comfort, even with all this gear inside. I used it mostly as a sling, keeping it secure against my back while walking, then swinging it around to work out of when shooting. It's very easy and fast to operate. There's a zippered pocket on the front flap (all external zippers are weatherproof) for quick items, another zippered storage area under the flap.

Then there's the main compartment. Here's where we get to a slick Lowepro innovation. The collapsable, interior FlexPockets are super space-efficient, yet protect the cameras. So I no longer have to endure wasted storage because of foam inserts. When I'm packing a camera, I pull a FlexPocket out, and when I'm just using the Streetline as a regular commuter bag, I collapse the FlexPocket to open up the entire interior of the carryall. It's clever, efficient, and works great.

Austin-EM5-P1270413-streetline-1280px.jpg

The strap and high-tech back panel are very comfortable, there's a handy top handle, and one of my personal favorites, a multi-function trolly sleeve. You can use it as a spare pocket when on foot, then separate the top and bottom velcro fasteners, and slide the bag over your rolling suitcase handle.

Austin-EM5-P1280416-streetline-1280px.jpg

Or, if you want, you can stash the Streetline 140 in your suitcase and use a bigger carryon for the flight. Thanks to the FlexPockets, the sling compresses quite flat, making it easy to stow with shirts and pants. When you arrive at your destination, load up the Streetline with your gear, and go explore.

I wore the bag all day, in rain, wind, and even some sun. It maintained its handsome looks regardless of the weather conditions. My gear remained safe and dry. Most observers would never guess it's camera bag. But it is, and a darn good one.

Austin-EM5-P1270404-streetline-1280px.jpg


Nimble Photographer Logo

The Lowepro StreetLine 140 ($149) has a high Nimbleosity Rating. What does that mean? You can learn about Nimbleosity and more by visiting TheNimblePhotographer.com.

lexar-microsd-package.jpg

I've been testing the Lexar 64GB Pro 1800X Micro SDXC card in my Olympus OM-D E-M5 Mark II with terrific results.

"What?" you say. "The OM-D uses regular SD cards, not micros."

And you are right. But the Lexar kit includes a matching pass-through SD card adapter, so I can take advantage of the 1800X card, and just as importantly, its tiny high-performance card reader that takes up virtually no room in my bag.

The bundled card reader is the frosting that makes this cake so sweet. By using it, instead of a regular memory card inserted into my Mac's SD port, I can maximize performance.

lexar-microsd-kit.jpg

For example, yesterday I recorded 1.15 GBs of video with the OM-D using the Lexar 1800X. When I transferred the files via the bundled thumbnail-sized reader, it took 5.16 seconds to copy them to my Mac. Like I said, speedy.

When the microSD isn't in the reader, I keep it in the SD card adapter so I don't lose it. And if I ever need that size for a smaller device, all I have to do is reformat the card, and I'm ready to go.

The Lexar 64GB Pro 1800X Micro SDXC card kit is now available at B&H for $102.84. If you need high performance both at capture and copy, it's worth a look.

The Nimbleosity Report

Do you want to keep up with the best content from The Digital Story and The Nimble Photographer? Sign up for The Nimbleosity Report, and receive highlights twice-a-month in a single page newsletter. Be a part of our community!

Want to Comment on this Post?

You can share your thoughts at the TDS Facebook page, where I'll post this story for discussion.

Now that digital cameras have reached a basic plateau of capability, I find myself buying "behind the curve" more often. What does that mean? Well, it's a bit like car shopping. Last year's model with a few thousand miles on it can be purchased at tremendous savings. And I'm finding the same is true with cameras. I'll explore this in greater depth in today's top story.

Gently Used, Please

My current favorite camera is the Olympus OM-D E-M5 Mark II. I bought it last January with the half grip for $1,229. A year later I'm as pleased with it as the day I bought it. But it I were to purchase the exact same body right now, I could buy it new for $899 and used for $799. And I wouldn't feel one bit behind the times.

used-contax.jpg

More and more, I find myself waiting for prices to drop or buying gently used equipment. I can do this because the technology itself has stabilized. So there isn't that much difference between current offerings and last year's models.

I shop used on Amazon, B&H, Adorama, Craigslist, eBay, and Etsy. And I've heard photographers talk about other sites too. In today's top story, I share some tips for buying used, and why you may want to consider doing so also.

In the News

Nikon apologizes for awarding prize to digitally altered photo - covered by DP Review

Last week, Nikon Singapore awarded a prize to an image that had been digitally altered, given away by the highly visible white square around an inserted plane's silhouette. As a result, Nikon has released this statement:

"We have heard your comments and feedback on this, and you are right - we should not compromise standards even for a casual photo contest. We have dialogued internally, with the community and with our loyal fans, and the photographer has also posted his own views on this issue. We have made an honest mistake and the rousing response from the community today is a reminder to us that the true spirit of photography is very much alive. Moving forward, we will tighten our image review process to avoid similar situations in the future. Thank you once again for all your responses today - for your humor and most of all, your candor and honesty. We hope not to disappoint you in the future and to continue to have your support."

Wood Prints Feel Like Art as Well as Look the Part

Print any photo from Instagram, phone or computer directly on wood. Blending the natural material wood with our professional print techniques every print is unique. Attention is given to every detail of our wood prints. From the crafted coved back, to the slotted hanging system allowing for simple hanging. Your print comes finished and ready to hang no frame is needed.

Wood Type: Baltic Birch
Thickness: 5/8"
Quality: Archival Quality Printing
Care: Moisture & UV Resistant

8"x8" is normally priced at $32. But you can get one for $24 using PROMO code: STORY. And in fact, you can get 25% off any wood print with that code at www.inkdot.com.

Member Quotes of the Week

Intelligent comments culled from The Digital Story Facebook page.

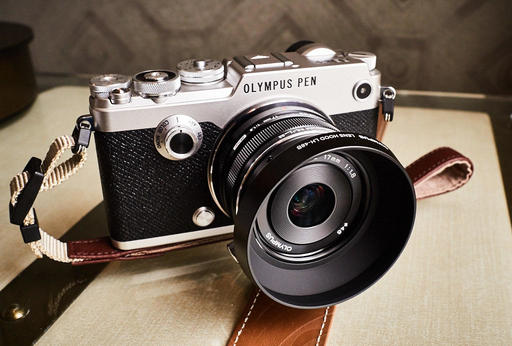
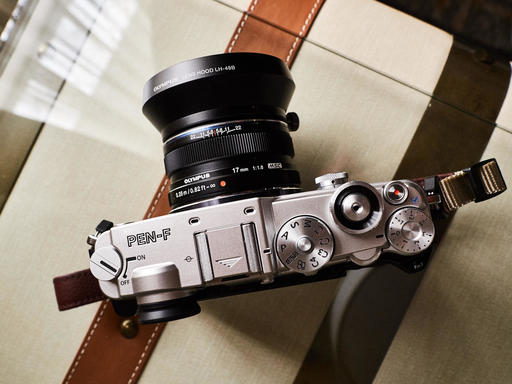
In regard to last week's Facebook Post: "A New Direction, The Olympus PEN-F" we had some terrific comments that I want to share it with you now.

Roger wrote: You've often made the point that in camera processing (jpeg and even special effects, art filters) have gotten to be really high quality and worth trying, and of course the raw is always there. I think it's worth also making the point that in camera processing, using it while you are shooting, changes your thought process while you're shooting. It's like putting on a prime lens instead of a zoom. The black and white film filters in this camera look like a lot of fun.

And Mike added: Great Podcast Derrick. It is an amazing camera and I can tell you for a fact that anyone interested in the San Francisco workshop should know I will have at least one there with me. The more you shoot the more creative you get is what I found over the last 3 months with it. It's hard to put down for me when I shoot in the streets.

Post your thoughts on our Facebook page. Believe me, I read them.

Updates and Such

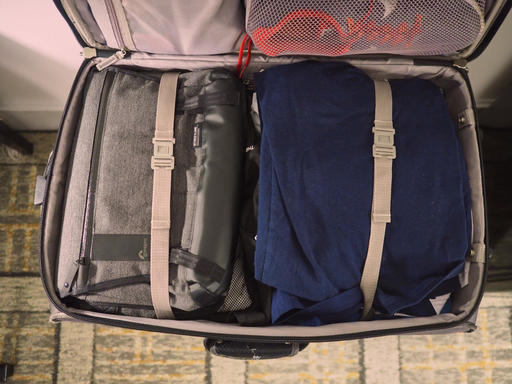
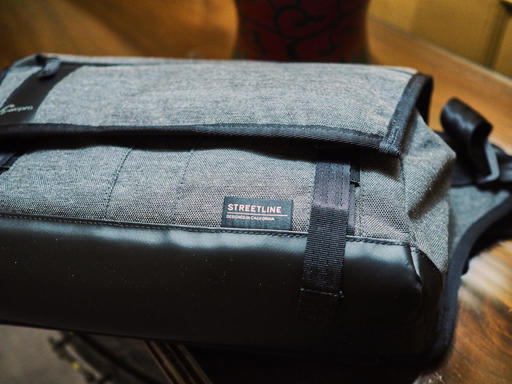
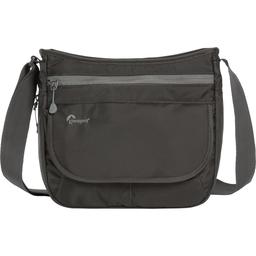
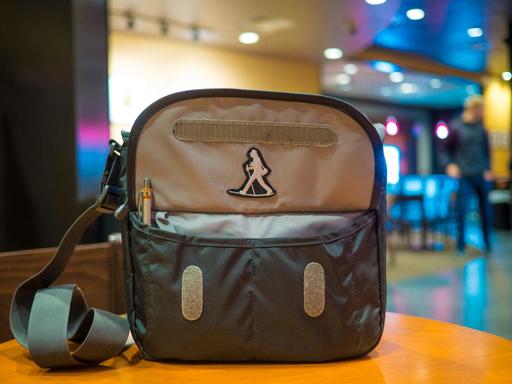
Big News for the SF Street Shooting Workshop - Olympus has agreed to provide us with PEN-F kits for testing and Lowepro is kicking in a street shooting bag that each participant can bring home. As a result, I'm going to reopen the previously sold out workshop to one more person. If you want to attend, please send email to derrick@thedigitalstory.com. First come, first served.

Out of Chicago Update - The debut of The Nimble Photographer Workshop sold out on Friday, June 24. Because there is a wait list, we've added a second workshop on Thursday June 23. I hope you can join me in Chicago this coming June. There's still time for Early Bird pricing.

Gemini, the Duplicate Finder by MacPaw - Gemini's simple, fast, and safe to use, so make sure you give it a try. It's available at macpaw.com/gemini.

And finally, be sure to visit our friends at Red River Paper for all of your inkjet supply needs. And a big thanks ImageFramer for also supporting this podcast.

See you next week!

More Ways to Participate

Want to share photos and talk with other members in our virtual camera club? Check out our Flickr Public Group. And from those images, I choose the TDS Member Photo of the Day.

Podcast Sponsors

Inkdot.com - Specializing in wood prints and other artistic treatments of your imagery - visit www.inkdot.com.

Red River Paper - Keep up with the world of inkjet printing, and win free paper, by liking Red River Paper on Facebook.

ImageFramer Take your photos to the next level with ImageFramer. Visit www.apparentsoft.com today.

MacPaw Creators of CleanMyMac 3 and other great software for Apple computers. Visit www.macpaw.com today.

The Nimbleosity Report

Do you want to keep up with the best content from The Digital Story and The Nimble Photographer? Sign up for The Nimbleosity Report, and receive highlights twice-a-month in a single page newsletter. Be a part of our community!

Want to Comment on this Post?

You can share your thoughts at the TDS Facebook page, where I'll post this story for discussion.

Streamline-Front-HiRez.jpg

The Nimble Streamline Expandable Shoulder Bag was my Las Vegas companion while I covered the CES show.

Over the course of 16-hour days, I carried my Olympus OM-D, a few lenses, iPad mini, and basic accessories... plus gloves and snacks too in the Streamline. The bag's design is perfect for maneuvering in crowded environments. Mirrorless and compact cameras can be stashed in an innocent looking tricot-lined front zipper area. The main compartment can be used for bigger cameras or personal items such as a folded windbreaker. It's also expandable via zipper.

There are smaller accessory pockets under the front flap that reveals the embroidered Walking Man Logo when opened.

streamline-open.jpg

Just like with the previous UltraLight bags, there are a limited number of Nimble Streamlines available. They were first announced to our newsletter subscribers at a discounted price with discounted shipping. And we have a few remaining at the "still reasonable" price of $29.95 plus shipping. Available only in the U.S., and while supplies last.

The Nimbleosity Report

Do you want to keep up with the best content from The Digital Story and The Nimble Photographer? Sign up for The Nimbleosity Report, and receive highlights twice-a-month in a single page newsletter. Be a part of our community!

Want to Comment on this Post?

You can share your thoughts at the TDS Facebook page, where I'll post this story for discussion.

Landscape shooters rejoice! Adobe has added Boundary Warp to the latest version of Lightroom CC and 6.4, and it's going to improve your panorama workflow.

fix-boundry.jpg

Instead of having to crop the image to remove those white areas with no information, either use the Auto Crop checkbox or the Boundary Warp slider to analyze the area and warp the image to fit the rectangular frame. It's quite clever, and it works great. We now can enjoy more picture in our panoramas.

There are also lens profile and RAW updates in Lightroom CC 2015.4 and standalone version 6.4. If you want to see all of the details about those, take a look at the Lightroom Journal Entry on the subject. And if you want to learn more about this feature in general, download my free eBook titled, Rocky Nook's Guide to HDR & Panoramas with Photo Merge in Lightroom CC.

The Nimbleosity Report

Do you want to keep up with the best content from The Digital Story and The Nimble Photographer? Sign up for The Nimbleosity Report, and receive highlights twice-a-month in a single page newsletter. Be a part of our community!

Want to Comment on this Post?

You can share your thoughts at the TDS Facebook page, where I'll post this story for discussion.

You may not remember the innovative half frame Olympus camera of decades ago, but that form factor has returned in a premium mirrorless body. And I tell you about it in today's show.

Opening Monologue

I've been in Austin Texas for the last few days exploring this city with an Olympus PEN-F in hand. And what a combination! Colorful, friendly Austin captured in the viewfinder of this classically designed rangefinder. In this show, I'm going to talk about both... the photo opportunities in the capital city of Texas, and the newest premium digital rangefinder to record those images.

Austin-PenF-P1260120.jpg

The Olympus PEN F

Here are some of the highlights of this just-announced camera.

  • 20.3 Megapixel Four Thirds Sensor
  • RAW and Jpeg capture at 5184 x 3888 pixels
  • Innovative monochrome and color customization
  • 5-stop, sensor-based, 5-axis, image stabilization
  • Left-side positioned electronic viewfinder for street shooters.

I cover my shooting experience with this camera in the top story of today's show.

Photography in Austin, Texas

What a mix of photography opportunities! You can wander 6th Street at night to immerse yourself in the nightclub music scene, tour the State Capital, explore nature at Ladybird park, and enjoy Texas hospitality at fine restaurants and hotels. I talk about my explorations in the second feature of today's show.

(Some of my favorite places to photograph and eat)
  • Sixth Street - Historic entertainment district.
  • Rainey Street - Cool bars and entertainment, a bit less touristy than Sixth.
  • The State Capitol - Free tour, and lots of interesting detail to photograph on the grounds.
  • Hope Outdoor Graffiti Gallery - If you don't mind the fumes of fresh spray paint, this is a colorful diversion.
  • Zilker Botanical Garden - Get your Zen on in this peaceful, but interesting sanctuary.
  • Torchy's Tacos!
  • La Condessa
  • The Broken Spoke honky tonk restaurant and bar

In the News

Fujifilm Planning to Launch a Medium Format Digital Camera, Report Says - covered by PetaPixel

Fujifilm is reportedly planning to shake up the camera world by launching its own interchangeable-lens medium format digital camera. Fuji Rumors writes that it got this information directly from a "top trusted Japanese source." The source states that a digital medium format Fujifilm camera has already gotten the green light from company management, so it's already in development.

"Yep, the medium format Fuji will come," Fuji Rumors says. "And if priced somewhere between the Pentax 645D [$3,400] and the Pentax 645Z [$7,000] this camera could be a real winner for Fujifilm."

Gemini, the Duplicate Finder by MacPaw

OK, how many of you have duplicate images on your Mac?. Raise your hands please. And we all know that finding and removing them manually IS NOT the way to go. So instead, try Gemini by MacPaw, a duplicate finder that does the job within minutes.

Here are the best things about Gemini:

  • Fast and accurate scanning algorithm that finds duplicate files and even folders.
  • Built-in file preview and metadata information.
  • Smart Auto Select that removes the copies and keeps the originals intact
  • iTunes and iPhoto support.
  • External drives and network volumes support.

Gemini's simple, fast, and safe to use, so make sure you give it a try. It's available at macpaw.com/gemini.

Member Quotes of the Week

Intelligent comments culled from The Digital Story Facebook page.

In regard to Saturday's Facebook Post: "Häagen-Dazs Ice Cream Lids Are Perfect 72mm Lens Caps" we had some terrific comments that I want to share it with you now.

Aaron: Of course it's not the cheap brand of ice cream. *Everything* in photography is expensive! :-)
Ken: Go ahead, but YOUR image will change.
Kim: Good to know to justify the ice-cream eating
John: Make sure you clean the top first! lol
Fred: The last job I did I lost my lens cap that was just that size! :-) Looks like it's time to go get a treat to fix the problem!
Ron: Now the rush starts to find all kinds of lids, for lots of lenses!

Post your thoughts on our Facebook page. Believe me, I read them.

Found Treasure

The registration forms have gone out to the reserve list for the Pt. Reyes Photography Workshop.

And finally, be sure to visit our friends at Red River Paper for all of your inkjet supply needs. And a big thanks to www.inkdot.com and ImageFramer for also supporting this podcast.

See you next week!

More Ways to Participate

Want to share photos and talk with other members in our virtual camera club? Check out our Flickr Public Group. And from those images, I choose the TDS Member Photo of the Day.

Podcast Sponsors

Inkdot.com - Specializing in wood prints and other artistic treatments of your imagery - visit www.inkdot.com.

Red River Paper - Keep up with the world of inkjet printing, and win free paper, by liking Red River Paper on Facebook.

ImageFramer Take your photos to the next level with ImageFramer. Visit www.apparentsoft.com today.

MacPaw Creators of CleanMyMac 3 and other great software for Apple computers. Visit www.macpaw.com today.

The Nimbleosity Report

Do you want to keep up with the best content from The Digital Story and The Nimble Photographer? Sign up for The Nimbleosity Report, and receive highlights twice-a-month in a single page newsletter. Be a part of our community!

Want to Comment on this Post?

You can share your thoughts at the TDS Facebook page, where I'll post this story for discussion.

The original PEN-F was an innovative half-frame film camera released in 1963. Now decades later, Olympus has returned to its design roots to create the throughly modern digital PEN-F. And it's a beauty.

gear-P1250359.jpg Front view of the Olympus PEN-F with the 17mm f/1.8 prime lens and metal hood.

The top and front covers of the body are crafted from magnesium, with aluminum metal dials. The exterior is wrapped in leather, including the back of the fully articulated LCD screen. Inside the body is a 20MP Four Thirds sensor and 5-axis stabilization providing up to 5 stops. The electronic viewfinder is positioned on the left side allowing street shooters to have one eye in the viewfinder and the other free to watch surrounding activity.

gear-P1250372-1600px.jpg

This is a camera built for street photography. Its low profile design, responsive shooting, and customizable monochrome and color profiles are wonderfully matched for creative capture in urban settings.

Austin-PenF-P1260220.jpg "Under the Bridge" - Olympus PEN-F with 75mm f/1.8 lens - ISO 200, f/4, 1/250th, Monochrome mode, mono profile 2. All photos by Derrick Story.

A machined aluminum dial on the front of the camera enables switching to monochrome, custom color, art filters, and CRT. You can further customize these settings using a spring lever positioned beneath the mode dial and using menu options. I became enamored with the B&W images I could produce with the PEN-F and found myself shooting in this mode most of the time.

Austin-PenF-P1260200.jpg "Austin Skyline" - Olympus PEN-F with 9mm f/8 fisheye lens - ISO 200, f/8, 1/500th, Monochrome mode, mono profile 2.

This doesn't mean that the camera isn't equally adept at recording rich, film-like color photographs. It is indeed. And to some degree, that's the point. Artists can use this tool to create exactly the images they visualize. The ability to bend and blend tones and colors is unlike anything I've shot with before. And when you discover a look that you've always wanted from a digital camera, it's impossible to resist experimenting even more.

Austin-PEN_F-P1250023.jpg "Austin State Capitol" Olympus PEN-F with 75mm f/1.8 lens - ISO 80, f/2, 1/2000th, Monochrome mode, mono profile 3.

The final production versions should hit retail outlets in early March. Going price will be $1,199.99 US for the body. I talk more about my experience with this camera on this week's TDS podcast. But the bottom line is: this is one very creative tool for photographers.

The Nimbleosity Report

Do you want to keep up with the best content from The Digital Story and The Nimble Photographer? Sign up for The Nimbleosity Report, and receive highlights twice-a-month in a single page newsletter. Be a part of our community!

Want to Comment on this Post?

You can share your thoughts at the TDS Facebook page, where I'll post this story for discussion.

The Capital at Night, Austin

Amid the great music and thriving night scene, quietly stands the Capital. And unlike other situations that I've seen in other cities, the street is lined with lights leading the eye to the handsome structure.

Austin-P1240315-1600px.jpg Austin, Texas at night. Photo by Derrick Story.

I waited for a green light, then slowly crossed the street in the crosswalk. I had 15 seconds left on the warning timer, so I stopped for a moment to capture this image with an Olympus OM-D E-M5 Mark II and Olympus 17mm f1.8. Settings were ISO 1600, f/2.0, 1/40th, -1/3 exposure compensation in program mode. I then processed the RAW file in Capture One Pro 9, using the B&W conversion tool with a yellow filter and fine grain film effect.

The Nimbleosity Report

Do you want to keep up with the best content from The Digital Story and The Nimble Photographer? Sign up for The Nimbleosity Report, and receive highlights twice-a-month in a single page newsletter. Be a part of our community!

Want to Comment on this Post?

You can share your thoughts at the TDS Facebook page, where I'll post this story for discussion.

Editing Extensions Without the Mess

The list of cool editing extensions for Photos for OS X is growing steadily: Aurora HDR Pro, DxO OpticsPro for Photos, Tonality, Affinity Retouch, and more. Mac users who want to take advantage of these tools without disrupting their existing workflow can do so easily by setting up a referenced library.

01-ava-extensions.jpg You can play with all of these tools without disrupting your workflow.

All you have to do is simply point Photos to the existing home of your master files. In my case, they're on a small flash drive connected to my Mac. Those images are the source files for my Aperture, Capture One, and Exposure X work. But I can also play with them in Photos without changing the masters or interfering with the libraries in my other programs. Here's a movie on how to set up a referenced library.

Once I have the referenced library set up, I can play with tools such as Aurora HDR for Photos. Generally speaking, I've found the editing extension version of these apps easier to use and totally non-destructive. I can still view the original at any time, even after I've left the extension interface.

02-editing-image.jpg Playing with the image in the editing extension Aurora HDR Pro for Photos for OS X. All images by Derrick Story.

If you want to see where your original picture is residing, just right-click on the image and select "Show Referenced File in Finder." There it is, exactly were it was before you had all of this fun.

03-file-location.jpg

My guess is that a lot of Mac-toting photographers are missing out on this experience, just because they haven't looked in to it. I'm telling you, these extensions are cool. Check them out.

And for other hands-on tutorials, be sure to take a look at Photos for OS X Essential Training on lynda.com.

More Help and Insights on Photos for OS X

Don't forget about the Photos for OS X Special Feature Section on The Digital Story. It's a roundup of tutorials, videos, and articles focused on helping you master Apple's latest photo management software. You can also find it under Photography in the top nav bar.

Want to Comment on this Post?

You can share your thoughts at the TDS Facebook page, where I'll post this story for discussion.