Recently in Photography

  Page 162 of 382 in Photography  

Photography Talk posted a good article titled, How to Photograph Big Events. There are some solid talking points in there worth reviewing if you have a shoot on the horizon.

balloon_classic_ IMG_2176.jpg

A few things that I would add or reinforce include:

  • Mirrorless cameras will lighten your load and help you blend in if you're not shooting with a media pass.
  • Be conservative and considerate when considering photographing a child. You may have a momma bear nearby who doesn't appreciate using her cub as a photo subject.
  • I think shoulder bags are better than backpacks for crowded events.
  • Bring your own food and water. You don't want to waste time standing in long concession lines for a greasy burger or to stay hydrated.
  • Bring model releases and use them for shots that you think might be valuable up the road.


Join me on my Instagram site as I explore the world of mobile photography. And now Instagram features 15-second movies too.

Want to Comment on this Post?

You can share your thoughts at the TDS Facebook page, where I'll post this story for discussion.

As creative people, we do so many interesting things on our Macs. If you want an easy and affordable way to capture that activity and share it with others, you may want to investigate Screenflick.

screenflick-for-mac.jpg

With this application, I can record any activity on my Mac, both visual and audio, then share it in a variety of formats, including QuickTime movies, Flash f4v, and resolutions tailored specifically for iOS devices. I can record a master movie, then export it in a variety of resolutions for different uses.

I can also record time lapse movies, watermark my output, or just capture a portion of the screen. And the best part of all, is that Screenflick renders fast, very fast. So I don't spend a lot of time waiting between recording sessions.

I've used Screenflick professionally. But for only $29, I'd buy it for my fun, creative projects too. You can test Screenflick for free. If you have a project in mind, you may want to take a closer look.

Want to Comment on this Post?

You can share your thoughts at the TDS Facebook page, where I'll post this story for discussion.

This week on The Digital Story photography podcast: GoPro HERO3+ Black Edition tops the Weekly Update; Taking the Transporter Sync for a Spin; From the Screening Room: Chris Orwig, Lightroom 5 Essentials; and on the Nimbleosity Report: the Square Perfect Backdrop System- All of this and more on today's show with Derrick Story.

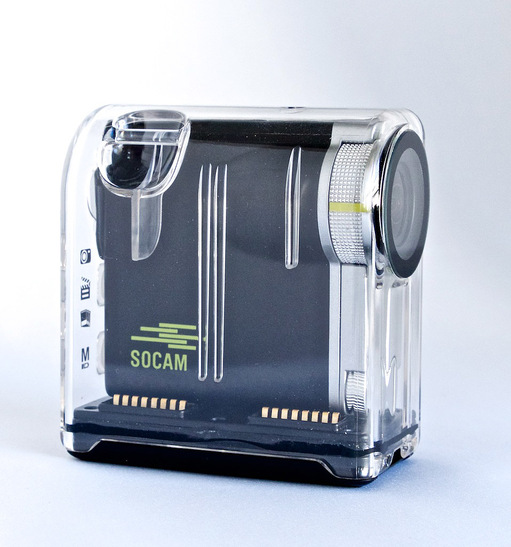
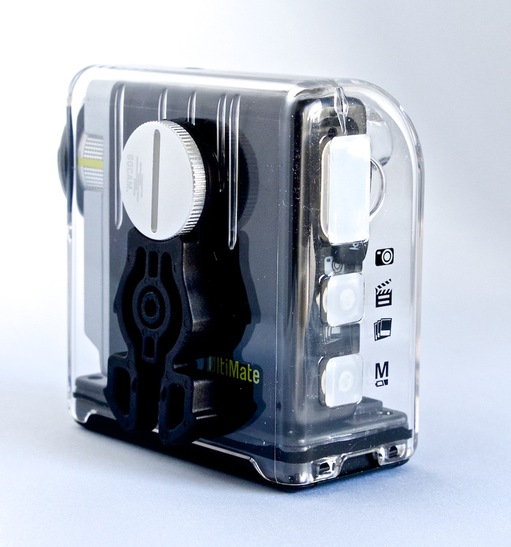
Story #1 - The Weekly Update: Hands-on with the GoPro Hero 3+ Black Edition (DP Review) Supports 4K, 2.7K, 1440p & 1080p Video. "It has better battery life, quicker Wi-Fi speeds with longer range, is more compact with the new case, has a significantly improved microphone, and the best image quality I've seen from a GoPro to date." In other news, Adobe Camera Raw release candidate supports 14 new cameras including Sony A6000, Fuji X-T1 (but no corresponding Lightroom update). (Imaging-Resource). And finally, Olympus Patents Impressive 12 and 14mm f/1.0 Ultra-Wide AF Lenses (PetaPixel).

Story #2 - Taking the Transporter Sync for a Spin.

I've been testing the Transporter Sync ($99) for an upcoming Lynda.com title that I'm working on for backing up your mobile photos. I'm still in the early stages of learning about this device, but I have a few things to share with you now.

transporter-sync.jpg

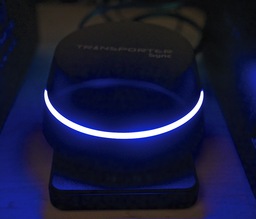
This is the standalone version of the transporter that doesn't include a hard drive. The thinking is that you add your own USB hard drive and it becomes a transporter.

One of the first things to note, is that whatever drive you use has to be completely erased by the transporter before it's available for storage. Once the Transporter has finished configuring the drive is then available for use.

You can access content on the drive the a desktop application, web browser, or iOS or android device. Right now I have a portable drive connected to the transporter that uses USB fo its power. I might switch to a drive with its own power supply to see if that increases performance.

The iOS app was more basic than I had anticipated. You can add images from your camera roll to your Transporter via your iPad or iPhone. But you can't do anything with them such as rename the file names put them in folders organize them things like that. And in fact, you can't even browse the images by icon. So all you end up with is a list of filenames without any indication of what the subject for the photo is.

At this point, I don't see the Transporter replacing services such as Loom that I think have more functionality for mobile photographers. It could be used as a straight back up solution, and I'm exploring that more and will report once I come to some conclusions about it.

Story #3 - From the Screening Room - Chris Orwig, Lightroom 5 Essentials. This week's featured artist is The enthusiastic Chris Orwig, who is an excellent Lightroom instructor. Chris shows you the things that you need to know to really master the basics of Lightroom 5.

You can watch Chris in action by visiting the TDS Screening Room at lynda.com/thedigitalstory. While you're there, you can start your 7 day free trial to watch other photography titles, plus every other topic in the library.

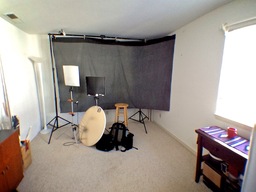
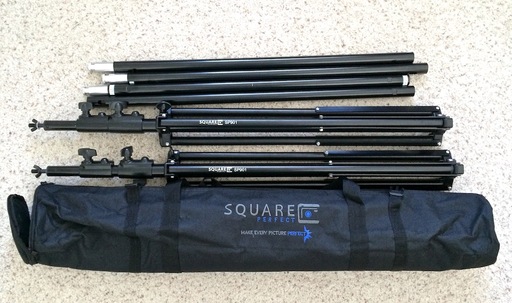
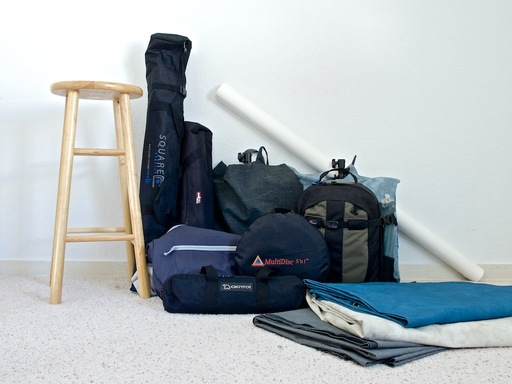
Story #4 - The Nimbleosity Report - The Square Perfect Backdrop Background Support Stand. This backdrop frame allows you to set up just about anywhere you have 10 feet of room. Plus it's affordable at lesson $70. And it breaks down to a pretty compact package. I talk more about it in the final segment of today's show.

Virtual Camera Club News

Photo Assignment for February 2014 is Smartphone.

The SizzlPix! Head to Head Challenge

Order a SizzlPix! using the image from which you've already made your best print. If, when you receive your SizzlPix!, you don't feel that it's the best version of your image ever, return yours within 30 days for a full refund.

Oh, and BTW: SizzlPix! now is qualified for PayPal "Bill Me Later," No payments, No interest for up to 6 months, which means, have your SizzlPix! now, and pay nothing until August!

BTW: If you're ordering through B&H or Amazon, please click on the respective ad tile under the Products header in the box half way down the 2nd column on thedigitalstory.com. That helps support the site.

Listen to the Podcast

In addition to subscribing in iTunes, you can also download the podcast file here (24 minutes). You can support this podcast by purchasing the TDS iPhone App for only $2.99 from the Apple App Store.

More Ways to Participate

Want to share photos and talk with other members in our virtual camera club? Check out our Flickr Public Group. And from those images, I choose the TDS Member Photo of the Day.

Podcast Sponsors

lynda.com - Learn lighting, portraiture, Photoshop skills, and more from expert-taught videos at lynda.com/thedigitalstory.

Red River Paper -- Keep up with the world of inkjet printing, and win free paper, by liking Red River Paper on Facebook.

SizzlPix! - High resolution output for your photography. You've never seen your imagery look so good. SizzlPix.com.

Want to Comment on this Post?

You can share your thoughts at the TDS Facebook page, where I'll post this story for discussion.

Getting It Right in Camera

One of the points we're emphasizing during filming this week for my latest lynda.com title on portraiture, is getting it right at capture. This image of Ashley, for example, has no post processing. It's a RAW file interpreted by Aperture 3.5 and exported as a Jpeg.

Before sharing these photos with Ashley, I will do some work on them. But my goal is to make that phase artistic, not corrective.

ashley-on-location.jpg

Among the advantages to this approach is making post a fun activity, and the ability to show the subject images during the shoot that inspire confidence. This leads to even better photos as the session moves forward.

For this pose, I used an off-camera flash on stand and a white fill reflector. The sun was behind the subject creating some nice back highlights. I mounted the Canon 85mm f/1.8 prime set to f/3.5 on a Canon 70D. ISO 100.

I'm hoping this title on photographing teens will be released in early Spring this year. I'll keep you posted.


Flickr Essential Training 2013 - I explore the entire Flickr universe, mobile and computer, in my lynda.com title, Flickr Essential Training. Stop by and take a look.

Want to Comment on this Post?

You can share your thoughts at the TDS Facebook page, where I'll post this story for discussion.

Packing Up the Nimble Portrait Studio

studio-before-packing.jpg

Most of my portrait work is outdoors. But there are those assignments where I need to set up indoors. With my portable studio kit, I'm able to fit all of the equipment in the back seat of car. Here's how I do it.

At the heart of my set up is the Square Perfect Background System ($65) that's quite sturdy, yet folds up into a single over-the-shoulder bag. I also like the Lowel Ego Digital Imaging Fluorescent 2 Light Kit (kit is $269 with stands and clamps).

square-perfect-sp901.jpg

I then add a few backdrops, stool, reflector, tripod, and of course my Lowepro backpack with camera gear and Speedlights. When it's all folded up and ready for transport, the studio looks like this.

packed-up-studio.jpg

Now all I need is a 10'x12' space, and of course, the subject!


Nimble Photographer Logo

This studio set up has a high Nimbleosity Rating. What does that mean? You can learn about Nimbleosity and more by visiting TheNimblePhotographer.com.

Want to Comment on this Post?

You can share your thoughts at the TDS Facebook page, where I'll post this story for discussion.

First Look at the SOCAM Action Camera

A new entry in the action cam arena is the SOCAM UltiMate, due for release in April.

Highlights include a 330 degree rotatable lens, gyro-image stabilization, 1080p video, slow motion (WVGA 120 fps), time lapse, photo burst (16MP 10fps), simple two-button design, versatile camera mounts, built-in WiFi, and an affordable price. (I heard around $249 with goodies so you don't have to spend extra on accessories. That number still needs to be confirmed.) [Update! I have a confirmed price of $269 US that includes the camera, water-tight housing, accessory clips, battery, and USB cord.]

socam-in-housing.jpg SOCAM in water-tight housing. I shot with it in a rain storm with no issues at all. Camera is easy to remove from housing when it isn't required. There's also connectors for two additional batteries in the housing. Photos by Derrick Story

The unit I'm testing measures 3.25" wide by 3.5" tall in the water-tight housing. The camera itself with no housing measures 2.75" wide by 2.75" tall. The rotating lens feature is handy. You can mount the camera as needed, then rotate the lens for the best composition. You can't, however, rotate the lens when the camera is in the water tight housing.

socam-back.jpg

There are four ports: USB, external mic, HDMI, and an accessory port. A standard tripod socket is on the side of the camera. That socket is also used for the included accessory mounts. Video files are written to a micro SD card in the .mp4 format. Quality was quite good in initial testing.

You can connect the camera wirelessly to your iPhone via its built-in WiFi and free SOCAM iOS app. I was able to get the two devices talking, but I need a bit more testing before sharing an opinion about the tandem's performance.

I'll have more to report after further use. But if you're looking for an affordable action cam, you might want to keep an eye out for reviews on the SOCAM after it's released in April.

Want to Comment on this Post?

You can share your thoughts at the TDS Facebook page, where I'll post this story for discussion.

This week on The Digital Story photography podcast: Sony a7R full review tops the Weekly Update; Build Your Own DIY Slide Digitizer; From the Screening Room: Julieanne Kost on Photoshop CC Essential Training; and on the Nimbleosity Report: How I dropped my iPhone from the top of the bleachers, and what happened after that - All of this and more on today's show with Derrick Story.

Story #1 - The Weekly Update: Full Review of the Sony a7R (DP Review) "When it comes down to it, the Sony a7R's image quality, created by a combination of its high-resolution sensor and premium quality optics, make it an impressive image-maker." Next, Nikon facing potential class action lawsuit due to D600 sensor oil issues (Imaging-Resource). And finally, we've got some specs and price information for the upcoming Pentax 645D CMOS Medium Format camera. It's going to cost about $10,000 and sport a 40-50-megapixel sensor (PetaPixel).

glasgow-scan.jpg

Story #2 - How to make a high quality slide digitizer with an old projector and a new camera. I'm getting excellent results with the Olympus OM-D E-M1 and the Olympus 60mm f/2.8 macro lens coupled to an old Leica P 150 projector. I cover why I chose to go this route, and how I assembled it. There'sd also a companion article titled DIY Slide Digitizer with Olympus OM-D and Leica Projector with how-to pictures and sample scans.

Original image captured in 1992 on Fuji 100 slide film.

Story #3 - From the Screening Room - Julieanne Kost: Photoshop CC Essential Training. This week's featured artist is one of the best Photoshop instructors I've ever listened to. Julieanne is an excellent photographer, so she knows the capture side of the equation too. And when she teaches, she's precise and adds plenty of wit and humor.

You can watch Julieanne in action by visiting the TDS Screening Room at lynda.com/thedigitalstory. While you're there, you can start your 7 day free trial to watch other photography titles, plus every other topic in the library.

Story #4 - The Nimbleosity Report - The Story of my Dropping an iPhone 5S from the top of the gym bleachers.

Virtual Camera Club News

Photo Assignment for February 2014 is Smartphone.

The SizzlPix! Head to Head Challenge

Order a SizzlPix! using the image from which you've already made your best print. If, when you receive your SizzlPix!, you don't feel that it's the best version of your image ever, return yours within 30 days for a full refund.

Oh, and BTW: SizzlPix! now is qualified for PayPal "Bill Me Later," No payments, No interest for up to 6 months, which means, have your SizzlPix! now, and pay nothing until August!

BTW: If you're ordering through B&H or Amazon, please click on the respective ad tile under the Products header in the box half way down the 2nd column on thedigitalstory.com. That helps support the site.

Listen to the Podcast

In addition to subscribing in iTunes, you can also download the podcast file here (33 minutes). You can support this podcast by purchasing the TDS iPhone App for only $2.99 from the Apple App Store.

More Ways to Participate

Want to share photos and talk with other members in our virtual camera club? Check out our Flickr Public Group. And from those images, I choose the TDS Member Photo of the Day.

Podcast Sponsors

lynda.com - Learn lighting, portraiture, Photoshop skills, and more from expert-taught videos at lynda.com/thedigitalstory.

Red River Paper -- Keep up with the world of inkjet printing, and win free paper, by liking Red River Paper on Facebook.

SizzlPix! - High resolution output for your photography. You've never seen your imagery look so good. SizzlPix.com.

Want to Comment on this Post?

You can share your thoughts at the TDS Facebook page, where I'll post this story for discussion.

olympus-share-wifi.png

Like many seasoned shooters, I have a library of slides that I'm not using, simply because they haven't been digitized. Thanks to inspiration from Victor Kaijser Bots, who converted a slide projector into an automated digitizer, I've created my own high quality rig with components that I had on hand.

My digitizer is a single-shot system that emphasizes quality over speed. I've dabbled with these projects in the past. The problem was always mediocre quality because of cheap optics.


Olympus Image Share app running on an iPhone 5S controlling the E-M1 that's digitizing the slides in the projector.


This rig solves that problem by using an Olympus 60mm f/2.8 macro lens with an Olympus OM-D E-M1. The Olympus 60mm has excellent edge-to-edge sharpness, plus a small barrel diameter to correctly couple with the slide projector. I simply remove the lens that came with the projector, then point the 60mm optic toward the illuminated slide.

slide-projector-setup.jpg I remove the lens from the Leica P 150 slide projector and point the macro 60mm toward the image. I used the Olympus Image Share WiFi app to control the OM-D E-M1.

The trick to making this rig work is to install a diffuser between the slide and the light source. This creates even illumination that's ideal for digitizing the image. I cut an piece of translucent plastic that was originally used for a portable light box that no longer worked. (I usually take apart broken items and salvage parts before discarding them.) I sandwich the diffuser with the slide and insert them into the single viewing slot on the projector.

slide-projector-diffuser.jpg The diffuser (on the right) is placed between the light source and the slide.

I used the Olympus Image Share app on my iPhone to focus and trip the shutter on the camera. This is really nice because I get a preview on the iPhone and have access to camera controls, without have to fiddle with the camera itself. Plus, I don't jar the E-M1 when initiating the exposure.

Riding the Train

The resulting digital images were very faithful to the originals, and quite easy to scan. This portrait was captured on a train in Scotland in 1992 with a Contax 167MT and Fuji 100 slide film.
The picture below was captured with the same equipment, then converted to B&W using Nik Sliver Efex Pro.

Holyrood House, Scotland

I could further automate this process by figuring out a way to mount the diffuser in the slide projector without damaging the projector itself. I still want to be able to present traditional slide shows with the Leica P 150. But I can tackle that challenge another day. For now, I'm having a blast converting images from my past and adding them to my Aperture library.

Aperture Tips and Techniques

To learn more about Aperture, which is what I use to image edit and catalog my digitized slides, check out my Aperture 3.3 Essential Training (2012) on lynda.com. Also, take a look at our Aperture 3 Learning Center. Tons of free content about how to get the most out of Aperture.


The Digital Story on Facebook -- discussion, outstanding images from the TDS community, and inside information. Join our celebration of great photography!


When you're out shooting with your interchangeable lens camera, remember to pull out your iPhone and snap a photo too. Why? Because your iPhone will log the location data that you can easily transfer to the corresponding images in Aperture.

import-from-iphone.jpg

In my latest Macworld Magazine article, Geotagging the easy way with Aperture 3.5, I explain three ways to add location data to the images you already have in your Aperture library.

I love the iPhone method. It's so easy. But if you haven't captured location data with it, you can use the geotagging tools built in to Aperture to accomplish the same goal. It's particularly fun for vacation and business trips.

Aperture Tips and Techniques

To learn more about Aperture, check out my Aperture 3.3 Essential Training (2012) on lynda.com. Also, take a look at our Aperture 3 Learning Center. Tons of free content about how to get the most out of Aperture.


The Digital Story on Facebook -- discussion, outstanding images from the TDS community, and inside information. Join our celebration of great photography!


One of the reasons why I often shoot RAW+Jpeg is to take advantage of in-camera effects or film simulation modes. The images with effects are saved as Jpegs. The master files are in the RAW format. By capturing those RAW files too, I have fully editable images to further experiment with further if I wish, especially if I don't like the way the Jpegs turned out.

00-both-versions.jpg Both images captured at the same time with a Fujifilm X20 compact camera. Picture on the left is the RAW file, and on the right is a B&W recorded using Fujifilm's Film Simulation mode. By shooting RAW+Jpeg, I get both files. Photos by Derrick Story.

When it's time to upload these files to Aperture, I choose "Both - Separate Originals" for my RAW+Jpeg pairs. I *do not* recommend using the other Pairs settings because the files get linked together. This proves to be a problem up the road.

01-import-as-separates.jpg Import as "Both - Separate Originals". Don't be fooled that the RAW files are B&W at this point. Aperture is just reading the embedded Jpegs.

Once the files are in my Aperture library, I select Auto Stack (Stacks > Auto Stack) and set the timing to 0:01. This creates a pairing for each of my compositions - one Jpeg with one Raw.

If I want to tidy up the library, I can Close All Stacks (Stacks > Close All Stacks), and I only see one version of each pair. You even have control over which version by using the Pick command.

03-both-raws-and-jpegs.jpg Jpegs and RAWs now side by side in Stack mode.

By using this technique, I'm more willing to experiment with the interesting effects included in my camera because I will always have the RAW file too. Use this technique to explore the unique features of your camera.

Aperture Tips and Techniques

To learn more about Aperture, check out my Aperture 3.3 Essential Training (2012) on lynda.com. Also, take a look at our Aperture 3 Learning Center. Tons of free content about how to get the most out of Aperture.


The Digital Story on Facebook -- discussion, outstanding images from the TDS community, and inside information. Join our celebration of great photography!