Recently in Photography

  Page 166 of 382 in Photography  

Derrick Airport Restroom

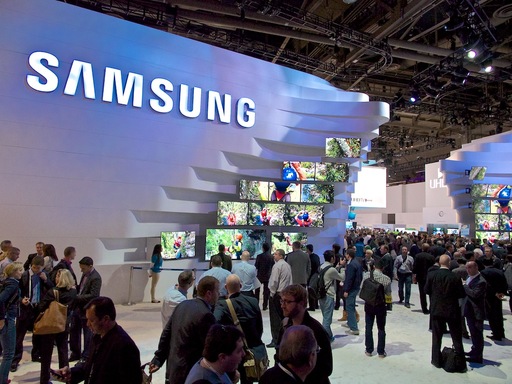
The Nimble Photographer is back from Las Vegas and the Consumer Electronics Show. No more public restrooms, crowded restaurants, or smoky casinos (at least for now...).

I discussed this assignment in The Nimble Photographer Journal with entries including Las Vegas and Assignment Gear. So how did it all work out? Quite well, actually.

I carried the Lowepro Urban Reporter 150 (shown in the picture) with me all day, everyday. I relied primarily on the Olympus OM-D E-M1 with the Panasonic 12-35mm f/2.8 zoom for my picture work.

If I went out for a stroll and casual shooting in the evening, I switched to the lighter Walking Man Shoulder Bag that's easier on my back and more discreet.

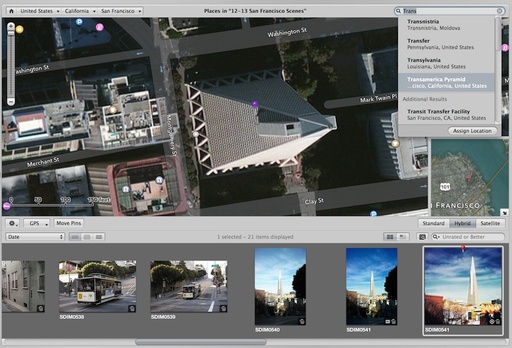
The images were transferred to either my iPad mini (with Verizon cellular) or the iPhone 5S (with AT&T cellular) depending on which device was getting the best reception. I used the WiFi capability of the E-M1 to copy images directly from the camera to the mobile devices that were running the Olympus O.I. Share iOS app.

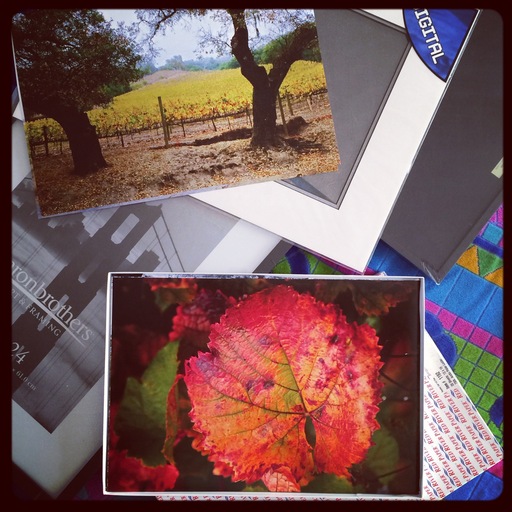
If there was time, I would fine-tune the pictures using Snapseed or iPhoto for iOS before pushing them up to the c't Digital Photography Facebook page, The Digital Story or the Lowepro social site.

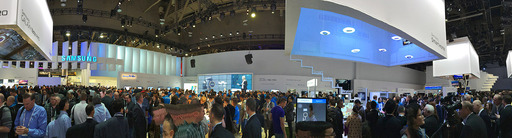
The organizers at CES made reporting a bit easier by beefing up the cellular networks at the Las Vegas Convention Center. This was much appreciated. It allowed me to post 3-4 times a day on the various sites while still on location.

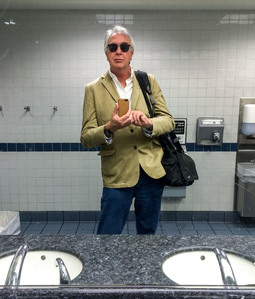
For my luggage, I used the eBags Mother Lode TLS Weekender Convertible along with the Urban Reporter. Why don't I use a roller? They're too cumbersome when you're in nimble mode.

For example, I checked out of my room yesterday morning and had to bring my luggage on assignment at the Convention Center. I then caught a cab from CES to the airport. I can wear the eBag on my back during all of this moving around. (I actually have the eBag on too in the above photo.) A roller just wouldn't work.

Now that I'm home, I'm definitely tired. But my gear worked flawlessly while I was on the road. And my clients seem happy with the timely reporting from Las Vegas.


Nimble Photographer Logo

This gear has a high Nimbleosity Rating. What does that mean? You can learn about Nimbleosity and more by visiting TheNimblePhotographer.com.

CES is an over-the-top event to begin with. It dominates Las Vegas, jams the monorail, and creates lines at every turn. But if you really want to witness a sea of technology humanity, go to the Samsung booth in the Central Hall.

Samsung Booth Entrance CES 2014 Samsung Booth Entrance CES 2014 - Photo by Derrick Story

In part, the enthusiasm is generated by the sheer variety of technological items offered by Samsung. Mobile devices, cameras, laptops, TVs, and on and on are displayed with flare and precision. Plus, Samsung is on a roll. And it's clear they intend to keep it going.

Booth Pano, Samsung CES 2014

Between my meeting with their PR folks, and my own personal exploration, I probably spent close to an hour in the Samsung area today. How many trade show booths can you say that about?

Want to Comment on this Post?

You can share your thoughts at the TDS Facebook page, where I'll post this story for discussion.

It's the modern day View Master. The Poppy turns your iPhone into a 3D creator and viewing device. And the best part? It's only $59.

Poppy 3D

Poppy works with iPhone 4, 4S, iPhone 5, 5C, 5S and the fifth generation iPod Touch. You put your phone in and Poppy's mirrors capture two stereographic images using your iPhone's single camera.

When you look in the viewfinder, Poppy's lenses combine the two video streams into a single, crisp, 3D video. It's beautiful, and really hard to describe or show in two dimensions.

It doesn't need batteries and there are no electronics. It's just optics and your iPhone's camera and screen, so we can keep the price low without sacrificing quality.

The images I created and viewed with the Poppy were great. And it works for video too.

Want to Comment on this Post?

You can share your thoughts at the TDS Facebook page, where I'll post this story for discussion.


Join me on my Instagram site as I explore Las Vegas during the CES show

5 Tips for Framing Your Prints

Adding mattes and frames to your prints provide the finishing touches. Here are five tips to keep in mind while preparing for this project.

Print Light Table

  • Buy frames and mattes that fit your output. For example, I like to create 13"x19" prints, so I buy frames and precut mattes to fit those dimensions. This saves time and makes the process much more pleasurable.
  • Clear off a large table and cover it with large towels. This provides you with a big work area that's frame and glass friendly.
  • Find your bulb blower and a lint free cloth. These are handy for wiping down the glass, blowing off paper particles, and keeping all the components smudge and dust free.
  • Print more than you need. When it's time to start framing, you want the freedom to design groupings. Plus, if you make a mistake with a print, it's good to know you have another at hand.
  • Keep your eyes peeled for frame and matte sales. Buy these items when they are affordable and stash them for when you're ready to work.

Hanging your art on the wall is wildly satisfying. Handsone frames and mattes make your pieces look even more impressive.

Want to Comment on this Post?

You can share your thoughts at the TDS Facebook page, where I'll post this story for discussion.

Very few of my cameras have built-in geotagging. And the ones that do, are sometimes inconsistent in their application of the data.

The good news is that it's easy enough to apply location information in post production with Aperture. It's not a regular part of my workflow. But for certain shots, such as this image of the Transamerica Pyramid in San Francisco, I like to do it.

Since I've added the GPS data, file sharing apps like Flickr with display it. Photo by Derrick Story.

The steps in Aperture are easy.

  • After you've finished editing the image, go to View > Places.
  • In the "Search the Map" box in the upper right, begin typing the location. Aperture will provide you with location options based on what you enter.
  • Click on the best option to choose it, then click on the Assign Location button. A red pin will be added to your photo to indicate that it's been geotagged.
  • Go to Preferences > Export and make sure that the box next to "Include location info in exported photos" is checked.
  • Close Preferences and export your photo.

Assign GPS Data in Aperture Adding location data using Places in Aperture 3.

After you've exported your image from Aperture, you can check your work by opening it in Preview. Go to Tools > Show Inspector. Click on the "i" tab, and you should see a GPS option. Click on it. The location information will be displayed.

Checking Data in Preview

You have now successfully geotagged your image. When it's shared on Flickr and elsewhere, viewers can see exactly where the subject is located. They might want to go there themselves.

Aperture Tips and Techniques

To learn more about Aperture, check out my Aperture 3.3 Essential Training (2012) on lynda.com. Also, take a look at our Aperture 3 Learning Center. Tons of free content about how to get the most out of Aperture.


The Digital Story on Facebook -- discussion, outstanding images from the TDS community, and inside information. Join our celebration of great photography!


One of the things I like about Instagram, is that it's a great vehicle for building creative discipline. My goal is to post five new images a week. And by doing so, I've become a more interesting photographer.

Old Fence "Old Fence" - Photos by Derrick Story

On one hand, I look at a lot of Instagram shots. There are so many different approaches. Some photographers focus on images of themselves, while others have favorite subjects outside of the mirror. Many contributors just want to do something different.

Taking all of this in inspires me to shoot outside of my comfort zone, experimenting with unique capture techniques or post production effects.

The Grapevine The Grapevine

But there's also something to the commitment of posting regularly. It's like writing everyday. The more I do it, the easier it becomes to create something new. Some photographers post a couple times a day. I think finding your personal frequency is important. But once you do, stick to it.

My Sister's 1965 VW Bus My Sister's 1965 VW Bus

Instagram has certainly had its share of controversy. And for some, it just isn't a good fit. But for me, it's been the first photo dairy that I've actually stuck with. I'm enjoying both the images by others, and the challenge to create new content day after day.


Join me on my Instagram site as I explore the world of mobile photography. And now Instagram features 15-second movies too.

Want to Comment on this Post?

You can share your thoughts at the TDS Facebook page, where I'll post this story for discussion.

"Critters" - Photo Assignment 92

For the November 2013 Photo Assignment, TDS shooters demonstrated their bravery while capturing these compelling portraits of four (or six) legged beasts. See for yourself in our gallery, Critters. And which one will be the SizzlPix Photo Assignment Pick of the Month?

Don-Zwicker-pa-nov-2013.jpg

"This little 'Critter' was shot during a photo excursion to Costa Rica," writes Don Zwicker. "I used a relatively short depth of field to isolate the frog in the image, while still capturing it in its natural environment." See all of the great images from this month's assignment by visiting the Critters gallery page.


Participate in This Month's Assignment

The Jan. 2014 assignment is "White." Details can be found on the Member Participation page. Deadline is Jan. 31, 2014. No limit on image size submitted.

Please follow the instructions carefully for labeling the subject line of the email for your submission. It's easy to lose these in the pile of mail if not labeled correctly. For example, the subject line for this month's assignment should be: "Photo Assignment: Jan 2014." Also, if you can, please don't strip out the metadata. And feel free to add any IPTC data you wish (These fields in particular: Caption, Credit, Copyright, Byline), I use that for the caption info.

Gallery posting is one month behind the deadline. So I'm posting Nov. 2013 at the end of Dec., the Dec. gallery will be posted at the end of Jan., and on and on.

Good luck with your Jan. assignment, and congratulations to all of the fine contributors for Nov.


Want to Comment on this Post?

You can share your thoughts at the TDS Facebook page, where I'll post this story for discussion.


iPad for Digital Photographers

If you love mobile photography like I do, then you'll enjoy iPad for Digital Photographers-- now available in print, Kindle, and iBooks versions.

This week on The Digital Story photography podcast: Top 10 Photo products of 2013; Nimbleosity Report - Hands on with the Olympus FL-300R electronic flash; Photo Help Desk: Exposure tips for mini studio product shots - All of this and more on today's show with Derrick Story.

Story #1 - Favorite products of 2013. It's been a great year for photo related tools. Certainly, however, a few standout as the best. Here are my personal award winners.

sony-a7r-no-lens.jpg

Story #2 - The Nimbleosity Report (www.thenimblephotographer.com): Hands on with the Olympus FL-300R compact flash. I used flash for the first time to cover my parents 60th wedding anniversary event at my sister's house in Huntington Beach California. Over the course of the day, I did both the bounce flash and direct flash with this little unit. I cover how it performed in the second segment of today show.

Story #3 - From the Photo Help Desk (www.photohelpdesk.com): Exposure tips for mini studio product shots. Collapsible many studios are great for small product shots. But sometimes those bright white backgrounds fool your camera's exposure meter, creating the old gray backgrounds instead of white ones. Here's how to clean things up in the third segment of today show.

Photo Assignment News

Photo Assignment for January 2014 is White.

BTW: If you're ordering through B&H or Amazon, please click on the respective ad tile under the Products header in the box half way down the 2nd column on thedigitalstory.com. That helps support the site.

Listen to the Podcast

In addition to subscribing in iTunes, you can also download the podcast file here (35 minutes). You can support this podcast by purchasing the TDS iPhone App for only $2.99 from the Apple App Store.

More Ways to Participate

Want to share photos and talk with other members in our virtual camera club? Check out our Flickr Public Group. And from those images, I choose the TDS Member Photo of the Day.


iPad for Digital Photographers

If you love mobile photography like I do, then you'll enjoy iPad for Digital Photographers-- now available in print, Kindle, and iBooks versions.

Podcast Sponsors

Red River Paper -- Keep up with the world of inkjet printing, and win free paper, by liking Red River Paper on Facebook.

Make Your Photos Sizzle with Color! -- SizzlPix is like High Definition TV for your photography.

Want to Comment on this Post?

You can share your thoughts at the TDS Facebook page, where I'll post this story for discussion.

Portrait Tips for iPhone Photographers

At first, you wouldn't think that the iPhone would be a good portrait camera. Its lens is wide with no optical zoom. The LED flash is too weak for outdoor fill. And it doesn't come with a tripod mount.

And yet, you can capture surprisingly good portraiture with it... including selfies that look much better than the typical Instagram snaps.

fill-light-for-portrait.jpg

In my latest Macworld Magazine article, How to shoot the best portraits with your iPhone, I share a half dozen proven tips for improving your people shots, including using your car window shade as a reflector. If you're toting an iPhone, you might want to check these out.


Nimble Photographer Logo

The iPhone has a high Nimbleosity Rating. What does that mean? You can learn about Nimbleosity and more by visiting TheNimblePhotographer.com.

Want to Comment on this Post?

You can share your thoughts at the TDS Facebook page, where I'll post this story for discussion.

I'm traveling again, so that's the subject of today's The Nimble Photographer Journal entry, Notes from the Road.

cloud-over-tejon-pass.jpg

And on Photo Help Desk, we help Barry control the tone of his mini-studio backdrop in the post, My White Has Turned Gray.

Want to Comment on this Post?

You can share your thoughts at the TDS Facebook page, where I'll post this story for discussion.


Join me on my Instagram site as I explore the world of mobile photography. And now Instagram features 15-second movies too.