Recently in Photography

  Page 254 of 382 in Photography  

I was thrilled to read that Eye-Fi has enabled a direct mode feature to its X2 series of cards. I had read in some of the reviews on the new iPad/iPhone app page that this functionality was difficult to enable. I decided to give it a spin (was going to anyway!).

Eye-Fi Direct Mode 
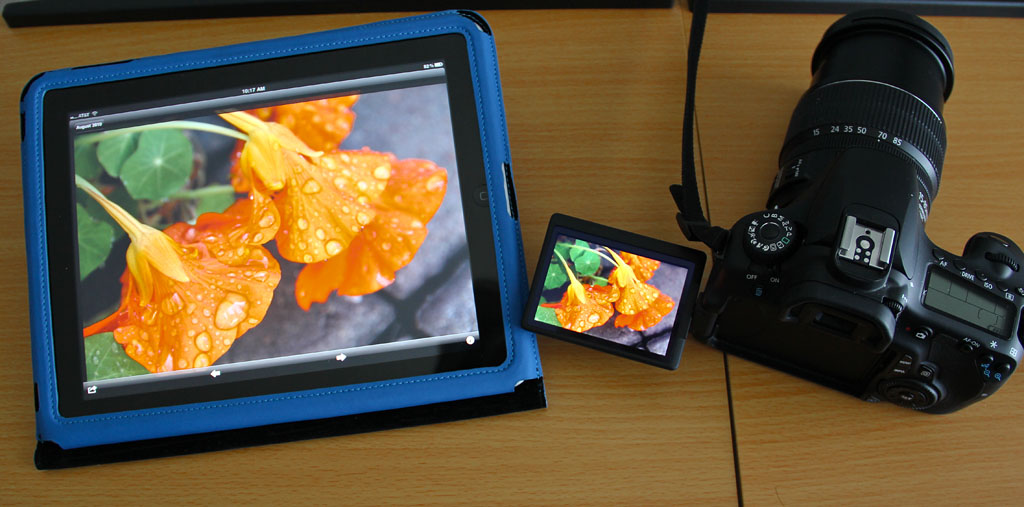
Direct mode transfer with an Eye-Fi Pro X2 card to an iPad. Click on image for larger size. Photo by Derrick Story.

The first thing I had to do was update the Eye-Fi Center software to the latest version. You can do this easily within the app. I then connected my Pro X2 card to the MacBook Air via the Eye-Fi card reader. I could use the built-in SD card slot on the Air, but I've learned that Eye-Fi cards like their own reader if one is available. Things just work better.

I then was able to update the firmware on the X2 card. This took about 30 seconds. Once I did that I could go to settings in Eye-Fi Center and enable Direct Mode.

eye-fi_direct_mode 
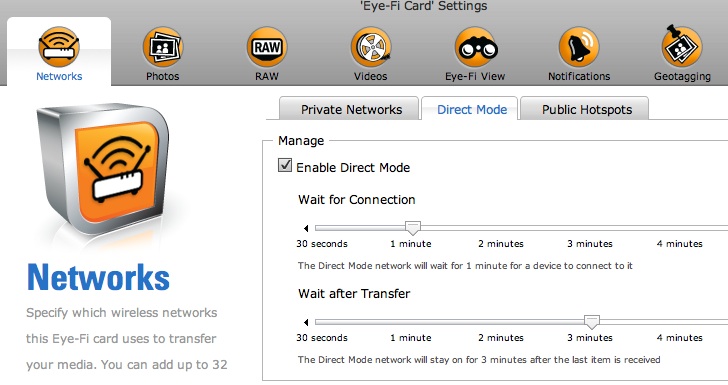
Enabling Direct Mode in the Eye-Fi Center software.

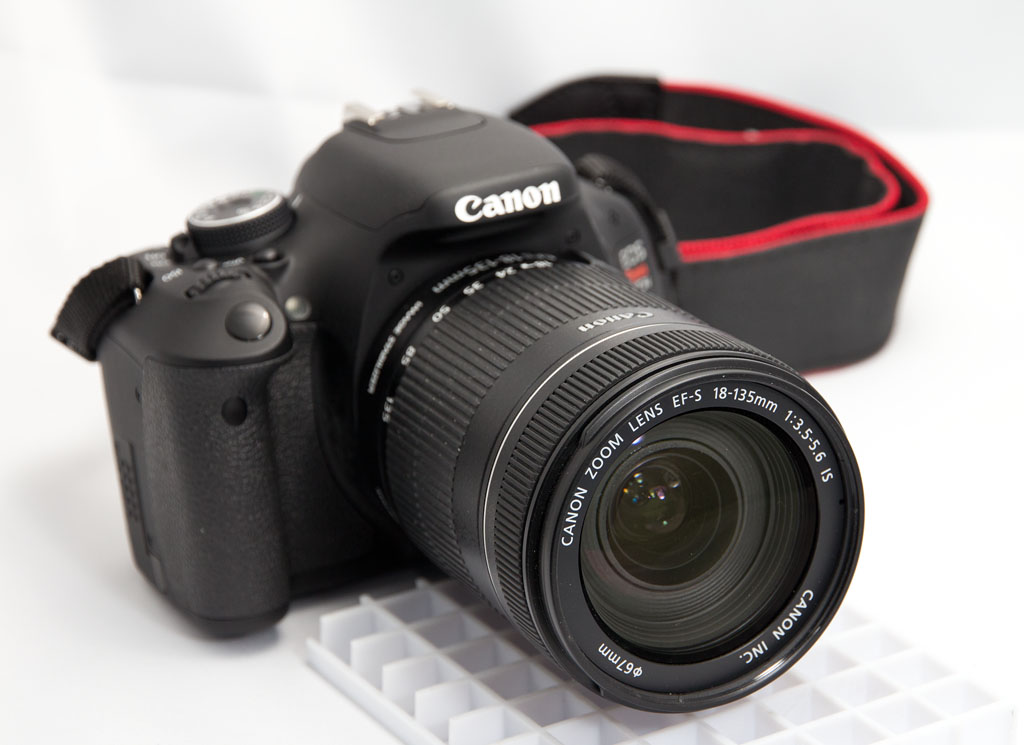
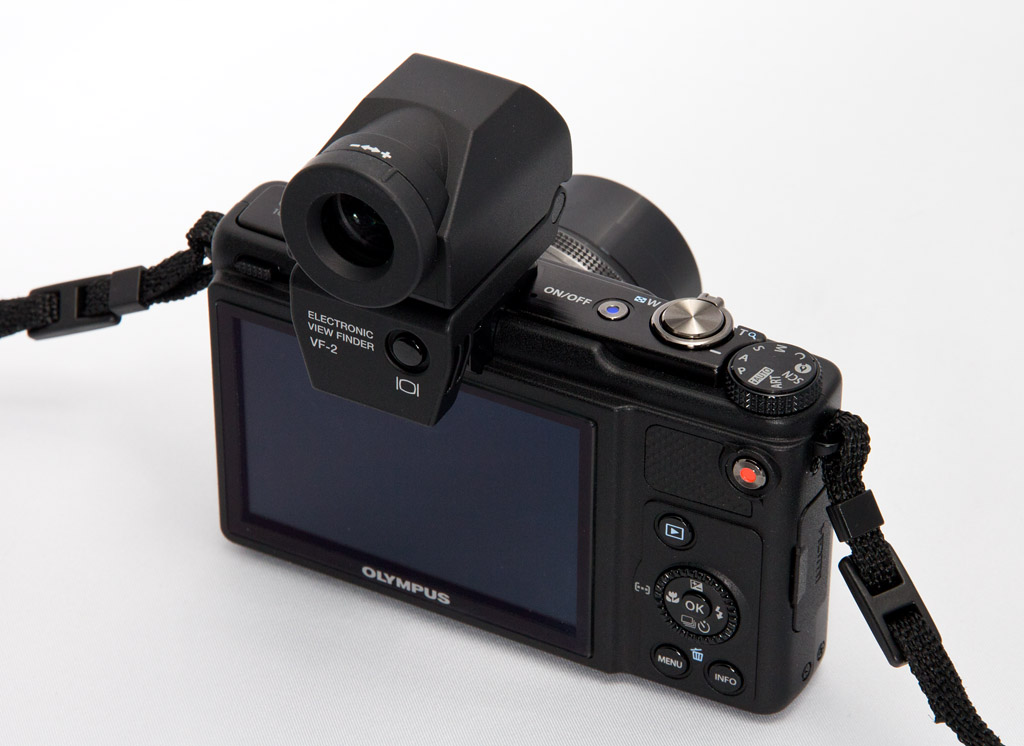
After I hit Save, I checked my other settings, then ejected the card. I put the Pro X2 in the Canon 60D, and took a couple of shots. My iPad was ready to go. I had downloaded the latest Eye-Fi software from the iTunes App Store. So all I had to do was enable Direct Mode on the iPad app, and then I could try a transfer. I picked one of the images on the 60D, protected it (I have selective upload that uses the protect function to determine what gets uploaded), and within 30 seconds, the image appeared on the iPad.

So my advice is to explore all of the settings in the Eye-Fi Center and in the Eye-Fi iPad/iPhone app to make sure you have all the Ts crossed. I'm going to continue to test this setup in different environments. I'll report anything new I find out. But so far, so good!


twitter.jpg Follow me on Twitter


This project recorded with an Olympus XZ-1 and Canon T3i, both shot at 720p. The studio demo footage employed the Rode VideoMic Pro plugged into the external mic jack of the T3i. The SF footage was captured with the XZ-1 without any accessories.

The Lowepro CompuDay Photo 150($65) is a messenger bag designed specifically for photographers. It has a clever camera compartment that allows access on-the-go to your DSLR, or that can be compressed when not in use to reclaim space in the bag.

I have a nice demo on the CompuDay Photo 150, then I take it on a business appointment in San Francisco to meet with pro shooter, Mikkel Aaland.

I really enjoy using the Lowepro CompuDay Photo 150for this type of work. I can carry up to a 17" laptop, DSLR, iPad, and misc gear, while not attracting attention to myself. Perfect for the urban environment.

Thanks to Mikkel Aaland for his help with this project.

More Lowepro Gear Videos

Lowepro Versapack 200 AW: Great for Biking Too

Stylish, Compact Bags for ILC Cameras

"10 Tips for Packing Your Camera Bag" - Digital Photography Podcast 265

Fashion Shooter Vered Koshlano Sports Tech Vest


twitter.jpg Follow me on Twitter


Exposure, color, and composition... the basics of photography. In this week's episode, we're going to review how the camera sees light, and how you can tame it to see the world the way your eyes do.

Listen to the Podcast

You can also download the podcast here (34 minutes). Or better yet, subscribe to the podcast in iTunes. You can support this podcast by purchasing the TDS iPhone App for only $2.99 from the Apple App Store.

Monthly Photo Assignment

Broken is the April 2011 Photo Assignment. You can read more about how to submit on our Member Participation page. Deadline for entry is April 30, 2011.

The SizzlPix Pick of the Month for the "Loved One" Photo Assignment is Kevin Miller for his shot, "Andrew, a special needs friend, loves his dogs."

TDS Fall 2011 Photography Workshop

We're making plans now for the Fall 2011 TDS Photography Workshop. If you want your name on the reserve list, just drop me a line.

More Ways to Participate

Want to share photos and talk with other members in our virtual camera club? Check out our Flickr Public Group. It's a blast!

Podcast Sponsors

Red River Paper -- Try the $7.99 Sample Kit.

Make Your Photos Sizzle with Color! -- SizzlPix is like High Definition TV for your photography.

Need a New Photo Bag? Check out the Lowepro Specialty Store on The Digital Story and use discount code LP20 to saven 20% at check out.


Technorati Tags:
, , , , ,


Bee on Lavender 3

Canon offers the Rebel T3i with the EF-S 18-135mm IS Zoomas a step-up to the shorter 18-55mm lens (it's an actual kit at a special price). Aside from the extended telephoto range, is it worth spending an extra $250 for this upgrade?

If you want a single lens that ranges from an effective 29mm to 216mm range, non-rotating front objective lens (better for polarizing filters), and metal lens mount, then you might be tempted by this upgrade. But if you're looking for a bump in image quality over the 18-55mm kit lens, then hang on to your wallet: the two lenses are about the same in terms of sharpness and distortion control. Now that isn't necessarily bad news, since both the 18-55mm and 18-135mm are solid performers.

"Bee on Lavender" photographed with a Rebel T3i and 18-135mm EF-S zoom at 135mm wide open (f/5.6). ISO 500, 1/250th second. The Jpeg image was first processed in Aperture 3, with a bit of additional sharpening in Photoshop CS5. Click on image for larger version. Photo by Derrick Story.

I've been testing the the 18-135mm on a Canon EOS Rebel T3i, and have enjoyed using it. Even though it's a bigger lens and does weigh more than the 18-55mm, it feels good on the Rebel body. And I liked not having to change lenses as often as I had previously with the shorter kit lens.

Canon EF-S 18-135mm IS Zoom Lens Canon EF-S 18-135mm IS Zoom Lens mounted on a EOS Rebel T3i. Click on image for larger size. Photo by Derrick Story.

If you want to go to the next level of image quality, however, I recommend the EF-S 15-85mm zoom that has a wider angle of view, quiet USM focusing motor, better build, and better sharpness, especially on the corners. However, this zoom costs about 3X more ($795) because it isn't a kit option, and doesn't have the same reach as the 18-135mm.

So, for essentially $250 (when purchased as part of a kit), the 18-135mm is a very good deal. (Keep in mind if you buy the 18-135mm separately, it's about $650.) And after shooting with it for a few weeks, I would have a hard time going back to the shorter 18-55mm kit zoom. I'd consider the upgrade if you're looking at the new Rebels.


twitter.jpg Follow me on Twitter


Until recently, I had considered the Lowepro Versapack 200 AW as primarily a hiking backpack. But I've discovered it's terrific for biking too. Here's a short movie on how I pack it for two-wheeled adventures.


twitter.jpg Follow me on Twitter


I've had photographers tell me that they would patiently wait -- sometimes for an hour -- for people to clear out of a scene so they could photograph it. This becomes a bigger challenge once school lets out and family vacation season begins.

But, do people really ruin your scenic shots? Take a look at the comparison below, captured at Ledson Winery in Sonoma County. (Cast you vote for which image you like best in the comments section of this article.)

Ledson Winery, Sonoma County, CA Do people really ruin this scenic shot? Personally, I don't think so. Click on image for larger version. Photos by Derrick Story.

Sometimes people add visual interest to a composition. Plus they can help with sense of scale. Yet it's true, there are those situations where they are an annoying distractions no matter how you compose the scene.

So the answer for me is to try to capture the photo both ways, then decide later which version I like best. And if it's not possible to eliminate those pesky humans, then I wait for a decisive moment where they're doing something interesting.

As for the photo above, which way to you vote? People... or not?


twitter.jpg Follow me on Twitter


"Rocket Launch" - Grab Shot 213

"I've been trying to capture a rocket launch from Vandenberg for almost a year now," writes Thomas Emmerich. "I finally got my chance tonight, and it came out pretty good for my first try. I almost missed it by mis-judging the launch angle from Ventura (CA)."

"Rocket Launch" - Grab Shot 213 Thomas Emmerich "Rocket Launch" - Grab Shot 213 by Thomas Emmerich. Click on image for larger version.

"I had to move the camera at the last moment and missed the first few seconds of the launch. The hard part about taking these shots is you can't see anything in the viewfinder while setting up, and then once you open the shutter, you can't tell where the rocket is in the frame or if its even in the frame. There are no second chances."

"I used my Canon T2i with a borrowed Canon 17-40mm F4L lens. Settings were F/8 and bulb mode with a infrared remote trigger to start and stop the exposure of 95 seconds. ISO 400. I found tips on photographing rockets at night by doing a Google search for 'Photograph Vandenberg Rocket Launch'".

There was quite a bit of water vapor in the air, which was made visible by the long exposure and the parking lot lights behind me.

This is our 213th Grab Shot! Wow. If you want to review the collection that began back in 2006, go to our Grab Shots page.

If you have a candid you'd like to share, take a look at our Submissions page, then send us your Grab Shot. We'll try to get it published for you on The Digital Story.

And you can view more images from our virtual camera club in the Member Photo Gallery.


The Digital Story Podcast App is the best way to stream or download weekly TDS podcast episodes. No more syncing your iPhone, iPod Touch, iPad, or even your Android phone just to get a podcast. And the best part is, The Digital Story Podcast App is your way to help support this show. Download it today!


twitter.jpg Follow me on Twitter


One of my favorite features in Adobe Camera Raw 6.3 (part of Photoshop CS5) is the Lens Correction tool. It's handy for correcting images from your glass that records a tad too much distortion, chromatic aberration, or vignetting. But I also like to use it to evaluate zooms that I'm testing for reviews or considering for purchase.

For most common zooms, all you have to do is open the file in Adobe Camera Raw, click on the Lens Correction tab, then check the box next to Enable Lens Profile Corrections. By checking and unchecking the box, you have another way to gauge the performance of the optics on your camera.

Adobe Camera Raw Lens Correction Off Adobe Camera Raw Lens Correction Off. Click on image for full size version.

Adobe Camera Raw Lens Correction On Adobe Camera Raw Lens Correction On. Click on image for full size version.

I recently field tested the Canon EF-S 15-85mm f/3.5-5.6 IS USM, and loved the shots it produced in the field. So I thought I'd take a look at how it fared in ACR. As you can see, there was some distorition, but nothing that caused my affection to wane.

Lightroom 3 has this same technology available in the Develop module. Look for Lens Corrections in the right-side pane.

In either application, this is a useful tool for correcting images and evaluating your glass.


twitter.jpg Follow me on Twitter


It happens a thousand times a day: a group of people want to commerate a moment together, and you're the person standing there with a camera. Yes, it's time for the classic photo opp -- the group shot.

For those situations, I have some great tips to help you improve those images. I've just released Photo Assignment: Group Shots on lynda.com to help you with exactly that.

I start with an equipment overview, including some of the latest tools such as Rogue FlashBenders. We then go on location to a historic theater in downtown Ventura CA to put our theories to the test. I photograph couples and small groups inside and out the brick building. I wrap up the tutorial by returning to the computer to review our results and share more tips and techniques.

The entire training runs just a bit over 30 minutes, yet covers plenty of ground. I'm confident that the next time you've got group shots on the assignment list, you'll be better prepared after watching this training.

More Online Photography Training at Your Fingertips

The Group Shots title is part of an ongoing series I have on lynda.com. You may also want to take a look at the Off Camera Flash title. I show you all sorts of helpful lighting techniques that are especially good for portraits.


twitter.jpg Follow me on Twitter


As high-end compact cameras became, well, more compact, their optical viewfinders fell by the wayside. For me, this wasn't such a terrible thing since they were usually awful anyway, often only showing a fraction of the photo you were actually recording. That being said, wouldn't it be nice to have something other than the LCD screen for composing with these little photographic gems?

Olympus XZ-1 with VF-2 Electronic Viewfinder Olympus XZ-1 with VF-2 Electronic Viewfinder. Click on image for larger version. Photo by Derrick Story.

The engineers at Olympus seem to think so too. For their latest well-heeled compact, the XZ-1 with f/1.8 zoom, they included an accessory shoe that accommodates the VF-2 Electronic Viewfinder (that also works on most of the PEN cameras.)

The VF-2 slides into the accessory port and provides an accurate view of both image and camera controls. You can switch back and forth between the viewfinder and the LCD by pressing the control button on the back of the viewfinder. The VF-2 is hinged, so you can angle up to 90 degrees providing more flexibility in how you hold the camera when you take pictures. There's also a diopter ring so you can adjust its clarity to your eyesight.As you can image, this accessory is a blessing when working in bright sunlight, which can make composition on an LCD difficult at best. But I use the VF-2 for all types of shooting. I find it easier to concentrate on my composition with the device, similar to the experience of composing through a DSLR.

What's amazing, however, is how small and light the entire package is. For photographers on the go, or just anyone who loves to travel light, the Olympus XZ-1 plus VF-2 Electronic Viewfinder does make compact photography more pleasurable than ever. The only downside? The price for this combo will also lighten your wallet.

The Olympus XZ-1 is running around $499 plus another $249 for the VF-2 Electronic Viewfinder. So don't try it unless you have the budget to spend. Because if you do, you'll certainly be hooked.

More Articles about the Olympus XZ-1

Olympus XZ-1 Review, Part 1

Olympus XZ-1 ISO Test 100-3200

"Olympus XZ-1 ISO Smackdown" - Digital Photography Podcast 267


twitter.jpg Follow me on Twitter