Recently in Photography

  Page 28 of 382 in Photography  

This is The Digital Story Podcast #770, Dec. 22, 2020. Today's theme is "Using Your Smartphone with Your Digital Camera, Not Instead of It." I'm Derrick Story.

Opening Monologue

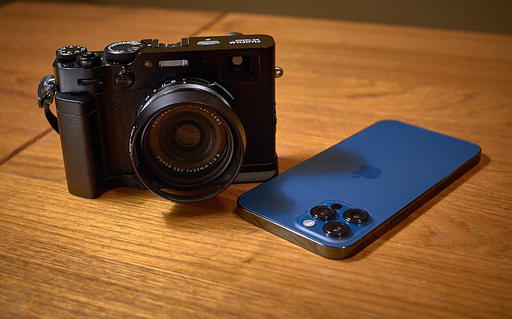
There's been so much talk about how smartphones will replace our digital cameras. But I think for nimble photographers, that's the wrong approach. Instead, let's explore how we can use smartphones with our digital cameras instead of replacing them. I'll share one scenario today with a Fujifilm X100V and iPhone 12 Pro Max. I hope you enjoy the show.

Using Your Smartphone with Your Digital Camera, Not Instead of It

1024-DSC_1821-tandem.jpg

There are certainly situations when I want a digital camera with all its tools and conveniences, and other situations when my smartphone will work just fine. But to tell you the truth - the best scenario is having them both with me.

Digital Camera Benefits

Let's start with a list of benefits for digital cameras.

  • Digital cameras typically have great viewfinders that are superior in many situations.
  • Camera companies have years of color technology under their belt that we can take advantage of, such as Fuji's film simulations.
  • Larger sensors make it easier to control depth of field.
  • It's nice not to have your photo shoot interrupted by a text message or phone call.
  • Digital cameras provide more megapixels and larger photo sites.
  • Many digital cameras are quite beautiful and are inspiring to use, such as my Olympus PEN-F and Fujifilm X100V.
  • The option of interchangeable lenses help us meet a variety of photo opportunities.

Smartphone Benefits

Smartphones do have their advantages as well.

  • Smartphones are ultra compact, and we typically have one in our pocket at all times.
  • Smartphones tend to be more adept at computational photography helping us overcome common technical challenges.
  • Cellular and WiFi connectivity are wildly useful.
  • Mobile imaging apps are quite powerful and have become more useful as screens have grown larger.
  • Smartphone are ubiquitous and don't attract unwanted attention in sensitive situations.
  • Smartphones can house up to three prime lenses in a single device making them quite versatile.
  • Smartphones can provide instant cloud backup of our images.

Benefits of Using Them Together

So, if we combine one well-specified smartphone with a favorite nimble camera, what are the benefits?

  • You don't have to carry extra lenses and accessories. My iPhone 12 Pro Max has, for example, 26mm f/1.6 prime, 65mm f/2.4 telephoto, and a 13mm f/2.4 ultra wide. Combine that with the 35mm f/2.0 prime on my X100V or 34mm f/1.8 prime on the PEN-F, and I have a full kit.
  • I can process and upload images from anywhere. Connecting the iPhone with the X100V gives me a powerful workstation in the field.
  • Smartphone are infinitely versatile thanks to software that's immediately downloadable.
  • When you think about it, smartphones are high value purchases compared to comparable cameras. My iPhone 12 Pro Max and Fujifilm X100V costs about the same. And I have a complete camera kit for $2,800.
  • Smartphones allow me to shoot with cameras that I love, despite their shortcomings because the iPhone fills in the functionality gaps.
  • Digital cameras give me high resolution and smartphones provide broad versatility.

Now, when I walk out the door, I can configure my digital camera the way that I want (monochrome mode, portrait lens, etc.) knowing that if I encounter a situation that it doesn't work for, I have my iPhone 12 Pro Max to fall back on. Indeed, this is a dynamic duo that I would not want to split up.

New Workshop! Integrating iPhone into a Pro Photography Workflow

There's been a lot of discussion about how contemporary iPhones will replace digital cameras. But in practice, they are better for augmenting your image capabilities rather than serving as your sole capture device. And now with Apple ProRAW and iPhone 12 Pro, this becomes more true than ever.

This workshop is designed to help you best integrate your modern iPhone into a professional photography workflow. Because of its compact size and powerful features, it can replace many bulky accessories that we were once required to carry along.

In this workshop you will explore:

  • Working with just one digital camera and an iPhone.
  • Taking advantage of a versatile fast prime lens on your digital camera and using iPhone for additional focal lengths.
  • Perfecting a RAW workflow with the iPhone.
  • Leveraging Apple ProRAW for those who have iPhone 12 Pro.
  • Building a kit that allows you to travel lighter without compromising capability.
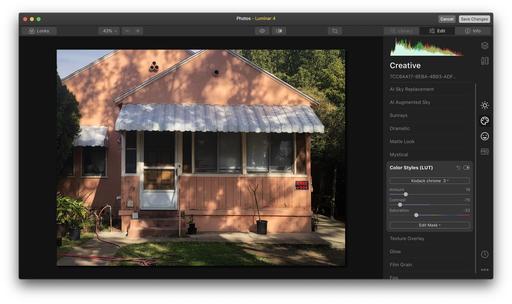
  • Post processing tips and techniques using Photos on Mac, iPad, and iPhone.
  • Investigating other software and workflows to augment your imaging prowess.

Photo assignments and weekly check-ins begin in early February 2021, with the grand finale final day on Feb. 27, 2021.

As part of this workshop you will have access to Derrick Story Online, our virtual headquarters where we compare notes, share pictures, and learn new techniques.

I'll hope you'll join me for this exciting event. Only 10 seats available. First come, first served.

You can register now for $135. Patreon members receive a $15 discount for this event.

Recommended Hardware for this workshop: iPhone X or newer. Mac running macOS Catalina or Big Sur.

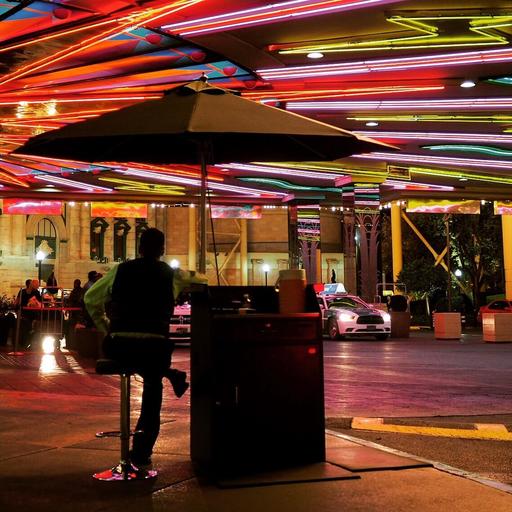
Tips for Shooting Holiday Lights with iPhone

You can read the entire article here on Petapixel.com.

Here's how the article starts:

The holidays in New York City are my favorite part of the year. It's such a magical and festive time all throughout the City. You'll find holiday trees, light displays, and the prettiest decorations around every corner.

It's such a joy to take photos in New York City during that time, and I'm excited to share with you some of my favorite tips for capturing beautiful and creative photos of holiday decorations. The best part is you don't need fancy, heavy, or expensive photo gear. Just take out your iPhone and start snapping.

Whether you're a professional photographer or just someone who loves taking photos, I've found that my iPhone 12 Pro Max offers that versatility to meet you at whatever level you're at.

Updates and Such

Inner Circle Members: A big thanks to those who support our podcast and our efforts!

Affiliate Links - The links to some products in this podcast contain an affiliate code that credits The Digital Story for any purchases made from B&H Photo and Amazon via that click-through. Depending on the purchase, we may receive some financial compensation.

And finally, be sure to visit our friends at Red River Paper for all of your inkjet supply needs.

See you next week!

Product Links and Comments

There are product links in this article that contain affiliate tags. In some cases, depending on the product, The Digital Story may receive compensation if you purchase a product via one of those links. There is no additional cost to you.

You can share your thoughts at the TDS Facebook page, where I'll post this story for discussion.

Capturing in B&W Has its Advantages

A lot of photographers tell me they don't need to shoot in B&W because they'll just convert the images later on in post. And yes, there's nothing wrong with that.

But why not have your cake and eat it too? If you capture in monochrome using RAW+Jpeg, you can reap the advantages of seeing and composing the images in B&W, and still have all of your options open in post. The Jpeg version will be processed in-camera according to your settings, and the RAW will remain untouched until you edit it later on the computer.

Here's an example of this technique using my Fujifilm X100V in film simulation mode.

monochrome-DSCF2261-BW.jpg Film simulation was ACROS + G filter. Further refined in Capture One Pro. Photos by Derrick Story.

color-DSCF2261-BW.jpg RAW file revealed in color.

My goal for the day was to come home a handful of black & white images for my Ultimate B&W Photography Workshop that I'm currently facilitating. Had I been shooting in color, I may not have pressed the shutter button.

The trunk of the car is so ugly in the color shot, I probably would have just let it drive by. But in monochrome, it isn't nearly as distracting. And in fact, I like the B&W image.

If you're goal is to end up with black and white photos, then I recommend capturing that way as well. By doing so, you will be better able to preview the shots and create stronger compositions. Plus, you might not let a car get away that you would have otherwise passed on.

Product Links and Comments

There are product links in this article that contain affiliate tags. In some cases, depending on the product, The Digital Story may receive compensation if you purchase a product via one of those links. There is no additional cost to you.

You can share your thoughts at the TDS Facebook page, where I'll post this story for discussion.

This is The Digital Story Podcast #769, Dec. 15, 2020. Today's theme is "What to Do About All of Those Digital Photos?" I'm Derrick Story.

Opening Monologue

Our digital photos pile up faster than leaves in Autumn. And today's show is dedicated to getting them bagged up and organized. We're going to rake up this job from two angles, using common sense organizing techniques and a dash of artificial intelligence. So glad you're here!

What to Do About All of Those Digital Photos?

dec-2013.jpg

We're going to start out today talking with Isabelle Dervaux, a professional photo organizer.

Isabelle shares some great ideas and advice to help you get your arms around all those images on your hard drive. She's also available to you for a free 20 minute phone consultation.

One of her favorite quotes:

"Twelve significant photographs in any one year is a good crop." - Ansel Adams.

And finally, you may want to follow her on Instagram.

CullAi Is a Free/Affordable AI Organizing Tool for Mac Photographers

I ran across this article, CullAi is a Free Artificial Intelligence Culling Tool for the Mac, and was quite interested in this software.

So I downloaded the app and began testing it. You can use it for free with 50 photos or less per run. But I wanted to see how it performed on a professional shoot, so I ponied up the $10 for unlimited processing and put it to work.

The bottom line is, this app is super helpful for large collections of images of people. That's its focus. And it works surprisingly well. I discuss my experience on the second segment of today's show.

You can download CullAi from the Mac App Store.

The New Donation Kit for Carefree Shipping of Found Film Cameras

We have more time around the house than ever. And you finally dove into that bedroom closet that's been begging for some organization.

If you found a film camera that you're no longer using, our new Donation Kit makes it easy to pack and ship. Just visit the Contact Form on thenimblephotographer.com, click the box next to Donating a Film Camera, and let me know what you have. In your note, be sure to include your shipping address.

If it's a camera we can use for the shop, I'll send you a Donation Kit that includes a USPS Priority Mail shipping box and prepaid label. All you have to do is tape it up, insert the camera, and add the label. USPS will pick up your shipment from the front door of your house during their regular mail delivery. It's that simple!

Your donation help get analog gear in the hands of aspiring fine art photographers, and the proceeds help support this podcast.

Updates and Such

Inner Circle Members: A big thanks to those who support our podcast and our efforts!

Affiliate Links - The links to some products in this podcast contain an affiliate code that credits The Digital Story for any purchases made from B&H Photo and Amazon via that click-through. Depending on the purchase, we may receive some financial compensation.

And finally, be sure to visit our friends at Red River Paper for all of your inkjet supply needs.

See you next week!

Product Links and Comments

There are product links in this article that contain affiliate tags. In some cases, depending on the product, The Digital Story may receive compensation if you purchase a product via one of those links. There is no additional cost to you.

You can share your thoughts at the TDS Facebook page, where I'll post this story for discussion.

LUTs to Enhance the Mood of the Moment

On a recent trip to Southern California, I took daily walks for both exercise and photography. I like capturing scenes that I think are iconic to neighborhoods in the area.

IMG_7060.jpeg Home in a Southern California bedroom community. Photo by Derrick Story.

One thing that always jumps out at me while visiting this area is the difference in color palette of the houses and landscapes. When I'm reviewing the images on my laptop, I like to enhance that vibe via color grading. One of my favorite tricks in the process is to tap LUTs.

LUTs (Lookup Tables) are a mathematically precise way of taking one set of RGB values and changing them to new set. A lot of things happen under the hood with LUTs, but in action they feel like presets. I often tap them in Luminar, and it's as simple as mousing over a list and previewing the effect on my photograph.

LUTs-So-Cal-Home.jpg Applying a LUT in Luminar 4.

Once I've found a color look that I think creates the mood I want, I can fine tune its appearance using the Amount, Contrast, and Saturation sliders. Often the effect feels subtle, but when I view the Before/After of the picture, the color grading adds that dash of salt that makes the dish taste better.

Keep in mind that LUTs are for color grading, not correction. So they are applied near the end of the editing process after you've adjusted white balance and exposure. Many applications support them, such a Lightroom, but some are easier to use than others. In my case, I prefer Luminar's approach.

Don't forget about LUTs when you're thinking mood. They can be an excellent finishing touch.

You can share your thoughts at the TDS Facebook page, where I'll post this story for discussion.

RAW Photography with Older iPhones

Only the latest iPhones (and top of the line models at that) can take advantage of Apple's new ProRAW format. But earlier models capture RAW quite well, and by following a few simple steps, can yield beautiful results.

I photographed this fall vineyard scene shooting RAW+Jpeg with an iPhone X using the Halide app. Thanks to the smarts of the iPhone, the Jpeg version looks good despite the strong backlighting from the sky.

unmodified-jpeg-Photos.jpeg Unmodified JPEG captured with an iPhone X using Halide.

But I wanted to get a bit more out of this image, so I decided to spend a couple minutes working with the RAW file. Here is the workflow that I use and recommend. I use Luminar 4 as an Editing Extension for Photos for macOS. Earlier versions of Luminar work well, as do other editing extensions.

  • Open the image in Photos for macOS on a Mac.
  • Go to Edit mode.
  • Go to Image > Use RAW as Original (this switches you to the RAW file from the JPEG).
  • Click on the 3 dots in the top toolbar and choose Luminar (or your favorite Editing Extension).
  • Enhance the RAW file to your taste in Luminar and click Save Changes.
  • Add any finishing touches back in Photos for macOS.

finished-vineyard.jpeg RAW version of vineyard edited in Luminar 4 and Photos for macOS. Images by Derrick Story.

The aspect of the image that I really appreciate being able to adjust in RAW is the sky. I can prevent blown-out highlights with the clouds and bring back some blue in the midtowns.That's far more difficult, if not impossible, with a JPEG version.

If you use iCloud with Photos, then the finished RAW file will be available on all of your Apple devices, including the iPhone that originally captured it. It's a good workflow for those times that you don't have one of your other cameras with you.

How to Watch Photos for macOS Catalina and iPadOS

Learn everything you need to know about Photos for the Mac and iPad by checking out my latest course on LinkedIn Learning and on lynda.com. This course is perfect for Mac and iPad based photographers who shoot with iPhone, Mirrorless, and DSLR cameras. It covers both photography and movies. And if I say so myself, it's a lot of fun.

You can share your thoughts at the TDS Facebook page, where I'll post this story for discussion.

This is The Digital Story Podcast #768, Dec. 8, 2020. Today's theme is "Document What You Do." I'm Derrick Story.

Opening Monologue

One of the best ways to put our photography skills to work is for documenting projects. Home improvement, car restoration, or simply cleaning out the garage are great examples of this endeavor. Today I'm going to discuss my documentation of a 1976 Lafayette LR-2200 stereo receiver that I restored. It was a terrific project, and I have the images to prove it. I hope you enjoy the show.

Document What You Do

I became interested in Lafayette Radio Electronics when I saw a few of their stereo receivers for sale on eBay. I was initially attracted to their design, but as I read up on them, many liked their warm sound as well.

Lafayette LR-2200 Vintage Stereo Receiver and Amp

Lafayette Electronics had retail stores, mostly in the New York/New Jersey area, but they were more widely known for their mail order catalog business. Their primary customer base was enthusiast radio operators and electronics hobbyists.

Their business began in 1931 and over the years their major competitors were Radio Shack and Heath Kit. In the 60s and 70s you would see Lafayette ads in Popular Electronics and Stereo Review, among other publications.

You could find just about anything you wanted, electronics-wise, in their 400 page catalog. I have a couple of them, and they are amazing. The pages were filled with tape recorders, microphones, stereo systems, CB radios and lots more.

The LR-2200 that I purchased sold for $299 with walnut-finished wood case. It featured 27 watts per channel, dual tuning meters, source selector switch for Phono, FM, FM Mute, MPX FIL. AM and Aux. And then advanced features such as low-noise transistors and phase-lock loop stereo FM circuit for improved separation and low distortion. Plus, it looked great.

I found a working unit on eBay for $45. One channel was working, which I guessed was just a fuse problem. It needed love. But by looking at the pictures, I figured that I could restore it to its once handsome self.

The receiver arrived in a large Huggies diapers box that was split on two sides with styrofoam popcorn leaking out. When I saw it in this disheveled state, my guess was that the driver could not get this mess off his truck fast enough.

After I unpacked it and discarded the shipping materials, I examined the stereo itself. Banged and battered, there was still hope. I was right about it needing a new fuse. It lit up! It was time to breath life in this old boy.

I pulled out my Fujifilm X100V and decided to document this project. It really doesn't add to much time to the work, and it is so worth it in the end.

Whether you're cleaning your garage or remodeling the kitchen, one of the best parts is being able to stand back and admire your work once it's finished. But a close second is being able to see the steps that got you there. And that's what documenting is about.

Lafayette LR-2200 Vintage Stereo Receiver and Amp

Lafayette LR-2200 Vintage Stereo Receiver and Amp

Lafayette LR-2200 Vintage Stereo Receiver and Amp

Here are five tips to keep in mind for your next project.

  • Work Area Aesthetics - In addition to the job itself, consider the work area lighting, backgrounds, etc. I have a white counter next to a north-facing window that's perfect for documenting the work on my projects.
  • Make Each Shot Interesting - This is where our skills as photographers come to play. We don't want to just record history here. We want to do so artistically making each image as interesting as possible.
  • Use Your Electronic Levels - They are very helpful for keeping things squared up and will save you time in post.
  • Pay Particular Attention to the Hero Shots at the End - The steps along the way are indeed chapters of your story. But the ending is the real payoff. So make extra time for the finished shots.
  • Watch Out for Geotagging with Smartphones - If you're going to share your images online, make sure that no location data is included. You probably don't want strangers knowing where your nice clean garage is located with all those expensive tools.

Lafayette ran into major financial difficulty when the Federal Communications Commission expanded a new citizens band radio spectrum to 40 channels in 1977. Lafayette's buyers had firm commitments to accept delivery of thousands of older design units capable of only 23 channels, and were not able to liquidate the inventory without taking a serious loss. Eventually, all of the old CB radios were sold for under $40

In 1981, Lafayette Radio entered Chapter 11 bankruptcy. Several Lafayette stores were purchased by Circuit City of Richmond, Virginia. Of the 150 stores that Lafayette had once owned, eight stores remained when Circuit City took over.

Lafayette-LR2200-Front.jpg

With my restored LR-2200 stereo receiver, I have a little bit of Lafayette history. I love the way the tuner and meters light up. It sounds fantastic. This was a good project.

The Essential Steps to Impressive Video Conferencing

If you want to learn more about looking and sounding great for your next online interaction, then I think you'll very much enjoy my online workshop, The Essential Steps to Impressive Video Conferencing.

This 1-hour deep dive focuses on the three major areas of successful online interaction: Audio, Video, and Environment. During the course, I walk you through a variety of techniques that range from using gear that you already have, to improving your chops through a few inexpensive purchases.

The course is available on our Nimble Photographer Workshop Page for $14.95.

I have tons of great tips and techniques waiting for you there. If you want to get serious about how you appear during online meetings, classes, interviews, and family interactions, then you definitely will want to watch this course.

How to Capture Excellent Landscape Images Despite Bright, Clear Skies

You can read the entire article here on Petapixel.

Successful landscape photographers usually mix interesting skies and compelling foregrounds. But what if the sky is totally clear and the sun is harsh and unflattering? In this 13-minute video, Michael Shainblum shows how he makes the best of this kind of situation.

There are few more deflating feelings for a landscape photographer than arriving at what is normally a great photo location only to be met with completely clear skies. In Shainblum's case, not only were there no clouds but also a pervasive wind that prevented him from even flying his drone. Rather than just call it a skunked day, he explains how he made the most of the situation by focusing on detail-oriented images made with a telephoto lens.

Shainblum shows how he finds natural formations that draw his eye based on the textures and available lighting. While the idea of photographing rocks isn't particularly glamorous, what Shainblum manages to make out of what would normally be seen as a boring, bad photography situation is impressive.

Updates and Such

Inner Circle Members: A big thanks to those who support our podcast and our efforts!

Affiliate Links - The links to some products in this podcast contain an affiliate code that credits The Digital Story for any purchases made from B&H Photo and Amazon via that click-through. Depending on the purchase, we may receive some financial compensation.

And finally, be sure to visit our friends at Red River Paper for all of your inkjet supply needs.

See you next week!

Product Links and Comments

There are product links in this article that contain affiliate tags. In some cases, depending on the product, The Digital Story may receive compensation if you purchase a product via one of those links. There is no additional cost to you.

You can share your thoughts at the TDS Facebook page, where I'll post this story for discussion.

Curated Gift Guide for Photographers

Artists aren't always the easiest people to shop for. It's not like you can get them a beret and call it a day. And photographers can be even tougher.

Fortunately I have a curated gift guide that's sure to have at least one item that will deliver a smile that will last the entire year. Take a peek and see what you think.

The OWC USB-C Travel Dock $49 is a handy accessory for laptop-toting creatives and well-suited for desktop use as well.

owc-travel-dock.jpg

With its tuck-away USB-C cable, it adds two USB 3.1 Gen 1 (Standard-A) ports, USB-C auxiliary power port (up to 100W), SD card reader (UHS-II), HDMI 2.0 port - all in a brick-sized form factor that's about the size of of a MacBook power adapter. It also includes a nifty piece of software (downloadable) called the Dock Ejector (Mac/Windows) that enables you to eject all connected drives at once.

Lens-Duo.jpg

  • Think Tank Photo Lens Case Duo 15 (Green) $19 ($8 savings) And the Think Tank Photo Lens Case Duo 30 (Green) $20 ($8 savings)- Keep your lens protected while maintaining access with the green Lens Case Duo 15 or 30 from Think Tank. With multiple carrying options like a grab handle and belt loop, this case adapts to your carrying equipment. Its water-resistant nylon exterior keeps moisture away from your sensitive lens. Two zippered openings allow for quick access to your equipment. Additionally, stretchy front pockets can hold a variety of accessories like lens caps and memory cards. 6.7" Interior height.
  • Kingston DataTraveler Duo ($9.99) - I can't be the only guy who has a USB-C laptop and a USB-A desktop. The world of technology is always in transition, and the different USB connectors are one of the more aggravating side effects. Fortunately, Kingston is helping out with their Kingston DataTraveler Duo ($9.99), and I couldn't be happier. One flash drive that works with all of my computers.
  • LED-Panel.jpg

  • PL-190R Photography LED Light 5000mah on-Camera Video Light, 2500K-8500K RGB Full Color Fill Light $59 - PL-190R Photography LED Light 5000mah on-Camera Video Light, 2500K-8500K RGB Full color Fill Light Features: 5000mAh, Extra-large capacity battery gorgeous sufficient charge. Small and exquisite, easy to carry. 12 ounces. 6"x4".
  • Lowepro Photo Hatchback Series BP 250 AW II Backpack (Midnight Blue/Gray) $99 - Designed to hold a DSLR with attached lens, two extra lenses, related accessories, and personal gear. On the front of the pack is a zippered storage area for personal items, accessory pockets, key fob, and a CradleFit pocket for your tablet. Camera equipment is stored inside the removable, padded insert, which is accessed through the back of the pack. Padded, touch-fastening dividers are helpful for organizing gear to your liking. A versatile pack, the insert seals at the top and features two carry handles for storing separately when converting the pack to general usage.
  • Rode-Mic.jpg

  • Rode VideoMicro Compact On-Camera Microphone with Rycote Lyre Shock Mount $59 - The VideoMicro is a compact microphone designed to improve the audio quality of your videos. It incorporates a high-quality cardioid condenser microphone capsule for great quality audio recordings when used with a wide range of cameras. A directional microphone, the VideoMicro reduces distracting peripheral sounds and focusses on the audio in front of the camera. Its pickup is more forgiving than RØDE's other on-camera microphones providing a more natural sound when recording indoors. Perfect for capturing incredible audio to accompany inspiring vision. The microphone body is made from aluminum, giving it a high level of RF rejection, and is finished in RØDE's high-grade ceramic anti-glare black coating. Included with the VideoMicro is a camera shoe mount featuring a Rycote Lyre shock mount. No Battery Required. 3.5mm mini-jack.

  • Ruggard Electronic Dry Cabinet (30L) $149 - The cabinet's fast-acting TE Cooling Wafer regulates the interior's relative humidity from 60 to 35% to help prevent fungus and corrosion that can damage your gear. Humidity adjustments take place over a 1- to 3-hour period.
    The cabinet features a keyed door with a plastic front handle built into the gasket-sealed glass door. A large, dimmable LCD displays ambient temperature (in Fahrenheit or Celsius), relative humidity, and other settings. Interior LED lights make viewing and finding gear easier. Both the base and the adjustable plastic shelf are padded to help guard against scratches, and the shelf's padding is contoured to accommodate lenses.
  • Panasonic-14mm.jpg

  • Panasonic LUMIX G 14mm f/2.5 ASPH II Lens $197 ($100 savings) - Assuming a truly thin profile of just 0.8"-thick, the Panasonic LUMIX G 14mm f/2.5 ASPH II Lens is a sleek wide-angle prime designed for Micro Four Thirds system cameras. Offering a 28mm-equivalent focal length, this lens takes on a wider-than-normal perspective to benefit its use in a broad variety of shooting situations. A stepping motor provides quick, quiet autofocus performance that is beneficial to both movie and still recording and an inner focusing system maintains the overall lens length during operation for greater responsiveness. This compact and versatile lens is an ideal option for everyday use.
  • Rokinon 12mm f/2.0 NCS CS Lens for Micro Four Thirds $249 ($150 savings) - Providing a 24mm effective focal length and a broad 83° angle of view, this lens is perfect to working in low-light conditions.
    Three extra-low dispersion elements and two aspherical elements have been incorporated into the optical design to minimize chromatic aberrations and distortion in order to produce sharper images. Additionally, a Nano Coating System (NCS) has been applied to the lens elements in order to reduce surface reflections and prevent lens flare and ghosting for improved light transmission and more contrast-rich imagery
  • Olympus-TG6.jpg

  • Olympus Tough TG-6 Waterproof $349 ($100 savings) - You live for the outdoors. Hiking steep mountain trails. Backpacking through a desert Canyon. Skiing in the wilderness. The tough tg-6 is ready for adventure. It's built to endure all the extreme environments you love exploring. You can drop it. Step on it. Go deep underwater or out into a freezing blizzard. It just keeps on shooting awesome stills and video. Packed with pro features, you'll nail difficult shots -- even in low light. Shoot intricately detailed macro photos and unique shots underwater with vivid color. The lightweight, compact tough tg-6. Engineered to survive the world's toughest places.

The Film Camera Shop features 35mm film cameras, lenses, accessories, and even an eBook on getting started with analog photography. Free shipping on items over $35 via USPS Priority Mail. All items refurbished and tested by Derrick Story.

film-camera-shjop.jpg

Stay safe, be creative, and have a thankful holiday season.

Product Links and Comments

There are product links in this article that contain affiliate tags. In some cases, depending on the product, The Digital Story may receive compensation if you purchase a product via one of those links. There is no additional cost to you.

You can share your thoughts at the TDS Facebook page, where I'll post this story for discussion.

The Quest for Neon

Neon signs definitely light up any urban night scene. The crazy colors, radiant glow, and sometimes bazaar designs are "found treasure" when roaming the streets.

The Kiss
New York City - Olympus E-P1 with Olympus 17mm f/2.8 lens.

New-Orleans-Neon.jpeg New Orleans - Olympus PEN-F with Panasonic 20mm lens.

Since neons have wonderful luminosity, you don't need any special gear. Just a relatively fast prime lens and an thirst for color.

Untitled South Beach, Miami - Olympus OM-D E-M10 with Olympus 17mm f/1.8 lens.

San-Francisco-Neon.jpeg San Francisco - Olympus OM-D E-M5 Mark II with Olympus 14-42mm EZ zoom.

One tip that I want to share is to photograph neons during the day as well, then return at dusk. Many of the signs are interesting even when not lit up.

IMG_3389.jpeg Las Vegas - Olympus OM-D E-M10 with Olympus 17mm f/1.8 lens.

Filmore-Neon.jpg Filmore, CA - Fujifilm X100V. All Photos by Derrick Story.

Once you begin your neon quest, you'll discover that they are more abundant than you may have initially thought. And even when everything else goes wrong on a night shoot, these images will make it all worth while.

You can share your thoughts at the TDS Facebook page, where I'll post this story for discussion.

This is The Digital Story Podcast #767, Dec. 1, 2020. Today's theme is "5 Great Printing Projects for Creative Photographers." I'm Derrick Story.

Opening Monologue

What a lot of photographers don't realize is that they've already done half the work toward completing a satisfying print project. What I'm going to suggest to you today are 5 options to finish them off. And believe me, you will be tempted by at least one of these (and probably more). I hope you enjoy the show.

5 Great Printing Projects for Creative Photographers

Today, you'll really want to visit the show notes because I have a link to a free eBook titled, Creative Printing. This 32-page guide includes the item numbers and specific paper stocks for the projects I discuss, plus include links to other helpful items. You can view it on a Mac, iPhone, or iPad running the free Books app.

As for the projects themselves, there are some good ones. Let's get started.

print-project.jpg

  • Framed Instagram Prints- Many photographers choose Instagram as a primary platform for sharing their images. And rightly so. Its toolbox of filters and adjustments are the perfect creative complement for smartphone snap-shooters. But what some photographers don't realize is that their images can have far more creative impact than what's displayed on their mobile devices. I didn't realize this myself until I started making prints from my Instagram captures. And my guess is that you will feel the same way.
    Share the IG picture to your computer (I use AirDrop), print 4x6, get an 8"x8" square frame with a 3.5"x3.5" opening, and mount.
  • Postcards from the Edge, People love to receive postcards. And with just your iPhone and a printer, you can easily create your own unique mailable art that will blow the doors off mass market souvenir shop rivals. There are two standard postcard sizes: 4"x6" and 5"x7". Fortunately, those are also common dimensions for printing paper. But this is the part you might not know - you can affordably purchase heavy card stock that allows for image printing on one side and graphics on the other. Load these blanks into your printer and marvel at what shoots out minutes later.
    In the eBook I have all of the paper stocks that I recommend. And here are the back templates for a 5"x7" size and for the 4"x6" size. My favorite stock is RRP 88lb. Polar Matte Card Stock 5x7 60 Sheets - Item Number: 1732.
  • Passport Photos at Home - "You can save yourself both time and money by creating your own passport photos at home. And they are legit!
    For this project, I used my iPhone, Canon wireless printer, and a few sheets of Red River Paper 4"x6" glossy stock. And with these simple tools, I have a set of passport photos in 20 minutes. (It takes longer than that to drive to the local drugstore.)
    Step one is to download the Biometric Passport Photo app for the iPhone. The download is free, but you'll have to pony up $1.99 to unlock the different print output sizes, including the 4"x6" dimensions that we're going to use.
  • Square Greeting Cards - "What's more impressive than showing off the latest Instagram shot on your iPhone? How about creating a square fine art greeting card directly from your mobile device? By using this Pages template that I've designed, you can do just that.
    Square greeting cards are always attention getters. We're so accustomed to the standard rectangular card format, that when someone hands us a square envelope, we think, "Hmmm, this is cool. I wonder what's inside?"
    In this case, it can be one of your Instagram shots brought to artistic life on fine art paper. And the best part is, you can create this card on your iPhone and send it directly to the printer. Once again, no computer required.
    I recommend Red River's 60lb. Polar Matte Greeting Card stock, 5.25" x 10.5" (Item #1892) and a box of 5.25"x5.25" square white envelopes (Item #7170). Polar Matte is one of my favorite printing surfaces. And you can download my Square Card Template.
  • Printing a Panorama Card - You don't have to shoot a panorama to make a panorama card. Just about any shot will work. And you'll be amazed at how different it looks in this printed format. Think of it as your own wide screen theater.
    Panorama cards bring your big scenes to life. Instead of being boxed-in on your mobile device, they are set free in full 9" wide glory. And if all of that wasn't good enough, you can use everyday #10 envelopes to send them in.
    Just like the other projects in this eBook, all the work can be done with your iPhone and a wireless printer. And just like most of these projects, we'll once again fool the printer into outputting something that isn't in its normal menu of choices.
    For this work of art, we're going to use Red River's 8"x9" Greeting Card, 60lb Premium Matte Plus (#1083).

Final Thought (from the book)

Recently, I celebrated a birthday with friends and family. We had a BBQ, music, and refreshments. A few gifts found they way to the event as well.

The next day, I wanted to thank everyone who had brought presents. So I pulled out my iPhone, found a party picture that I liked, turned on my Canon printer, and created a small stack of 5.25"x5.25" fine art square cards.

I produced them all in about 10 minutes, using the template from Chapter 5. It actually took me longer to address them than it did to print.

I'm sharing this story because it's a real life example of why I love being a photographer who prints. I could have sent a thank you email to everyone - sometimes I do. But for this occasion, I wanted to go the extra mile. And personalized greeting cards seemed like the right move. I would have loved to be there when each person opened theirs.

One Degree of Separation and the Appeal of Mirrorless Cameras

Derrick reads his latest post soon to be published on Medium.com

The New Donation Kit for Carefree Shipping of Found Film Cameras

We have more time around the house than ever. And you finally dove into that bedroom closet that's been begging for some organization.

If you found a film camera that you're no longer using, our new Donation Kit makes it easy to pack and ship. Just visit the Contact Form on thenimblephotographer.com, click the box next to Donating a Film Camera, and let me know what you have. In your note, be sure to include your shipping address.

If it's a camera we can use for the shop, I'll send you a Donation Kit that includes a USPS Priority Mail shipping box and prepaid label. All you have to do is tape it up, insert the camera, and add the label. USPS will pick up your shipment from the front door of your house during their regular mail delivery. It's that simple!

Your donation help get analog gear in the hands of aspiring fine art photographers, and the proceeds help support this podcast.

Updates and Such

The Ultimate B&W Photography Workshop Second Session Sold Out

The first session sold out in two days. So I've added a second session of the The Ultimate B&W Photography Workshop begins with its first assignment and check-in on Dec. 22 and builds to our class presentation on Saturday Jan. 16, 2021. It is now sold out as well.

I've created a new space called DerrickStoryOnline to support our virtual and physical workshops. Those who signed up for the Eastern Sierra event will have permanent access to this growing community.

Inner Circle Members: A big thanks to those who support our podcast and our efforts!

Affiliate Links - The links to some products in this podcast contain an affiliate code that credits The Digital Story for any purchases made from B&H Photo and Amazon via that click-through. Depending on the purchase, we may receive some financial compensation.

And finally, be sure to visit our friends at Red River Paper for all of your inkjet supply needs.

See you next week!

Product Links and Comments

There are product links in this article that contain affiliate tags. In some cases, depending on the product, The Digital Story may receive compensation if you purchase a product via one of those links. There is no additional cost to you.

You can share your thoughts at the TDS Facebook page, where I'll post this story for discussion.

This is The Digital Story Podcast #766, Nov. 24, 2020. Today's theme is "The Anti-Black-Friday Gift Guide for Photographers." I'm Derrick Story.

Opening Monologue

Over the next several days, you're going to hear the BF term many, many times - even after the actual day has passed. The truth of the matter is that you will be able to get decent deals on just about anything you set your sights on, so let's focus on quality gear with lots of appeal. I hope you enjoy these gift ideas.

The Anti-Black-Friday Gift Guide for Photographers

Lens-Duo.jpg

  • Think Tank Photo Lens Case Duo 15 (Green) $19 ($8 savings) And the Think Tank Photo Lens Case Duo 30 (Green) $20 ($8 savings)- Keep your lens protected while maintaining access with the green Lens Case Duo 15 or 30 from Think Tank. With multiple carrying options like a grab handle and belt loop, this case adapts to your carrying equipment. Its water-resistant nylon exterior keeps moisture away from your sensitive lens. Two zippered openings allow for quick access to your equipment. Additionally, stretchy front pockets can hold a variety of accessories like lens caps and memory cards. 6.7" Interior height.
  • Kingston DataTraveler Duo ($9.99) - I can't be the only guy who has a USB-C laptop and a USB-A desktop. The world of technology is always in transition, and the different USB connectors are one of the more aggravating side effects. Fortunately, Kingston is helping out with their Kingston DataTraveler Duo ($9.99), and I couldn't be happier. One flash drive that works with all of my computers.
  • LED-Panel.jpg

  • PL-190R Photography LED Light 5000mah on-Camera Video Light, 2500K-8500K RGB Full Color Fill Light $49 - PL-190R Photography LED Light 5000mah on-Camera Video Light, 2500K-8500K RGB Full color Fill Light Features: 5000mAh, Extra-large capacity battery gorgeous sufficient charge. Small and exquisite, easy to carry. 12 ounces. 6"x4".
  • Lowepro Photo Hatchback Series BP 250 AW II Backpack (Midnight Blue/Gray) $56 ($56 savings) - Designed to hold a DSLR with attached lens, two extra lenses, related accessories, and personal gear. On the front of the pack is a zippered storage area for personal items, accessory pockets, key fob, and a CradleFit pocket for your tablet. Camera equipment is stored inside the removable, padded insert, which is accessed through the back of the pack. Padded, touch-fastening dividers are helpful for organizing gear to your liking. A versatile pack, the insert seals at the top and features two carry handles for storing separately when converting the pack to general usage.
  • Rode-Mic.jpg

  • Rode VideoMicro Compact On-Camera Microphone with Rycote Lyre Shock Mount $59 - The VideoMicro is a compact microphone designed to improve the audio quality of your videos. It incorporates a high-quality cardioid condenser microphone capsule for great quality audio recordings when used with a wide range of cameras. A directional microphone, the VideoMicro reduces distracting peripheral sounds and focusses on the audio in front of the camera. Its pickup is more forgiving than RØDE's other on-camera microphones providing a more natural sound when recording indoors. Perfect for capturing incredible audio to accompany inspiring vision. The microphone body is made from aluminum, giving it a high level of RF rejection, and is finished in RØDE's high-grade ceramic anti-glare black coating. Included with the VideoMicro is a camera shoe mount featuring a Rycote Lyre shock mount. No Battery Required. 3.5mm mini-jack.

  • Ruggard Electronic Dry Cabinet (30L) $119 ($30 savings) - The cabinet's fast-acting TE Cooling Wafer regulates the interior's relative humidity from 60 to 35% to help prevent fungus and corrosion that can damage your gear. Humidity adjustments take place over a 1- to 3-hour period.
    The cabinet features a keyed door with a plastic front handle built into the gasket-sealed glass door. A large, dimmable LCD displays ambient temperature (in Fahrenheit or Celsius), relative humidity, and other settings. Interior LED lights make viewing and finding gear easier. Both the base and the adjustable plastic shelf are padded to help guard against scratches, and the shelf's padding is contoured to accommodate lenses.
  • Panasonic-14mm.jpg

  • Panasonic LUMIX G 14mm f/2.5 ASPH II Lens $197 ($100 savings) - Assuming a truly thin profile of just 0.8"-thick, the Panasonic LUMIX G 14mm f/2.5 ASPH II Lens is a sleek wide-angle prime designed for Micro Four Thirds system cameras. Offering a 28mm-equivalent focal length, this lens takes on a wider-than-normal perspective to benefit its use in a broad variety of shooting situations. A stepping motor provides quick, quiet autofocus performance that is beneficial to both movie and still recording and an inner focusing system maintains the overall lens length during operation for greater responsiveness. This compact and versatile lens is an ideal option for everyday use.
  • Rokinon 12mm f/2.0 NCS CS Lens for Micro Four Thirds $249 ($150 savings) - Providing a 24mm effective focal length and a broad 83° angle of view, this lens is perfect to working in low-light conditions.
    Three extra-low dispersion elements and two aspherical elements have been incorporated into the optical design to minimize chromatic aberrations and distortion in order to produce sharper images. Additionally, a Nano Coating System (NCS) has been applied to the lens elements in order to reduce surface reflections and prevent lens flare and ghosting for improved light transmission and more contrast-rich imagery
  • Olympus-TG6.jpg

  • Olympus Tough TG-6 Waterproof $349 ($100 savings) - You live for the outdoors. Hiking steep mountain trails. Backpacking through a desert Canyon. Skiing in the wilderness. The tough tg-6 is ready for adventure. It's built to endure all the extreme environments you love exploring. You can drop it. Step on it. Go deep underwater or out into a freezing blizzard. It just keeps on shooting awesome stills and video. Packed with pro features, you'll nail difficult shots -- even in low light. Shoot intricately detailed macro photos and unique shots underwater with vivid color. The lightweight, compact tough tg-6. Engineered to survive the world's toughest places.

Kodak to Release '70s-Inspired Metal Film Cases in Six Colors

You can read the entire article here on PetaPixel.

Kodak-canister.jpg

A new product bearing the Kodak name seems to ask, "If you're shooting film, why not immerse yourself in the experience?" The company is releasing metal film canisters commonly used in the 1970s brand new for 2020. Groovy.

Retopro is a brand licensee of Eastman Kodak Company and has emblazoned the iconic photography brand's logo on metal canisters designed to hold film rolls. The body is made of aluminum and the cap is made of steel, a design popular in the 1970s before the industry made the switch to plastic.

"We are inspired by the selection of materials and colours, and wish to recreate a new version of the Kodak Film Case, only to make it even more practical and stylish," the company writes.

You can order now for $25 each.

The New Donation Kit for Carefree Shipping of Found Film Cameras

We have more time around the house than ever. And you finally dove into that bedroom closet that's been begging for some organization.

If you found a film camera that you're no longer using, our new Donation Kit makes it easy to pack and ship. Just visit the Contact Form on thenimblephotographer.com, click the box next to Donating a Film Camera, and let me know what you have. In your note, be sure to include your shipping address.

If it's a camera we can use for the shop, I'll send you a Donation Kit that includes a USPS Priority Mail shipping box and prepaid label. All you have to do is tape it up, insert the camera, and add the label. USPS will pick up your shipment from the front door of your house during their regular mail delivery. It's that simple!

Your donation help get analog gear in the hands of aspiring fine art photographers, and the proceeds help support this podcast.

Updates and Such

The Ultimate B&W Photography Workshop Now Has a Second Session

The first session sold out in two days. So I've added a second session of the The Ultimate B&W Photography Workshop begins with its first assignment and check-in on Dec. 22 and builds to our class presentation on Saturday Jan. 16, 2021. We currently have 2 seats open for the second session.

I've created a new space called DerrickStoryOnline to support our virtual and physical workshops. Those who signed up for the Eastern Sierra event will have permanent access to this growing community.

Inner Circle Members: A big thanks to those who support our podcast and our efforts!

Affiliate Links - The links to some products in this podcast contain an affiliate code that credits The Digital Story for any purchases made from B&H Photo and Amazon via that click-through. Depending on the purchase, we may receive some financial compensation.

And finally, be sure to visit our friends at Red River Paper for all of your inkjet supply needs.

See you next week!

Product Links and Comments

There are product links in this article that contain affiliate tags. In some cases, depending on the product, The Digital Story may receive compensation if you purchase a product via one of those links. There is no additional cost to you.

You can share your thoughts at the TDS Facebook page, where I'll post this story for discussion.