Recently in Photography

  Page 310 of 382 in Photography  

Fireworks

Pyromaniacs all across the States are gearing up for their favorite day: The 4th of July. Technically, it's an American holiday to celebrate independence from England. But we all know its true popularity stems from great BBQ and dazzling fireworks displays. If you want to capture your own fiery composition, here are a few tips.

Let's start with the basics: turn off your flash. Yes, you're going to be shooting in a dark environment, and if your camera is set to auto flash, it's going to fire. This is the last thing you want, so turn it off.

Next, break out the tripod. You're going to be using long exposures. Use a cable or remote release if you have one. If not, just gently press the shutter button with your finger.

Resist the urge to increase your ISO setting. Keep it at 100 to help reduce image noise. You'll also have to switch to manual exposure. Auto exposure will overexpose your dark skies turning them to mushy gray. Start with a manual setting of 3 seconds at F-5.6 or F-8, and see what you get. Adjust accordingly from there.

If your camera captures in Raw, you may want to consider it for this event. You'll have an easier time recovering blow-out highlights and controlling the shadow areas of the image.

Finally, use a wide angle lens so you can capture as much of the sky as possible. If you know the display is going to peak in a certain area, you can zoom in a bit. Remember, since you're shooting at the highest resolution possible, you can always crop your image later.

These tips will ensure that you come away from your 4th of July celebration with more than a tummy full of hot dogs and beer. Have a great time!


About the Photo
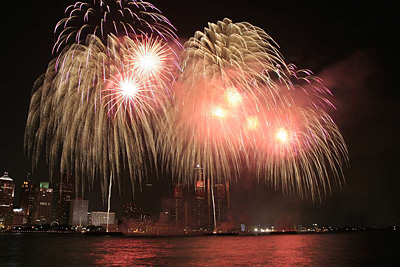
Brian C Davenport went to Windsor,Canada to shoot the Freedom Festival fireworks over the Detroit skyline. Here's how he got the shot.

"It was a very long day but the last 30 min was outstanding," said Brian. "Getting there early in the day gave us a front row seat, right on the shoreline to set up our tripods. I shot about 200 images during the day, and the fireworks shots came out really nice. It was a little tricky as this was a show where there were very few single bursts so there was alot of light in the air most of the time. I settled on 18mm, ISO 100, f8 and 3-5 sec exposure. These settings gave some definition to the bursts without too much "blow-out" of the highlights."

Technorati Tags: , ,

The Olympus E-P1 digital camera supports six Art Filters that allow you to apply effects in-camera. You have a choice of Pop Art, Soft Focus, Pale & Light Color, Light Tone, Grainy Film, and Pin Hole. You can apply the filters to both still images and video. To see how these work, just switch to "Art" on the top mode dial of the E-P1.

Even though you can apply these filters in shooting mode, I prefer to capture in Raw on the E-P1, then do my creative work later in playback mode. Any of the six filters can be applied at that time. The original, untouched Raw file remains in the camera, but you also get a full size 4032 x 3024 Jpeg with the effect. You can apply as many filers as you want to each master file. My personal favorite Art Filters are Pop Art, Soft Focus, Grainy Film, and Pin Hole.

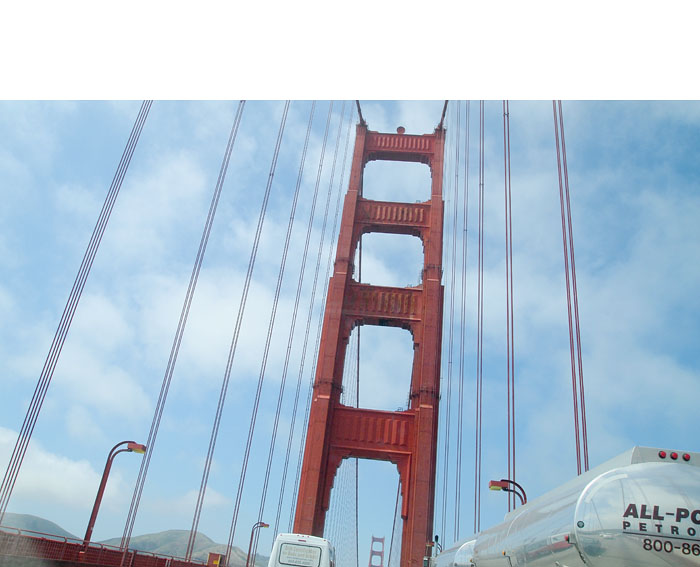
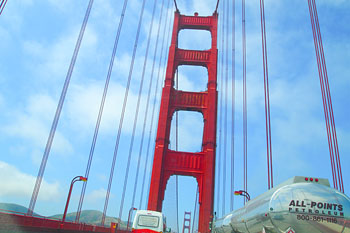
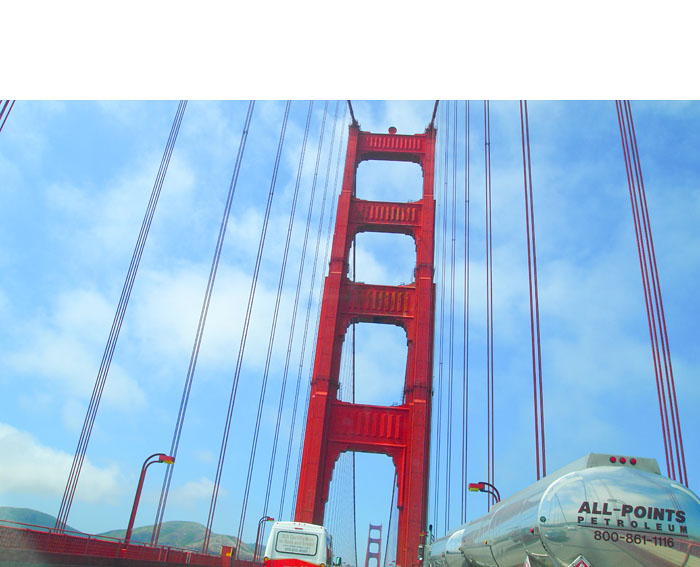
The top image was captured in Raw mode on the Olympus E-P1 (click on it to see larger view). Then later, I applied the Pop Art Art Filter in playback mode. It would have been difficult to capture with the Art Filter on since I was already shooting through a car window. Photo by Derrick Story. See more examples on my Flickr set titled Olympus E-P1 Art Filters.

Technique for Applying Art Filters in Playback Mode

  1. Turn on camera and switch mode dial to "Art".
  2. Choose the Art Filter you want to apply from the six options. Press the OK button.
  3. Go to Playback mode and navigate to the image you want to apply the filter to.
  4. Press the Menu button and navigate to the Playback settings, third category from the top.
  5. Select Edit from this menu.
  6. Click on SEL IMAGE.
  7. Press the OK button and choose RAW DATA EDIT.
  8. Click YES.

The E-P1 will process the image, and within a few seconds you're looking at a new version of the shot with the Art Filter applied. It might seem like a lot of steps to accomplish this when you read the list above, but it actually goes quite fast in practice. Plus, you have the benefit of retaining the Raw file, and working quickly during the shoot. Get the best shot you can on the spot, then get creative later in playback mode.

Of all of the Art Filters, I think Soft Focus is the most practical. It provides a nice amount of filtration without destroying the detail in the image. But I'm sure you'll have your own favorites. This is a great activity for on the plane after flying home from vacation. Just fire up the Olympus E-P1 and get creative. Then, when you get home, download the images to your computer and enjoy.

More Articles on the Olympus E-P1

If you're interested in the Olympus E-P1, check out my ISO Comparison post. I run at series of photos from the camera staring at ISO 100 all the way up to ISO 6400. I also have a podcast covering the features of the E-P1. I also have a First Look at the Olympus E-P1 article at Macworld Magazine. Another helpful tip is the Olympus E-P1 "Please Check the Status of Your Lens" Message.


twitter.jpg Follow me on Twitter

-


Create Artistic Pet Silhouettes from Your Photos

groomer_has_it_web_sm.jpg

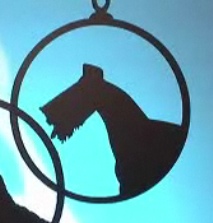
Sometimes you just don't know when you'll find inspiration for your next craft project. One of my favorite TV shows, Groomer Has It put a clever spin on the classic art form of black paper silhouettes. In many scenes, the interior walls were decorated with these cute pet profiles, so I was inspired to make one, too.

Take a frontal or profile picture of your pet. Print the image onto an 8.5" x 11" sheet of copy paper. Place your "photocopy" over a piece of black paper and staple the corners to secure the papers together. Use a sharp pair of scissors to cut around the details. Here's cutting a tip: if you move the paper and not the scissors, you'll get a cleaner edges on your silhouette.

When you're done trimming, adhere your cutout to a bright colored, patterned, or neutral background paper using a spray adhesive. Finally, frame Fluffy or Fido, and your artwork is complete!

Illustration from the Groomer Has It show on Animal Planet.

More Creative Output Projects

Be sure to visit our Creative Output studio for more great project ideas.

Hate ICC profiles? Confused by print dialog boxes? You can avoid these headaches and print without pain, if you're willing to give up a little flexibility. In this podcast I use the HP C6380 all-in-one printer as an example of pain-free printing. And of course, I add a few tips and tricks along the way.

Monthly Photo Assignment

Splash is the June 2009 Photo Assignment. You can capture anything from a child jumping in a pool to an olive dropping into a martini. You can read more about how to submit on our Submissions page. Deadline for entry is June 30, 2009 (but you have an extra day or so if you need it). The photo assignment for July is "Soft Background."

Listen to the Podcast

You can also download the podcast here (26 minutes). Or better yet, subscribe to the podcast in iTunes.

You also might be interested in my article, All-in-One Printer Torture Test: HP C6380 vs Kodak ESP 7 Review

Want to share photos and talk with other members in our virtual camera club? Check out our new Flickr Public Group. It's a blast!


twitter.jpg Follow me on Twitter

-


Podcast Sponsors

SiteGrinder lets you take ownership of your websites. Effortlessly output pages right from Photoshop.

Red River Paper -- Try the $7.99 Sample Kit.

Add Magic to Your Slideshows -- FotoMagico presentations are so amazing that your audience will be asking how you did it.


Technorati Tags: , , , , ,

DIY Copy Stand for iPhone 3GS

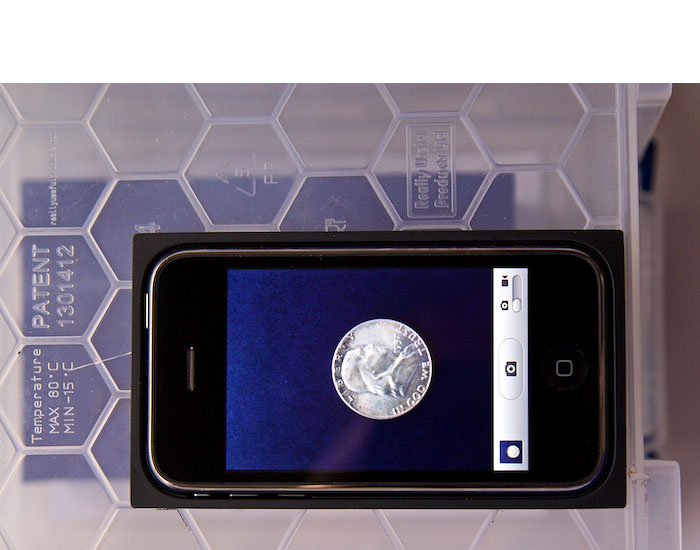
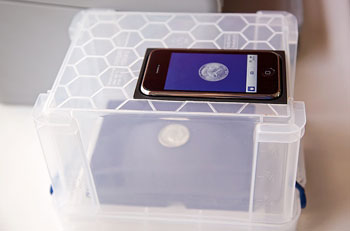
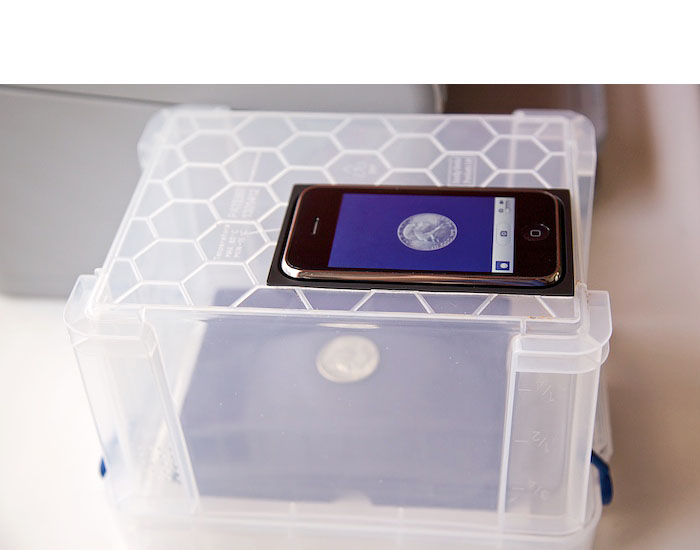
The camera in the iPhone 3GS has improved close-up capabilities, tap focus, and more resolution than previous models. You can use the 3GS to photograph small objects, business cards, even duplicate 4" x 6" prints. With this DIY copy stand that's easy to make, you can produce high quality images with just a couple taps on its screen.

If you've ever tried close-up work with the iPhone, you know you have two challenges. The first is holding the camera steady enough to avoid camera shake. The second is getting the plane of the camera parallel to the plane of the subject to avoid distortion. This little device helps with both, plus diffuses the light for a more flattering rendering.

I have step-by-step photos showing the key elements of this project on The Digital Story Flickr page. In short, it works like this. You remove the tray from the iPhone packaging, drill a hole in it for the lens to see through, cut an opening in the bottom of a translucent box to set the tray in, and you're done. It's really that simple. I recommend that you start with a box that's at least 6" tall. That will give you enough distance to copy 4" x 6" prints. You can use "risers" such a little boxes to photograph smaller items that need more magnification. Here's a short instructional video that provides a nice overview.

Please feel free to add your comments, improvements, or variations on this project. The iPhone 3GS is a handy little camera, and I want to squeeze every ounce of capability out of it.

More on the iPhone 3GS

iPhone 3GS Movie Making Basics - Video for All

"iPhone 3G S from Photographer's POV" - Digital Photography Podcast 180


twitter.jpg Follow me on Twitter

-


Rim lighting is an effecting approach for both portraits as well as inanimate objects. This May 09 Photo Assignment Gallery shows off some terrific examples of this technique.

The July 2009 assignment is "Soft Background." Start working on your contribution now. Details can be found on the Member Participation page. You can submit photo assignment pictures up to 600 pixels in the widest direction.

jim_stocking_may09.jpg

Please follow the instructions carefully for labeling the subject line of the email for your submission. It's easy to lose these in the pile of mail if not labeled correctly. For example, the subject line for next month's assignment should be: "Photo Assignment: June 2009." Also, if you can, please don't strip out the metadata. And feel free to add any IPTC data you wish (These fields in particular: Caption, Credit, Copyright, Byline), I use that for the caption info.

Photo by Jim Stocking.

Good luck with your July assignment, and congratulations to all of the fine contributors for May. It's a beautiful collection of images.


twitter.jpg Follow me on Twitter

-


Now Available! The Digital Photography Companion. The official guide for The Digital Story Virtual Camera Club.

  • 25 handy and informative tables for quick reference.
  • Metadata listings for every photo in the book
  • Dedicated chapter on making printing easy.
  • Photo management software guide.
  • Many, many inside tips gleaned from years of experience.
  • Comprehensive (214 pages), yet fits easily in camera bag.

Technorati Tags: , ,

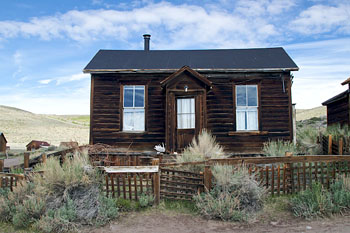
The Canon Digital Rebel T1i (500D) is proving to be an excellent field camera. In my first test, I roamed the streets of San Francisco with a Canon 70-200 mm f/4 L zoom. For my next adventure, I visited Bodie State Park off of Hwy. 395 in Northern California. Since CA may be closing most of its State Parks due to the budget crisis, I wanted to visit Bodie again for what I hope isn't a last look.

Setting Up the Canon T1i

This time, I mounted one of my favorite zooms on the T1i, the 24-105mm f/4 L IS. I used a rotating polarizer for most of the outdoor shots, that were captured early to mid morning. ISO was generally set to 200, which works great on the T1i and gives me a little more exposure latitude. Even though battery life is quite good on the T1i, I did use the BG-E5 Battery Grip ($114) for this trip. It allows me to load two LP-E5 batteries or 6 AA cells. I recommend going the LP-E5 route because it feels lighter in that configuration.

Handling

As I stated in the first test, this DSLR is great in the field. It feels good in the hands, is light on the shoulder, records excellent images, and I have my entire inventory of Canon lenses at my disposal. You can see a catalog of 12 images from this shoot by visiting the Canon T1i Visits Bodie State Park photo set on Flickr. All of the images were captured with the T1i and the 24-105mm zoom.

Video Recording

I've been recording video primarily in the 720p mode (1280 x 720) on the T1i. It's a nice fit for publishing HD on YouTube, plus I get the full 30 fps capture. One major difference with the T1i compared to movie making with the 5D Mark II, is that I don't have an external mic jack on the T1i. I get a lot of ambient sound in addition to the subject I'm recording. But the video itself is terrific. I highly recommend using an IS lens for video recording, or you'll be disappointed with the results.

Final Thoughts

I consider the Canon T1i capable of serious field work, especially when you want to travel light. I carried a small bag that had 3 lenses (18-55 mm IS, 24-105mm IS, and the 70-200 f/4), the T1i, battery grip, polarizer, and extra memory. The bag was light and I was able to capture everything I wanted, the way I wanted, using this rig.

There are two major pitfalls with the Canon T1i in the field that you should be aware of. First, this is not a weather proof camera and will not stand up to harsh elements the way the Canon pro models will. So you have to protect the body when things get stormy. Also, as I mentioned before, there isn't an external mic jack for video capture. So your audio options are pretty limited.

Speaking of video, be sure to have a large capacity Class 6 SDHC memory card. Personally, I like the Sandisk SDSDX3-008G-A31 8GB Extreme III SDHC card for $56. It's tough, fast, and dependable for field work. So, a couple cards like this, an extra battery, and a few light lenses, and you can handle just about any challenge in the field with this camera.


twitter.jpg Follow me on Twitter

-


Technorati Tags: , , , ,

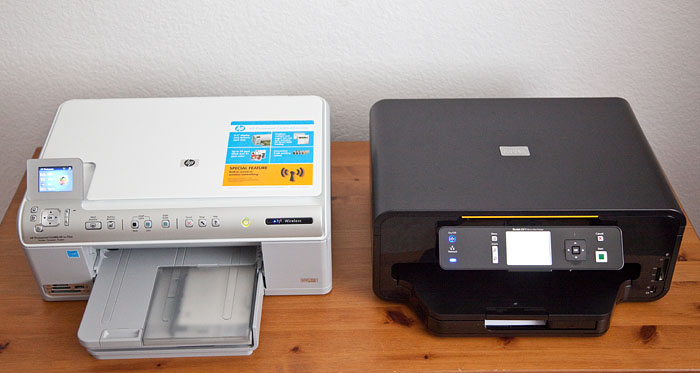
There was a time when photographers would no more consider buying a multifunctional printer than they would go on vacation with only a 64 MB memory card. But technology marches on, and today I have not one, but two "all-in-one" printers that tout excellent photo printing abilities. Behind door number one stands the HP C6380 All-in-One (left), and behind door number two challenges the Kodak ESP 7 All-in-One (right).

So who should consider an all-in-one for light office and photo output? I'd say amateur photographers who don't want to mess with ICC profiles (let the printer choose the settings), who don't need photos bigger than letter size, and who don't print more than 500 images a year. If you fall into that category, you should read on.

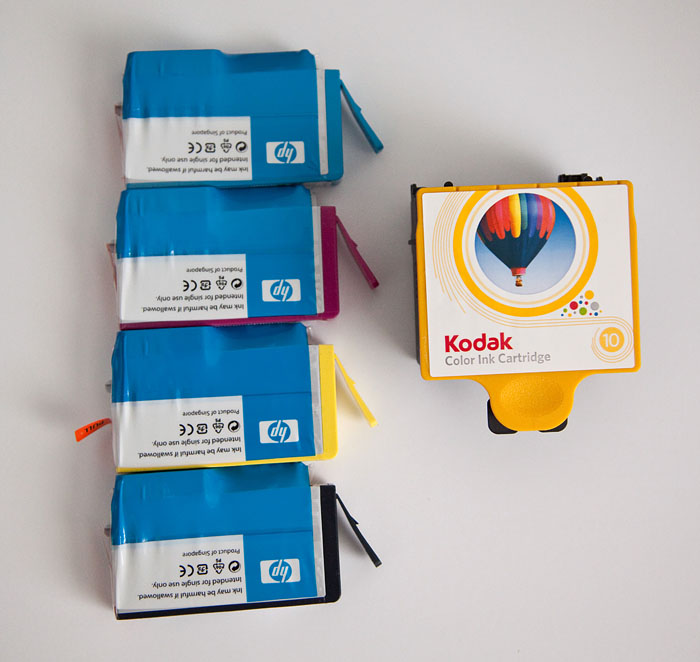
Both the HP and the Kodak are light to carry, have footprints that will fit on a dinner placemat, and provide printing, scanning, copying, and WiFi connectivity. Each printer has two paper trays: bottom for letter size output (plain paper or photo stock) and top for photo snapshots. Even though these printers are Mac and Windows friendly and come with good software, you can go for days without using a computer with them. That's because most functions can be controlled via their respective LCD panels, and they both accept USB Flash drives and standard camera memory cards. Once difference you'll notice is that the HP has four individual photo ink cartridges while the Kodak uses a single photo ink unit. (See the illustration above for a comparison; HP individual cartridges on the left.) Each retails for around $199 US, but until June 28th, the HP is on sale for $149.99 (via the HP web site.

Unpacking and setting up both printers is easy. I averaged 30 minutes for each, and that included connecting them to my WiFi network. Neither include USB cables, so if you don't go wireless, make sure you have a cable available. Both devices are handsome in their own way, enhanced by colorful LCDs that presented me with easy to understand menus. I never had a problem navigating either device. One thing you should note, however, is that both printers are fairly noisy, with the HP spending more time grinding its gears. I would say these are definitely office printers, with hopefully, no one trying to sleep in the same room.

There's been some talking back and forth between HP and Kodak about how much it costs to print with their machines. I'll address that, but it's just as important to me how they perform. So I've put together a small battery of torture tests to see if either printer is worthy of residing in the office of a the hobbyist photographer. I was careful to conduct the tests fairly, using the same originals and a stop watch for timing, with each unit set to "out of the box" automatic settings.

This review is geared toward photo enthusiasts who are considering an all-in-one printer for their home office. Since I happen to be an enthusiast myself, I devised tests that were interesting to me, providing information that I would want to know about costs, output performance, image quality, and paper durability. If you're not a photographer and these issues aren't as important to you, then you might want to check out other reviews of these devices.

Basic Office Skills

Since these are multifunctional machines, we should take a look at copying and scanning. Each device has a letter-sized scanner on top that can be used for black & white or color business copies. In the paper tray, I used Staples Inkjet Paper (letter size, 24 lb, 98 bright). Here's the first battery of tests. The times listed are how long each printer took to complete the task.

Black and White Copies (10 copies from original)

HP - 1:55.7 -- Kodak - 1:57.2. Both printers did a good job of producing clean B&W copies in reasonably fast time. Edge: This one's a tie.

Full Color Copies (5 copies from original)

HP - 3:03.9 -- Kodak - 2:37.3. The HP spent some time going through a printer preparation cycle before beginning job, but its quality was noticeably better on plain paper, especially in the reds and with detail reproduction. The Kodak was a bit faster, but print quality was acceptable at best. Reds lacked saturation and detail. Edge: HP 6380.

Scan Document and Save as Electronic File

HP - 00:27.9 -- Kodak - 00:50.3. The HP saves the scanned document as a Jpeg and wrote it to a USB Flash drive. I converted it to PDF using Preview on a Mac. I would have preferred to skip the conversion step and have the HP save to PDF. The Kodak, however, did not have the option to save to USB Flash drive, so I chose save to my Mac wirelessly. That didn't work. The Kodak constantly hung on the job. So I tried the other option of saving to memory card, and that worked like a champ. The output from the Kodak was also a Jpeg, and it had more saturated colors, but with some artifacts. The HP colors were more muted, and there were no artifacts. Plus, the HP saved the Jpeg file at 300 ppi to Kodak's 72 ppi. Edge: HP6380.

Basic Photo Printing Skills

Now, here's where it gets a bit more interesting for me. Two companies pitted against one another, both take a lot of pride in their photo printing.

Snapshot Reprint Test (4x6 color photo placed on scanner glass and reproduced to 4x6 color output - 1 print -- all settings were on automatic, no computer involved.) Note: I used HP ink and paper designed for the C6380 and Kodak ink and paper designed for the ESP 7. For more on that, see the "Dunking the Prints" section below.

HP - 1:13:4 -- Kodak - 1:15.9. HP print quality was excellent, color reproduction was near perfect, great contrast. The Kodak print displayed a moderate purple shift on blues, less contrast, average detail reproduction. Edge: HP C6380.

iPhoto Print Test 4 x 6 (iPhoto print job sent from calibrated Mac using WiFi -- all settings were on automatic, used manufacturers ink and paper.)

HP - 1:16.9 -- Kodak - 51.4. HP had better contrast, excellent color fidelity Kodak output had less contrast, slight color shift. Edge: Another Tie (HP gets slight nod for output quality; Kodak printed faster).

Letter Sized Output on Third Party Photo Paper (iPhoto print job sent from calibrated Mac using WiFi -- all settings were on automatic, used manufacturers ink and Red River Arctic Polar Luster paper.)

HP - 1:12.9 -- Kodak - 2:07:0. Both output had noticeable color shift and neither print was acceptable. Edge: neither.

Printing Torture Test

The final set of tests were the most demanding of them all. These were designed to see how output from these printers will hold up under adverse conditions. First, I started with the dunk test, where 4" x 6" prints were immersed in water for 10 minutes. Then I hung them off the edge of the counter for the droop test. And finally I let the prints air dry for the curl test.

Dunking the Prints

After making prints from the same file, I immersed them in water for 10 minutes. For the HP prints, I used the HP 564 Series Photo Value Pack-150 sht/4 x 6 in that lists for $34.99 US includes enough ink and paper to make 150 4" x 6" prints (which works out to a little over 23 cents a print). For the Kodak images I used the KODAK Premium Photo Value Pack that's selling for $19.99 US and provides ink and paper to make 135 4" x 6" prints (which works out to be about 15 cents a print).

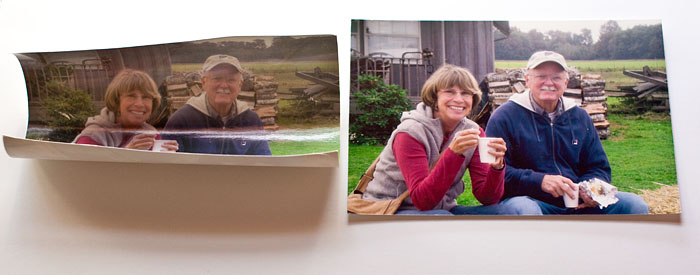
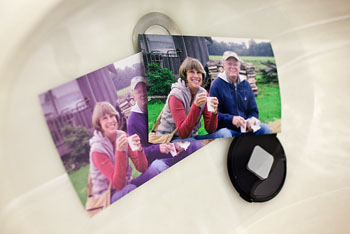
As you can see in the third illustration (Kodak print on the left, HP print on the right), the Kodak paper absorbed water and the the image colors shifted. Edge: HP C6380.

The Droop Test

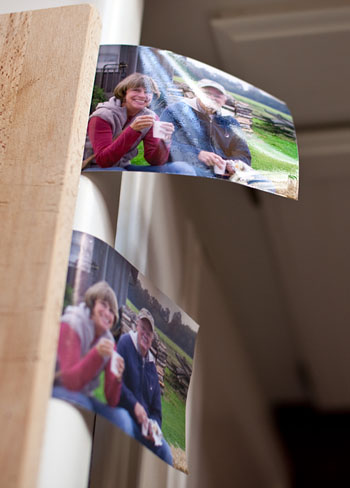
After the prints were soaked in water, I hung them off the edge of the counter. The Kodak print (on the bottom) drooped nearly all the way down to the side of the counter. The HP print (top) still had decent resistance to gravity. Edge: HP C6380.

The Curl Test

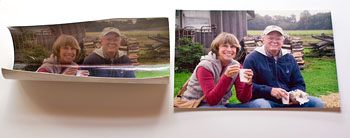
While the prints were still wet, I set them up in a dish rack to let them dry at room temperature. Once they were completely dry, I laid them out on a flat surface and photographed them. As you can see in the bottom illustration, the Kodak image (left) curled quite a bit compared to the HP image on the right. Edge: HP 6380

The "Kodak Advantage" vs HP's "Lab Quality"

On their web site, Kodak states "All KODAK Inkjet Photo Papers are porous. That means they dry instantly, so you can go from picture to print in seconds. Plus, our papers absorb inks faster, so your pictures won't smear or smudge." If I read this correctly then, the Kodak papers didn't fare well in my Dunk, Droop, and Curl tests by design. HP, on the other hand, likes to use the term, "lab quality" for their prints, and their materials have a very different feel, again by design.

The price difference per print is about 8 cents using these materials, with Kodak providing the cost savings. If you printed 300 4" x 6" snapshots a year (25 prints a month), then using these Kodak supplies, you would save $24 a year. If you upgraded your Kodak materials to the Ultra Premium Photo Paper, then your per print cost would go up to over 40 cents a print, and the cost savings then would be in HP's favor.

So it seems to me that when you compare Kodak and HP using these devices for primarily photo output, you get what you pay for. HP's prints do feel and look like prints from a traditional photo lab. They're very durable and will hold up well to handling. Kodak Premium paper costs less, and if you're not as picky about color fidelity and contrast, and don't mind a more porous paper, then you can save a few bucks using the KODAK Premium Photo Value Pack in the ESP 7.

The Final Word

When you compare the HP C6380 All-in-One to the Kodak ESP 7 All-in-One from a photography point of view, it really comes down to your priorities. Both units do what they're designed to do and look going doing it. But the photo output is quite different between them.

Personally, I lean toward the HP C6380 because I do like those lab quality prints. And at 23 cents each, they seem like a great value. Plus, the scanning unit in the C6380 produced cleaner images with fewer artifacts. And regardless of which printer you use, make sure you spend a little time learning all of its features. Both the C6380 and the ESP 7 include a lot of capability for the dollar.


twitter.jpg Follow me on Twitter

-


The new Creative Output section of The Digital Story was created to inspire photographers to find new ways to share their images with others. I sometimes refer to this process as, "going beyond the print."

I brought in a true expert in this field, Stephanie Scheetz, to oversee this endeavor. Stephanie has been a craft designer and instructor for major craft companies for more than 15 years. She has taught classes throughout the U.S. and Asia, and has appeared on TV craft shows and home shopping programs in the U.S. and U.K. Her work can be found in craft industry and consumer magazines, in addition to, catalogs, advertisements, and books. In addition to that, Stephanie is an engaging personality.

So she and I sat down in front of the microphone this week to talk about her views on Creative Output and to give you a preview of the types of projects she's working on. You'll come away from the show with great ideas, and hopefully get to know Stephanie a little better.

Monthly Photo Assignment

Splash is the June 2009 Photo Assignment. You can capture anything from a child jumping in a pool to an olive dropping into a martini. You can read more about how to submit on our Submissions page. Deadline for entry is June 30, 2009.

Listen to the Podcast

You can also download the podcast here (26 minutes). Or better yet, subscribe to the podcast in iTunes.

Other Creative Output Projects with Stephanie

Make a Custom Photo Gift Bag (Video Tutorial)

Buckle-Up Frame

A Time to Remember - Make Your Own Photo Clock

Packing Tape Transparencies

Want to share photos and talk with other members in our virtual camera club? Check out our new Flickr Public Group. It's a blast!


twitter.jpg Follow me on Twitter

-


Podcast Sponsors

SiteGrinder lets you take ownership of your websites. Effortlessly output pages right from Photoshop.

Red River Paper -- Try the $7.99 Sample Kit.

Add Magic to Your Slideshows -- FotoMagico presentations are so amazing that your audience will be asking how you did it.


Technorati Tags: , , , , ,

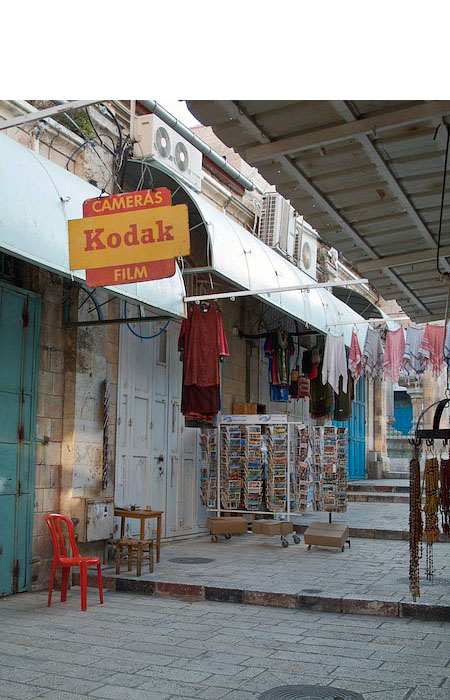
"Thought I'd submit this shot from Jerusalem's Old City," writes Roderick James. "The sign didn't look out of place in this old market, but seemed jarring in our digital world -- especially since I grabbed this image with my Canon G10."

Roderick set his G10 to ISO 80, 1/80th at f/3.2 for this trip down memory lane.

Photo by Roderick James. Click on image to zoom to larger size.

If you have a candid you'd like to share, take a look at our Submissions page, then send us your Grab Shot. We'll try to get it published for you on The Digital Story.

And you can view more images from our virtual camera club in the Member Photo Gallery.


twitter.jpg Follow me on Twitter

-

Technorati Tags: , , ,