Recently in Photography

  Page 315 of 382 in Photography  

iphone_web.jpg

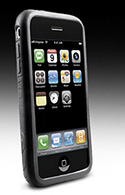
The planets appear to be aligning for the release of the third generation iPhone this summer. Of particular interest to our community are the rumors of a larger image sensor that supports up to 3.2 megapixel still captures, and the ability to record video.

If indeed we see these upgrades, then the iPhone stands to move forward as the "camera you always have with you." Combined with the already useful network connectivity and plethora of photography software via the App store, you could find yourself reaching for your smartphone first in picture taking situations. I predict we would see more candids and grab shots captured with an upgraded iPhone. We should know more this coming June.

iPhone App Reviews

Cropulater Brings Picture Cropping to the iPhone

Panorama 2.1 for the iPhone

FotoTimer Provides Self-Timer for the iPhone

HP iPrint App Makes Printing Easy from iPhone or iPod touch

True Photo App for iPhone: CameraBag

"Exposure" (Now "Darkslide") Puts Flickr on Your iPhone


twitter.jpg Follow me on Twitter

-


Now Available! The Digital Photography Companion. The official guide for The Digital Story Virtual Camera Club.

  • 25 handy and informative tables for quick reference.
  • Metadata listings for every photo in the book
  • Dedicated chapter on making printing easy.
  • Photo management software guide.
  • Many, many inside tips gleaned from years of experience.
  • Comprehensive (214 pages), yet fits easily in camera bag.

Technorati Tags: , , , ,

mike_owen.jpg

Terrific video by PhotoAnswers where Canon Product Manager Mike Owen discusses the new Canon T1i (500D). In short, the combination of attributes including affordable price, high resolution LCD, HD video recording, and high ISO -- all crammed into a compact package, make the Rebel T1i a tempting DSLR. You'll have even a harder time resisting after watching this video.


twitter.jpg Follow me on Twitter

-


Technorati Tags: , , ,

going_out_of_business.jpg

I was up on the second floor talking with a senior clerk in Housewares who had just found out she was going to lose her job. This was the first week of liquidation at the Gottschalks department store in Santa Rosa, Ca. She had worked for the company for more than 5 years.

"How are you doing?" I asked.

"Mostly, I'm just mad." she replied. "I just hate seeing this happen here. And I don't want to lose my job."

She said this as she kindly helped me with a small purchase during our conversation.

By way of background, I learned that: "Gottschalks, founded in Fresno in 1904, operated 58 department stores and three specialty stores, including locations in Santa Cruz and Watsonville. It had about 5,200 employees in California, Oregon, Washington, Alaska, Idaho and Nevada," wrote Tim Sheehan of The Fresno Bee. "Gottschalks filed for Chapter 11 bankruptcy in mid-January in hopes of either reorganizing its debt or finding a buyer." But unfortunately neither plan worked and they had to turn over their business to a liquidator.

The sequence for closing a large retail store this way is predictable, almost mathematical. First, the liquidator moves in and takes over the operation. Initially, they may actually raise the prices. For example, while I was in Gottschalks, I overheard one customer commenting, "I was here last week and this set of dishes was on sale for 40 percent off. Now they're only 20 percent discounted." This also happened with a Circuit City store closing (as reported by Ira Glass in This American Life). The liquidators raised prices at the beginning of the closing to get as much money as possible, then slowly deepened the discounts as inventory dwindled.

everything_must_go.jpg

Even though the signs outside tempt shoppers with savings up to 60 percent, they most likely won't see that level of discounting for weeks. Meanwhile, inside on the second floor in Housewares, I feel the eerie sensation of death. I know that soon everything I see here will be gone. Out of the corner of my eye I notice another clerk who had given me a great deal on a major purchase months back. I had this fleeting thought that maybe I had taken advantage of him, and now he was certain to lose his job.

"These are good people," blurted the woman who was helping me at the counter. "I've really enjoyed working for this company." She then carefully finished wrapping my purchase and wished me a good day. "Best of luck," I said, and took the escalator back down to the first floor, knowing this will be my last visit to Gottschalks of Santa Rosa.

Photos by Derrick Story with a Canon 5D Mark ll and a Canon 24-105mm f/4 lens. Images processed and converted to B&W in Aperture.


twitter.jpg Follow me on Twitter

-


Technorati Tags: , , ,

cropulator.png

If you're using your iPhone to capture pictures then upload directly online to sites such as Flickr, then having them in the best shape possible before transfer is important. One of the easiest ways to improve just about any photograph is to crop it. This is especially true with cameras sans zoom lenses, such as the iPhone.

Cropulator does exactly that. It provides easy to drag handles that lets you quickly crop an image, then saves a copy of it to your camera roll with a new sequential file name. You have both the cropped and the original images there waiting for you. It also provides an aspect ratio lock, rotation, straightening, and a help page.

If the iPhone is your pocket photo studio, then Cropulator is a must have app. You can get it in the App Store for 99 cents.

More iPhone App Reviews

Panorama 2.1 for the iPhone

FotoTimer Provides Self-Timer for the iPhone

HP iPrint App Makes Printing Easy from iPhone or iPod touch

True Photo App for iPhone: CameraBag

"Exposure" (Now "Darkslide") Puts Flickr on Your iPhone

Podcasts About iPhone Photography

"iPhone as Your Grab Shot Camera" - Digital Photography Podcast 168

Podcast 21: Conversation with Derrick Story, Pro Photog and Author, About iPhone Photo Apps


twitter.jpg Follow me on Twitter

-


Technorati Tags: , , , ,

Super Compact Photo Studio

merax_photo_studio.jpg

Here's a fun one for you. How about a super compact photo studio that folds up smaller than a pizza box, but includes two lights, reversible backdrop, camera stand, and diffused panels on three sides? It even has a handle so you can carry it like a briefcase. And what if I told you it costs less than $43, including software?

I just tested the Merax One Shot Portable Photo Studio Lighting Box Kit, and it works as advertised. You can illuminate your items using regular daylight, or with the 2800K lamps included in the kit. The 22" softbox with blue/white reversible background can accommodate typical eBay items and other small goodies. And for Windows users, there's software for dropping out the background if that's what you want to do.

It's not high tech, and the lights are far from top quality, but for less than $50 you can get a clever, compact, photo studio that let's you shoot anywhere.


twitter.jpg Follow me on Twitter

-


Technorati Tags: , ,

big_picture_logo.jpg

Wondering who participated in Earth Hour 2009? Here are 17 big time locations with "before and after" shots compliments of the Boston Globe. Participants include Taipei, Hong Kong, Athens, Beijing, Toronto, Rome, Sydney, Shanghai, Bangkok, Paris, Stockholm, London, Lausanne, Lima, LA, Jakarta, and Las Vegas.

The presentation is fun. You start out by observing the scene with all the lights on. Then you click on the picture and it fades in observance to Earth Hour.


twitter.jpg Follow me on Twitter

-


Technorati Tags: , ,

flickr_screenshot.png

In iPhoto '09, Apple added connectivity to Flickr, the world's most popular online photo sharing site. I thought this would make an interesting video training title, so we've just published on Lynda.com: iPhoto '09: 10 Things to Know About Flickr. There are a couple free movies on that page if you want a quick peek at how this series looks.


twitter.jpg Follow me on Twitter

-


Technorati Tags: , , , ,

Photocopier for the Unemployed

Now that I don't have a "regular job" anymore, I've converted part of my home to an office. I have a computer, printer, and most of the necessities to carry out my freelance work. But one thing I really miss from my previous life as a full-time employee is a photocopier.

I could go out and spend the money for an all-in-one printer/photocopier. But quite frankly, I probably should pay the property taxes first. So I've cobbled together a "photocopier for the unemployed," and I thought you might be interested in how this works.

canoscan.png

First thing I had to do was find some sort of scanning device. I dug around in the "old equipment closet" and found a CanoScan FB630U that I had bought years ago for around $100. It had a USB connector (which is critical to success of this project), and the driver for my Mac was still available for download on the Canon site (in .sit format, however. So I had to download a trial version of Stuffit to decompress the file.)

I decided to use an old Mac laptop that wasn't seeing much action these days as my scanning workstation. It had Photoshop Elements 4 loaded on it, and the application accepted the ancient Canon driver. So I made a little extra room in my home office, set up the laptop, plugged in the scanner, and fired everything up.

Surprisingly, it worked! I used a bank document for the test because it had lots of small writing and fine lines. I set the software to scan at 300 dpi for an 8.5"x11" document. I used the black & white setting to keep the file size small and scanning time to a minimum.

scanner_driver.png

I then made a scan and the image appeared in Photoshop Elements. I simply hit "Print" and was soon greeted with a decent reproduction of the original document. I decided to keep an electronic version also for my records, so I converted the Bitmap image to Grayscale and saved it as a Jpeg at "10" quality. The file size was a little less than 1MB, and I printed it too as part of the test. It looked great. With a little practice, I was able to produce a "photocopy" within a couple of minutes. And since I have more time than money, this seemed like a good alternative to a dedicated photocopier. Plus, now I can scan other stuff too!

image_size.png

Note: To make sure your output looks good, open the Image Size dialog box in Photoshop, uncheck the "Resample Image" box, and change the resolution to 300. Your "photocopy" will look great.


twitter.jpg Follow me on Twitter

-


Technorati Tags: , , , ,

macworld_online.png

"Light is photography’s essential ingredient. Abundant illumination makes our job easy—we simply compose and shoot. But what happens when the lights go down? Do we become slaves to unflattering bursts of an electronic flash? Not at all. By mastering a few basic techniques, you can turn off the flash to capture beautiful, evocative images. Look in your camera’s settings for the lightning bolt icon, and select the flash off option," starts the article, Get great photos in low light. In the piece, I provide lots of basic tips. Then there are a terrific batch of helpful comments that add even more information.


twitter.jpg Follow me on Twitter

-


Join me on March 28 for "How I Did It" - A Workshop in High-Impact Photography


Technorati Tags: , , , , ,

image_capture.jpg

Along with Preview (The Simplest of All Raw Converters), Image Capture is one of those amazing hidden gems that comes on every Mac. Look in your Applications folder, launch it, then connect just about any photo device. Once you do, Image Capture recognizes the camera and presents you with lots of downloading options. In fact, Image Capture is the application I recommend to iPhone users for transferring full resolution pictures that they record with the device.

download_some.jpg

The trick is, when you launch the app and connect your iPhone, to click on the "Download Some" window. By doing so, Image Capture presents you with thumbnail versions of all the pictures on the device. You choose only the shots you want, decide where to put them, and then click the "Download" button.

Be sure to check out the Options button, because that allows you to choose the color space that's applied to the images on download. You also have an informative list view available (shown at the top of this post) that displays your metadata for each shot on the device. And if that weren't enough, choose "Build Web Page" from the "Automatic Task" popup menu, and Image Capture will download the selected images, then build a web page with them complete with clickable thumbnails -- all in one step! There are lots of other options in that popup menu, including triggering Automator with its own scripts (select Custom for that).

One final note about Image Capture, it works with most Mac-compatible flatbed scanners. So if you need to connect a scanner for a quick job, this might be the best way to go.

Like I said, this is an amazing little app.


twitter.jpg Follow me on Twitter

-


Join me on March 28 for "How I Did It" - A Workshop in High-Impact Photography


Technorati Tags: , , , ,