This is The Digital Story Podcast #739, May 19, 2020. Today's theme is "New Capture One Pro, and More!." I'm Derrick Story.
Opening Monologue
Capture One Pro continues to roll with its latest release that features new tools, RAW support (including E-M1 Mark III), lens profiles, and a discounted version for Nikon users. Plus, here's a way to put your skills to use to help small businesses in your community. All of this, and more, on today's TDS Photography Podcast.
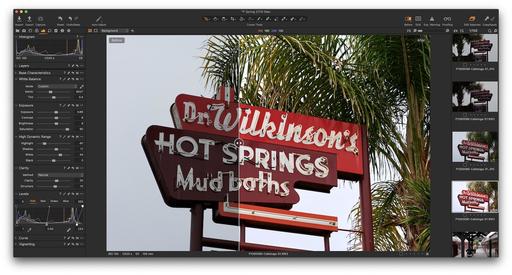
New Capture One Pro 20.1
So much to cover with this pt.1 release of Capture One Pro 20. First of all, it's free for current licensed users of 20. I'll start with the new features, then get into RAW support, and wrap up with the new Nikon version of the app.
New Features!
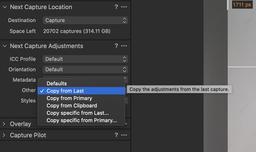
- Heal and Clone
- Before/After feature - Two styles to choose from.
- New activation and onboarding flow
- Nikon profiles - The profiles available in Nikon Picture Controls are now replicated within Capture One for selected camera models. These profiles are available from the ICC Profile menu within Base Characteristics. They provide the same tone curve and color corrections known from the built-in Nikon JPG files as a starting point for your raw file.
(compatible with RAW files from: D6, D5, D850, D810/D810A, D800, D780, D750, D610, Z7, Z6, D500, D7500, D5600, D5500, D3500, D3400, D3300, Z50).
New RAW Support
Canon 250D
Canon PowerShot G5 X Mark II
Canon PowerShot G7 X Mark III
Nikon P950
Leica M10 Monochrome
Olympus E-M1 Mark III
Phase One iXH-150
Zeiss ZX (which isn't even out yet, but has a B&H catalog page)
New Nikon Version
Get all the editing tools to you need to make your Nikon images look their best. And for selected camera models, apply built-in Nikon profiles that match the colors in your camera.
More than 75 Nikon cameras supported.
You can get Express for $99 a year via subscription or for $129 for perpetual license (compared to $278 for the Pro version that supports all cameras.) There are a few features omitted from Express, such as layers.
Improved Lightroom importer
New functionality in the Lightroom importer opens up for a better transition experience. It is now clearer what will happen and what you can expect when importing your Lightroom catalog into Capture One.
It is now possible to import offline images (Smart Previews in Lightroom) and have them automatically sync up once the original files become online again, for example when an external drive containing these images is reconnected. Files that failed to import will be compiled in a list to handle after the import is complete. This list will include files from unsupported cameras or file formats that are not supported in Capture One.
Learn Capture One Pro 20 in Just 2 Hours
You can master Capture One Pro 20 with my latest online class, Capture One Pro 20 Essential Training on LinkedIn Learning, or, if you're a lynda.com subscriber, you can watch it there as well.
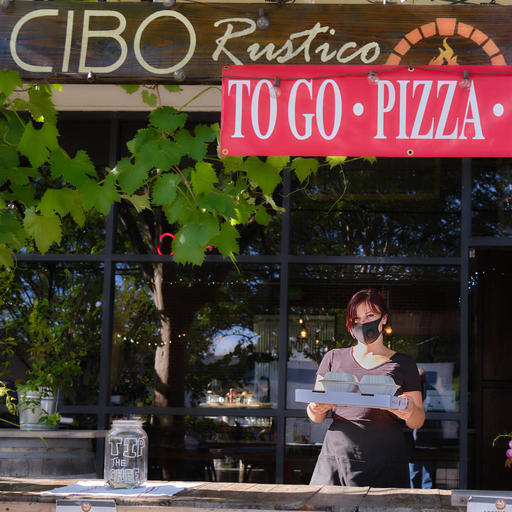
Help Your Local Businesses with Photography and Social
Over the last two months, many shops and restaurants have been adapting to changes resulting from the pandemic. Part of the challenge, at least in my area, has been letting potential customers know they are open and how they are operating. I think this is something we can help with.
I was thinking that photographers and storytellers could serve as "ant scouts" to find these local establishments, photograph them, then share their stories on social media. By using the hashtag #open4pickup - people who follow us, or search via the hashtag could see the faces and places of these businesses who are adapting to these crazy circumstances.
We could also offer ideas to help keep everyone safe in the process, such as ordering ahead of time and paying with a credit card (including tip), wearing a face covering when picking up your purchase (even if you're staying in the car) and washing your hands throughly once your return home.
My personal plan is to research and visit a new local establishment once a week. I'll ask them if it's OK to take the picture and share it online. And I'm recording geotags at the same time using either my iPhone or my Fujifilm X100V, which also can record location. That way people can easily find the business when they see your post.
As I small business owner myself, I'm really pulling for the other shops and restaurants in my hometown. I'm hoping you will consider this idea as well - #open4pickup.
The New Donation Kit for Carefree Shipping of Found Film Cameras
We have more time around the house than ever. And you finally dove into that bedroom closet that's been begging for some organization.
If you found a film camera that you're no longer using, our new Donation Kit makes it easy to pack and ship. Just visit the Contact Form on thenimblephotographer.com, click the box next to Donating a Film Camera, and let me know what you have. In your note, be sure to include your shipping address.
If it's a camera we can use for the shop, I'll send you a Donation Kit that includes a USPS Priority Mail shipping box and prepaid label. All you have to do is tape it up, insert the camera, and add the label. USPS will pick up your shipment from the front door of your house during their regular mail delivery. It's that simple!
Your donation help get analog gear in the hands of aspiring fine art photographers, and the proceeds help support this podcast.
Digitizing Family Memories Course Now Available Online
Each of the four classes will outline a specific set of steps for you to accomplish. By the end of the course, you will have an organized digital archive of your most valuable family images.
You can sign up for the course by visiting the Workshops page on The Nimble Photographer. The course fee is a reasonable $39 (on sale right now). It includes the 4 class videos, class notes, and access to the class forums that are a part of each movie.
Updates and Such
Inner Circle Members: A big thanks to those who support our podcast and our efforts!
Due to the coronavirus pandemic, we've had to postpone our July photography workshop at Lassen Volcanic Park. We so still have on the schedule, however, our Eastern Sierra event in October.
How to Watch Photos for macOS Catalina and iPadOS - Learn everything you need to know about Photos for the Mac and iPad by checking out my latest course on LinkedIn Learning and on lynda.com. This course is perfect for Mac and iPad based photographers who shoot with iPhone, Mirrorless, and DSLR cameras. It covers both photography and movies. And if I say so myself, it's a lot of fun.
B&H and Amazon tiles on www.thedigitalstory. If you click on them first, you're helping to support this podcast. (The Digital Story is supported by its audience. When you purchase through links on our site, we may earn an affiliate commission.) And speaking of supporting this show, and big thanks to our Patreon Inner Circle members:
Affiliate Links - The links to some products in this podcast contain an affiliate code that credits The Digital Story for any purchases made from B&H Photo and Amazon via that click-through. Depending on the purchase, we may receive some financial compensation.
And finally, be sure to visit our friends at Red River Paper for all of your inkjet supply needs.
See you next week!
More Ways to Participate
Want to share photos and talk with other members in our virtual camera club? Check out our Flickr Public Group. And from those images, I choose the TDS Member Photo of the Day.
Podcast Sponsors
Red River Paper - Keep up with the world of inkjet printing, and win free paper, by liking Red River Paper on Facebook.
The Nimbleosity Report
Do you want to keep up with the best content from The Digital Story and The Nimble Photographer? Sign up for The Nimbleosity Report, and receive highlights twice-a-month in a single page newsletter. Be a part of our community!
Want to Comment on this Post?
You can share your thoughts at the TDS Facebook page, where I'll post this story for discussion.