I first learned about the original E-M5 in a closed door meeting at CES 2012. Olympus broke the news to the public the next month, and we started a whole new era of mirrorless photography. Now with the Mark III ready to hit the streets, I thought we'd take a look at this latest model, and the 8-year journey it took to get here. I hope you enjoy the show.
- 20.4 Megapixel Live MOS sensor
- TruePic VIII Quad Core Processor
- Dual F.A.S.T. AF (Contrast & Phase Detection AF) 121 Point (All Cross Type) On-Chip Phase Detection)
- 5-Axis Image Stabilization with up to 6.5 Shutter Speed Steps Compensation with Sync-IS
- 2.36M dot OLED Electronic Viewfinder
- 3.0" Vari-Angle Touch LCD
- Dust, Splash and Freezeproof
- 10fps [H] mode 6fps [L] mode mechanical shutter
30fps [H] mode 10fps [L] mode silent electronic shutter
- 4k Video Capture (30/25/24 fps) with Flat Picture Mode
- USB In-camera Charging
- 30fps Silent Electronic Shutter
- PRO Capture Lag-Free Electronic Shutter Mode
Some people have referred to the Mark III as a mini-EM-1, and I think there's good reason for that nickname.
But its evolution really took a different path, and I think its worth going back to 2012 to understand the real significance of this camera.
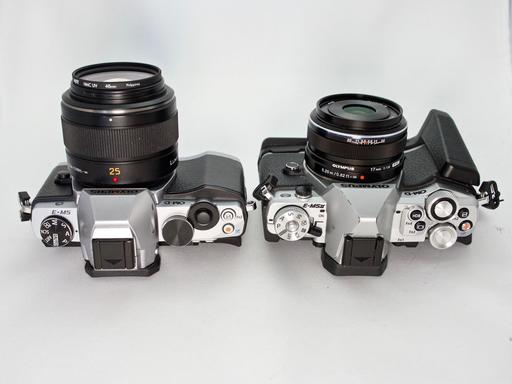 Top decks of the E-M5 (left) and the E-M5 Mark II
The first E-M5 was actually a fairly simple camera to operate. It had a mode dial on the left top panel with PASM, i-Auto, movie, Scene, and Art Filter options. On the right side were unmarked twin control dials with function and movie buttons. That was it.
But its functionality was fantastic. You could program the function buttons and the dials to suit your shooting style. The body was weather resistant, and the handling was very comfortable. I still shoot with one today in the studio. I use it for my product shots.
Some people complained that the buttons were too "spongy" due to their weather sealing. I know what they mean, but they never really bothered me that much. The camera is quite durable, and it's performing as well today as when I first bought it.
Then, in February 2015, the Mark II was released. This was a very different camera, and one of my all time favorites.
First of all, it was a wonderful HD video camera. Olympus replaced the up and down tilting LCD with a fully articulated model. The sensor-based image stabilization was further refined. And with the optional grip, you had jacks for both mic and headphones. The video it rendered was truly beautiful. Again, I still use this camera today. It's really good for live streaming.
The top deck of the Mark II was more sophisticated than its earlier sibling. A convenient on/off switch was moved to the mode dial, and there were now four buttons and two dials on top. I really liked the program lever on the back that allowed me to switch from my still photography settings to movie settings in one easy motion.
This camera was equally capable for both stills and movies. Plus Olympus added the 40MP High Res Shot feature. And they continued to refine its features and performance through multiple firmware upgrades.
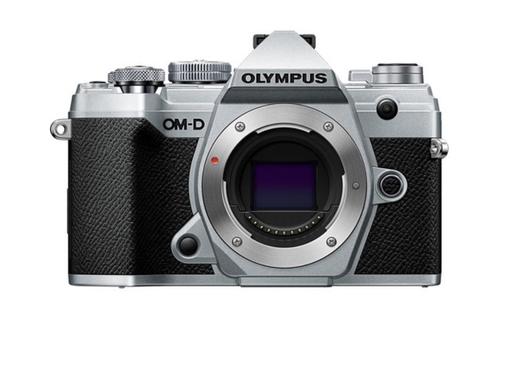
One thing that held back both the Mark I and the Mark II was computer processing power. In particular, burst modes in RAW were limited and the camera often had to pause to write to the card. And the second limitation was the 16MP sensor. And this brings us to the Mark III.
Not only does it look more like an E-M1 Mark II on the top deck, it features a more robust TruePic VIII Quad Core Processor inside. The overall appearance is sleeker than the chunky Mark II, plus we now have 4K video (which many wanted in the Mark II), Pro Capture, 30fps silent electronic shutter, and a 20MP sensor. Horsepower is no longer an issue.
In a sense, we've returned to the cleaner look of the Mark I, but with the firepower of the E-M1. I think this is going to be a winning combination for Olympus. It was worth the 4-year wait.
Our LA Street Photography Experience is Coming this March
This 3-day event on March 13-15 explores classic Los Angeles locations and architecture. Our excursions will take us as far west as Venice Beach, as well as famous movie spots and the back streets of this fascinating Southern California area.
You will learn new techniques for safe and effective street photography, how to capture the vibe of great architecture, and enjoy some classic California cuisine along the way.
Olympus Educator, Mike Boening, is our co-instructor. Those of you who have worked with Mike at our SF Street Photography events know how much he brings to the table. Not only is he an official Olympus Educator, he's an accomplished street photographer, and he's going to bring gear for you to test and learn about.
If you want to join Mike and me this coming March, just visit the information and registration page, or go to www.thenimblephotographer.com and click on the Workshops link, or go to the Olympus site - no matter how you get there, Mike and I are looking forward to working with you this coming Spring.
Amateur Photographer Magazine Celebrates 100 Years of Olympus
You can visit their site here.
I downloaded a copy to my iPad for $3.99 using their app, which is free in the App Store. It's a terrific article with lots of pictures of Olympus gear over the years, including the Olympus Flex twin lens, Olympus 35 rangefinder, the original PEN f, and of course, the amazing OM series.
They also show selected Olympus print ads from over the years, a cool article, What Olympus Means to Me, a discussion on the Micro Four Thirds Era, and an article on OM to OM-D. There is a lot of great stuff here for those who appreciate the innovation of this brand.
Updates and Such
Inner Circle Members: A big thanks to those who support our podcast and our efforts!
Podcasting Skills Course - The course date is scheduled for November 9, 2019. Registration is open now at www.thenimblephotographer.com.
B&H and Amazon tiles on www.thedigitalstory. If you click on them first, you're helping to support this podcast. (The Digital Story is supported by its audience. When you purchase through links on our site, we may earn an affiliate commission.) And speaking of supporting this show, and big thanks to our Patreon Inner Circle members:
Affiliate Links - The link to the Olympus OM-D E-M5 Mark III contains an affiliate code that credits The Digital Story for any purchases made from B&H Photo via that click-through. Depending on the purchase, we may receive some financial compensation.
And finally, be sure to visit our friends at Red River Paper for all of your inkjet supply needs.
See you next week!
More Ways to Participate
Want to share photos and talk with other members in our virtual camera club? Check out our Flickr Public Group. And from those images, I choose the TDS Member Photo of the Day.
Podcast Sponsors
Red River Paper - Keep up with the world of inkjet printing, and win free paper, by liking Red River Paper on Facebook.
The Nimbleosity Report
Do you want to keep up with the best content from The Digital Story and The Nimble Photographer? Sign up for The Nimbleosity Report, and receive highlights twice-a-month in a single page newsletter. Be a part of our community!
Want to Comment on this Post?
You can share your thoughts at the TDS Facebook page, where I'll post this story for discussion.
 Signs that miss the mark are one of my favorite juxtapositions. Photo by Derrick Story.