This is The Digital Story Podcast #601, Set. 12, 2017. Today's theme is "HDMI Out - The Untapped Resource." I'm Derrick Story.
Opening Monologue
I haven't shot much with my Olympus OM-D E-M5 Mark II since the PEN-F came into my life. It's not that I don't like the OM-D anymore; I love it. But the PEN-F is just so sexy. So I started thinking, "What could I use my OM-D for? What is its special talent?" Well, for one thing, it records amazing video. And it does have that HDMI port. Then it all came together. In this week's podcast I show you the wonders of my recent discovery: HDMI Out.
I Just Can't Stand My FaceTime Camera Any Longer
I've been getting by with my FaceTime camera with Skype and other streaming needs. I'm not sure why I stuck with it so long because I hate the video it produces. For one thing, it's too wide. It's too dark. And I look 10 years older than I really am. Yet, I was still using it.
This all came to an end one morning when I was testing mimoLive with my friend Oliver, the head of Boinx Software. Oliver is a very straightforward kind of guy. And when he saw the live video I was producing with his software, he commented, "What are you using? The FaceTime camera?"
I said, "Yes I am."
"Why?" he asked. "You're a photographer. You have cameras. You have lights. Use them."
He was right. But the problem was, I didn't have any experience in streaming video, only recording to the memory card in the camera. I didn't know how to connect to my Mac and an external hard drive.
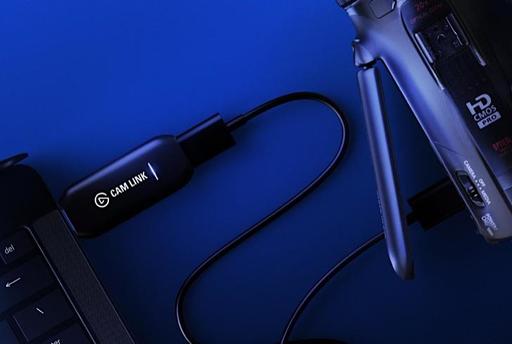
Interestingly enough, at this time, elgato released a new product called Cam Link. It's a $129 interface about the size of a thumb drive that converts HDMI output from your camera to USB for your computer. I bought one immediately and started testing. And as a result, I've fallen in love with my OM-D and its HDMI port.
What Exactly Is Happening with HDMI Out?
Essentially, instead of sending visual information to your memory card, the camera redirects it out through the HDMI port. Depending on what you're connecting too, this means that you can record full HD footage directly to a hard drive, or stream it via Skype, Facebook Live, or a number of other apps and services.
This opens up a whole new world of movie making. You still have access to all of the settings and controls that you normally use on your camera, it's just that the output feed is redirected.
In my case, I'm using mimoLive to produce my Nimble Classroom series. It's essentially a TV production environment for my Mac. So I can switch between my OM-D and the FaceTime camera for the output. And the difference is night and day. For the first time in my adult life, I look OK on live stream.
I'm using the Panasonic 20mm f/1.7 lens, with the Portrait configuration, white balance, exposure compensation, and manual focusing. I have complete control over the image, and I can stream or record at 1080p at 60fps. And not a pixel goes to the memory card. It's all flowing directly to a 2 TB Western Digital hard drive.
Will Your Camera Work with HDMI Out?
There are a few simple checks you can make to see if your camera will work in scenarios like I've described.
- Look for an HDMI Port - Many cameras have HDMI out, but not all. So check your specs.
- Determine the Type of HDMI Port - There's more than one port size. And you have to figure out the port on your camera and the device that you're connecting it to. There's the standard HDMI connector, mini, and micro. Figure out what you need, then order the appropriate cable.
- Clean Output - Check your camera to ensure that it has clean HDMI output. This means that you can turn off all onscreen menu items and that you get full-size HD output. The easiest way to test this is to connect your camera via HDMI to an LCD TV and view what appears on the TV screen. If it is clean and detailed, you're good to go.
- Automatic Shut Off - Some camera automatically shut down their output after a certain amount of time. It could be 5 minutes or 30. Some allow you to adjust this via their menus. And some don't have it at all. Find out yours and determine if it will work for your needs.
- External Power Capable - If you're going to have long recording sessions, you may want to investigate external power options to extend broadcast time. As an alternative, a power grip with an extra battery might do the trick, depending on how seamlessly the camera shifts from one battery to the next.
The Elgato Cam Link works great with my E-M5 Mark II. Beware of the system requirements for your Mac or PC computer however. When it says 4th generation quad-core Intel i5 CPU or better, it means it. I tried using it with a dual core, and the image flickered. No good! You'll also need either Windows 10 (64-bit) or macOS Sierra and an USB 3 port. If you meet those requirements, however, Cam Link will open up a new world for your HDMI compatible camera.
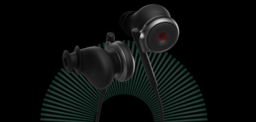
Lifelike 3D Audio Recording Headset
Last week I promised you an audio goodie as well. This is about as cool as it gets for video recording in the field. The Lifelike 3D Audio Recording Headset is currently accepting backers on INDIEGOGO, and this affordable device is amazing.
With just these simple earbuds and your iPhone, you can record panoramic, lifelike audio to use with your videos, or as standalone files. I explain in more detail in this second segment.
Updates and Such
Big thanks to all of our Patreon members!
Our next Nimble Classroom focuses on Luminar Pro Techniques on Saturday Sept. 23. If you want to master this amazing image editing application, join us online for this workshop. We chat among ourselves via a Slack classroom, and I'm teaching via live video and screen sharing. It's a blast!
B&H and Amazon tiles on www.thedigitalstory. If you click on them first, you're helping to support this podcast. And speaking of supporting this show, and big thanks to our Patreon Inner Circle members.
And finally, be sure to visit our friends at Red River Paper for all of your inkjet supply needs.
Texas-based Red River Paper recently announced a new fine art paper, Palo Duro Etching. The new paper is a 100 percent cotton rag paper and is free of optical brightener additives. The paper is designed to offer warm white tones, deep blacks and a subtle texture to accurately recreate traditional darkroom fine art prints.
See you next week!
More Ways to Participate
Want to share photos and talk with other members in our virtual camera club? Check out our Flickr Public Group. And from those images, I choose the TDS Member Photo of the Day.
Podcast Sponsors
Cascable - Cascable is the best tool available for working with your camera in the field.
Red River Paper - Keep up with the world of inkjet printing, and win free paper, by liking Red River Paper on Facebook.
The Nimbleosity Report
Do you want to keep up with the best content from The Digital Story and The Nimble Photographer? Sign up for The Nimbleosity Report, and receive highlights twice-a-month in a single page newsletter. Be a part of our community!
Want to Comment on this Post?
You can share your thoughts at the TDS Facebook page, where I'll post this story for discussion.