This is The Digital Story Podcast #594, July 25, 2017. Today's theme is "No Such Thing as Free Time." I'm Derrick Story.
Opening Monologue
Time is like horizontal space in an office. If there's an opening, it becomes occupied. Seems to be a law of human nature that free time belongs to the young and the old. For everyone else, time must be planned. And if your photography isn't on the agenda, it won't make the cut. Ensuring that doesn't happen is the first topic of today's show.
No Such Thing as Free Time
It was a little after 7pm when I had finished watering the garden. The plants were thirsty after another 90 degree day in Sonoma County. But things were changing as the day began to wind down. There was a light ocean breeze in the air, and the temperature slipped back to the low 70s.
My chores were done, and I had a decision to make. Should I head inside, make a drink, and park it on couch? Tempting, and certainly justified after a weekend of work. But I hadn't shot since Thursday. And the light was absolutely beautiful right now.
Instead, I grabbed my camera bag and the keys to the Vanagon (that's right, the Vanagon!). Shilo Park was only a mile and a half from my house. I'm going to spend this last hour of light outside.
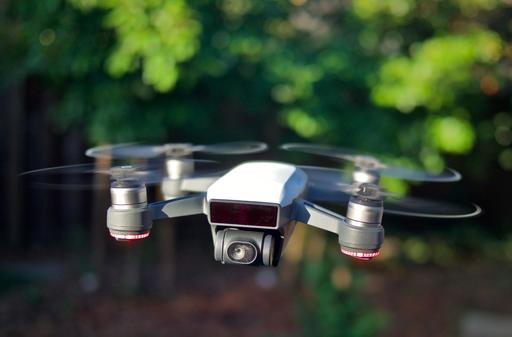
My first choice was to fly the DJI Spark. I waited about 10 minutes until everyone had cleared out of the parking area. I didn't want to end their day of nature with the sound of my drone. Once everything was clear, I lifted off and shot video for the next 15 minutes. The shadows were long and the colors were warm. It was a beautiful time for aerial photography.
Later that night as I was editing the footage in Final Cut, I thought about that last hour of the day. It made my whole weekend. And I almost let it slip away.
If you've let opportunities slip by you, here are five suggestions to help keep photography on your priority list.
- Manage Your Energy - At first this might sound like an odd addition, but it's been my long standing opinion and fatigue is the enemy of creativity. The three most important facets of energy management is sleep, exercise, and diet. Keep enough gas in your tank so you can seize the moment when it presents itself.
- Sell Yourself on the Value of Your Photography Work - If you don't believe that shooting is of vital importance, no one else is going to take your seriously. And you need them to do so if you're going to carve out time for your creative endeavors.
- Explore New Techniques and Gear - Many photographers feel a little guilty about acquiring new gear. But if a camera, lens, housing, drone, tripod, reflector, or bag excites you to the point of motivation, I think that's a good thing.
- Create Projects and See Them Through - Projects are vital to creative longevity. Last week I talked about seeing an image all the way through printing to framing. Photo essays, finished movies, printed books are other great examples of completed projects.
- Get Better - Few things are more motivating than mastery. The first thing that I thought when I reviewed my final movie from Shilo Park is that I can't wait to get out there again and make a better movie. What I did last night was better than any aerial work I had done before, and now I have the confidence to do even better.
If you make time for your photography, it will reward you beyond any reasonable exception. It is one of the best investments in you that you can make.
More On Being a Good UAS Citizen
After my podcast about the DJI Spark (Unmanned Aircraft System), I received quite a bit of mail, some of it kindly chiding me for not being more clear about certification. So, here's a bit more info about flying your UAS, including a link to the getting started page on the FAA site.
If you're flying only for fun, there are no pilot requirements. If you plan to use your drone commercially, however, you must have Remote Pilot Airman Certificate that involves a written test. The big question in my mind is how do you define commercial? Education, BTW, seems to fall into the non-commercial category.
Need to be aware of restricted airspace. Maintain line of sight with your drone, and always yield to manned aircraft. Don't fly over people unless you have their explicit permission. Do not fly from a moving car. UAS flight is for daylight hours only.
And just as important as all of that, be courteous to others and use common sense. If you follow these guidelines, you should have a rewarding experience, and it won't be at the expense of others.
ImageFramer 4.1 Available
ImageFramer 4.1 is available, which includes hiding layers (including image layer) and a drop-down list of templates in Lightroom plugin (needs an update of the plugin).
More information can be found at right here.
ImageFramer on Facebook
For more tips like these, and lots more, visit ImageFramer on Facebook. And give your images the ImageFramer look they deserve.
We want everyone to enjoy the benefits of the new ImageFramer. ImageFramer 4.0 is a free upgrade for ImageFramer 3 customers. Note that it requires macOS 10.11 (El Capitan) or later. TDS listeners can receive a 20 percent discount by visiting: our ImageFramer landing page.
New Subjects Added to The Nimble Classroom
I've trying to figure out a way to bring more personalized training to photographer without them having to travel. It's one thing to get on a plane to photograph wine country or the French Quarter, but not quite as alluring to sit in a classroom for two days.
As a result, I've designed a new approach called, The Nimble Classroom. And now there are four courses for the Summer Session of The Nimble Classroom.
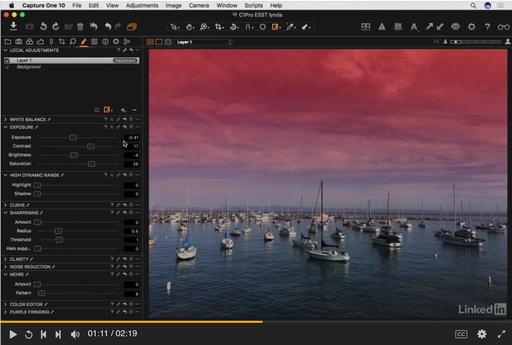
- August 19, Catalog Management, Capture One Pro
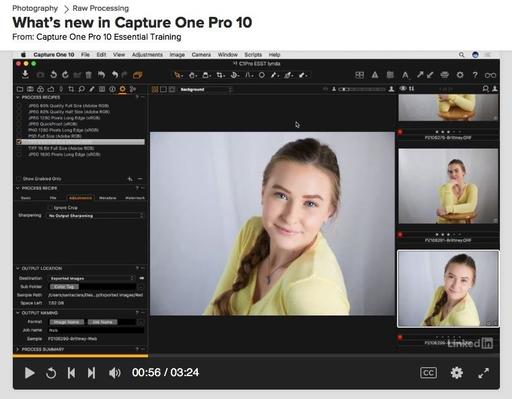
- September 9, Expert Editing, Capture One Pro
- September 23, Luminar Pro Techniques
- October 7, Photos 3 for macOS
You can learn more about them and sign up for your favorites by visiting The Nimble Classroom online.
Updates and Such
Big thanks to all of our Patreon members!
B&H and Amazon tiles on www.thedigitalstory. If you click on them first, you're helping to support this podcast. And speaking of supporting this show, and big thanks to our Patreon Inner Circle members.
And finally, be sure to visit our friends at Red River Paper for all of your inkjet supply needs.
Texas-based Red River Paper recently announced a new fine art paper, Palo Duro Etching. The new paper is a 100 percent cotton rag paper and is free of optical brightener additives. The paper is designed to offer warm white tones, deep blacks and a subtle texture to accurately recreate traditional darkroom fine art prints.
See you next week!
More Ways to Participate
Want to share photos and talk with other members in our virtual camera club? Check out our Flickr Public Group. And from those images, I choose the TDS Member Photo of the Day.
Podcast Sponsors
ImageFramer 4 - ImageFramer is used by artists, professional and amateur photographers, scrapbookers, framers, and people who simply want their family photos to look better.
Red River Paper - Keep up with the world of inkjet printing, and win free paper, by liking Red River Paper on Facebook.
The Nimbleosity Report
Do you want to keep up with the best content from The Digital Story and The Nimble Photographer? Sign up for The Nimbleosity Report, and receive highlights twice-a-month in a single page newsletter. Be a part of our community!
Want to Comment on this Post?
You can share your thoughts at the TDS Facebook page, where I'll post this story for discussion.
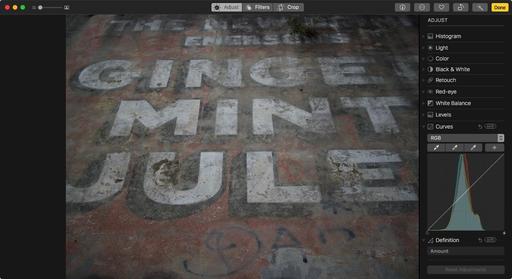
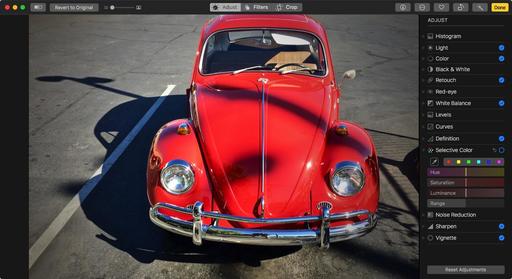 Classic VW Bug. Photo by Derrick Story.
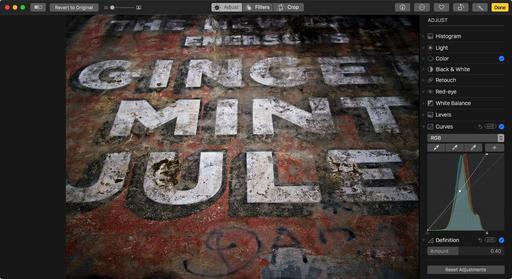
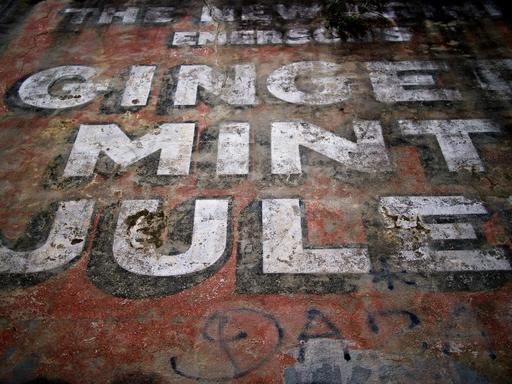
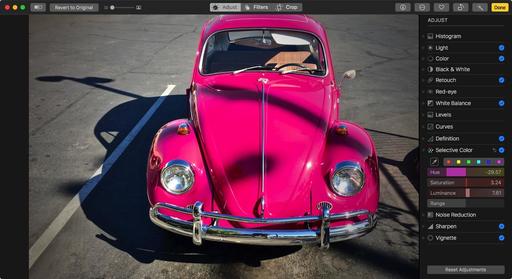 VW Bug after Selective Color edit.
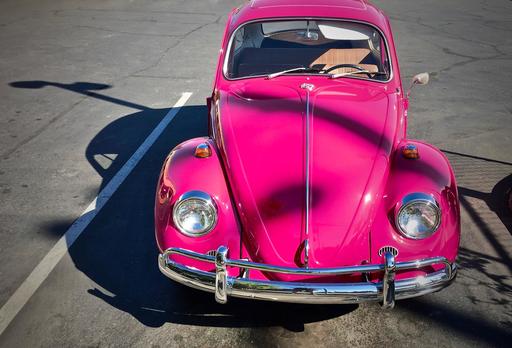 Here's the final version of the image.