This is The Digital Story Podcast #588, June 13, 2017. Today's theme is "Tiny Gardens for Big Pictures." I'm Derrick Story.
Opening Monologue
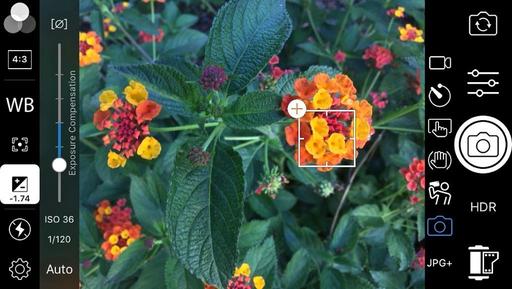
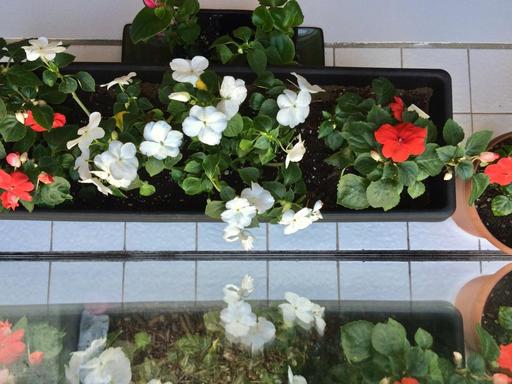
Regardless if you live in a cozy apartment with just a narrow balcony, or have your own house with a spacious back patio, you can create a photo wonderland with container gardening. Not only do you enjoy the benefits of nurturing your botanical friends, but they will reward you with stunning images. I'll plant those seeds on today's show.
Tiny Gardens for Big Pictures
Yes, most of us would love to travel to exotic places to photography flora and fauna. And for a week or two a year, we might get that opportunity.
But for the other 50 weeks, cultivating your own botanical paradise can provide you with hours of photographic entertainment. And to help you get started, here are some of my favorite container plants.
- Pansies and Violas - Vibrant multicolor blooms. Partial sun.
- Dwarf Hydrangea - Most hydrangeas bloom white or whitish-pink, then turn to shades of pink, purple, lime green, or a combination of shades. Mostly shade.
- Summer Snapdragon (Angelonia) - Can take direct sun and will bloom all summer long. They come in pinks, mauves, deep purple, purple-blues, white, and more.
- Begonias - Like partial sun exposure. Don't overwater them. Come in a vast array of colors.
- Double Impatiens - Open flowers all season long--and never need deadheading. Choose double impatiens for areas offering part to full shade. Look for blooms in a variety of colors, including white, red, pink and purple tones.
- Swan River Daisy - A spreading annual, the swan river daisy is ideal for hanging baskets. It produces white, pink, or purplish flowers.
- Florists' chrysanthemum - Pot rooted cuttings midwinter to early spring, using porous, fibrous, moisture-holding planting mix. Move plants to larger pots as growth requires--don't let them become root-bound. Pinch and/or stake as required. Plants need water daily in warm weather, every other day in cool conditions. Feed with liquid fertilizer every 7 to 10 days until buds show color.
- Flowering kale and cabbage - Flowering kale (and cabbage, too) has interesting rosettes that really pop in containers.
- Johnny Jump-Up - Very cheery flower that does great in pots.
- Chives - Chives are without a doubt, one of the hardiest herbs that you can plant. They grow very well in containers or just about anywhere else you want to plant them. Chives are great for adding flavor to soups, dips, and of course, baked potatoes. Chives are also perennials so once you plant them, they'll come back year after year. You can move them indoors if you want to keep your harvest going all year long, but they do prefer a bit of sunlight throughout the day so choose a spot where they can get some sun at least through a window during the winter.
Plus, you can practice using your macro lens. And maybe even justify that LED ring light you have had your eye on.
Review: Lomography Lomo'Instant Automat Glass Magellan
As reported by The Phoblographer.
The Lomography Lomo'Instant Automat Glass Magellan answers the prayers and wishes of almost every Fujifilm Instax Mini film user-and it's arguably one of the absolute best cameras shooting the format on the market.
Obviously, part of this appeal is the glass lens on the front of the camera. This lens is the same optic used on the company's Lomography LCA 120-and so it is the sharpest and the fastest aperture lens available for use on any Instax camera (at the time of publishing this review.) That quality will appeal to a lot of photographers; and though there are a number of shooters who still want manual controls, you'd be shocked at how great the photos are from the Lomography Lomo'Instant Automat Glass Magellan.
It's available on the Lomography site for $189.
Digging Deeper with ImageFramer 4
ImageFramer is used by artists, professional and amateur photographers, scrapbookers, framers, and simply people who simply want their family photos to look better.
ImageFramer helps you to:
- Themed frames: Frames for holidays, seasonal frames, kid frames, romance (for weddings) and many more creative designs. Great for greeting card designs, scrapbooking, enriching family photos etc.
- Overlays: Text or image overlays can be used for adding copyright notices, signatures, descriptions, and even automatic data, like file name, date (file or EXIF), location, caption and headline from IPTC metadata. New in version 4: Snapping overlays to center or edges and simplified interaction with text color and fonts.
- Design Templates. ImageFramer comes with some preset templates. It's easy to add your own templates. These can be used in-app or through Lightroom or in built-in Batch Processor. New in version 4: Saving templates to files and importing them into a another ImageFramer installation.
- Mats. ImageFramer has a special color mat frame types that can look beveled with control over bevel width, and the colors of both the mat and the bevel. Size of mat can be different in each direction (often useful to have a wider mat on the bottom). Multiple mat (and frame) layers allow limitless combinations.
- Integration with Workflows: Adobe Lightroom Export plugin, Photos.app, Sharing extension. Useful for portfolios, web site exports, printing (even simple designs like overlays or a simple white border).
We want everyone to enjoy the benefits of the new ImageFramer. ImageFramer 4.0 is a free upgrade for ImageFramer 3 customers. Note that it requires macOS 10.11 (El Capitan) or later. TDS listeners can receive a 20 percent discount by visiting: our ImageFramer landing page.
Updates and Such
Big thanks to all of our Patreon members! You will be receiving a free copy of my next eBook!
Registration invitations have gone out to Reserve List members for the Autumn in Wine Country Photography Workshop. If you are on the Reserve List, but didn't get your invite, please contact me. You can learn more about the workshops by visiting the TDS Workshops Page.
B&H and Amazon tiles on www.thedigitalstory. If you click on them first, you're helping to support this podcast. And speaking of supporting this show, and big thanks to our Patreon Inner Circle members.
And finally, be sure to visit our friends at Red River Paper for all of your inkjet supply needs.
Texas-based Red River Paper recently announced a new fine art paper, Palo Duro Etching. The new paper is a 100 percent cotton rag paper and is free of optical brightener additives. The paper is designed to offer warm white tones, deep blacks and a subtle texture to accurately recreate traditional darkroom fine art prints.
See you next week!
More Ways to Participate
Want to share photos and talk with other members in our virtual camera club? Check out our Flickr Public Group. And from those images, I choose the TDS Member Photo of the Day.
Podcast Sponsors
ImageFramer 4 - ImageFramer is used by artists, professional and amateur photographers, scrapbookers, framers, and people who simply want their family photos to look better.
Red River Paper - Keep up with the world of inkjet printing, and win free paper, by liking Red River Paper on Facebook.
The Nimbleosity Report
Do you want to keep up with the best content from The Digital Story and The Nimble Photographer? Sign up for The Nimbleosity Report, and receive highlights twice-a-month in a single page newsletter. Be a part of our community!
Want to Comment on this Post?
You can share your thoughts at the TDS Facebook page, where I'll post this story for discussion.
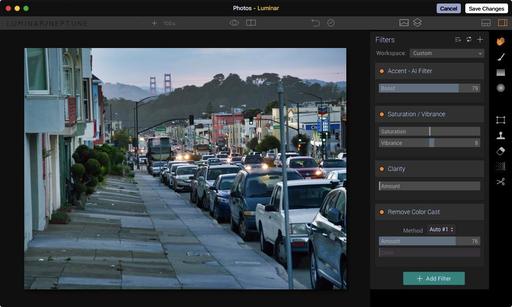
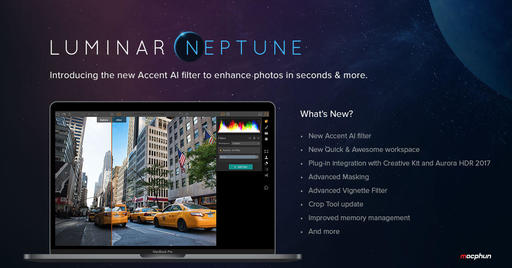
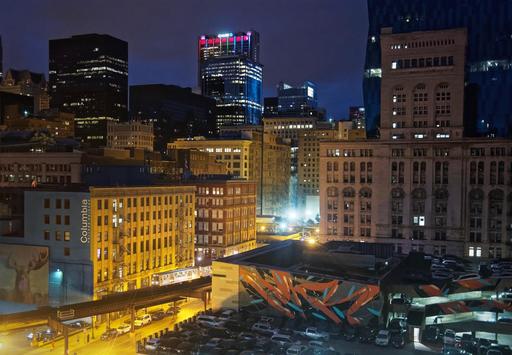 Chicago with Train at Twilight - Olympus PEN-F, Panasonic 40mm f/1.7, ISO 3200. Processed in Photos for macOS and Luminar. Photo by Derrick Story.