Apple CEO Tim Cook, Craig Federighi, and the rest of the cast kept the audience waiting a few extra minutes before walking out on stage. But once Tim jogged into the spotlight, he and his crew had plenty to say.
"We have six important announcements to share with you this morning," the CEO remarked. He then rolled right into Apple TV, noting that Amazon Prime Video will be joining the family. (Yay!)
The next topic was Apple Watch. Kevin Lynch took the stage and introduced watchOS 4. Machine Learning makes a substantive appearance with the predictive Siri watch face. The watchface dynamically updates, depending on time of day and the data the watch knows about you. Plus, there's lots of new fitness stuff, as you would expect, and a redesigned Music app. But there was nothing specifically about Photos for watchOS 4 (maybe next time). Free upgrade for Apple Watch owners coming this Fall.
Next up, was the Mac. The next macOS will be named High Sierra, with an updated Safari that features auto-blocking video (yay!). Safari will also apply machine learning to incorporate Intelligent Tracking Prevention. So those creepy ads that follow you all over the Internet can be eliminated. macOS High Sierra with launch a public beta soon, then be available for all users this Fall. If will run on any machine that can currently run Sierra.
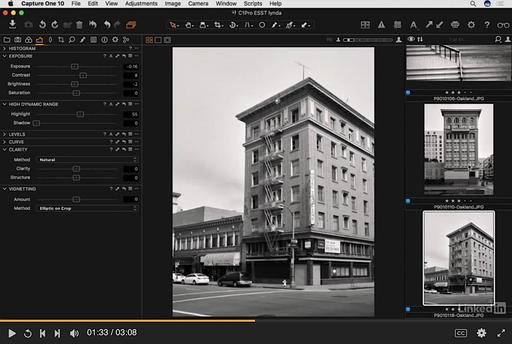
Updated Photos for macOS
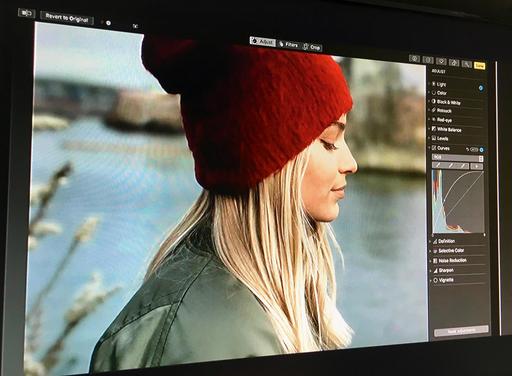
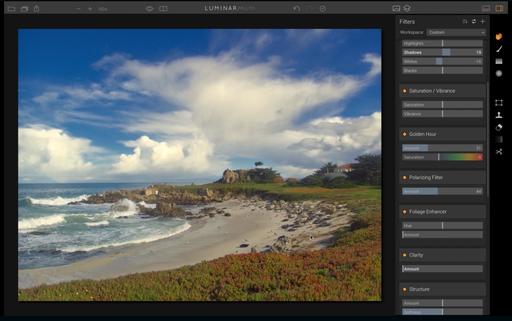
Much to my delight, Photos received a reasonable amount of airtime on stage. More machine learning organization, as I anticipated. But a few unexpected surprises included the addition of curves, selective color editing, and synchronized adjustments with third party apps. Apple has also upped its game with photo books.
The UI for Photos for macOS also receives some polishing, as you can examine for yourself with the above illustration. All in all, this looks like a solid update to Photos. I'm looking forward to learning more of the finer details.
Beefy iMacs
As the keynote rolled on, Apple covered updates to the iMacs, MacBook Pros, with a new configuration for the 13" MacBook Pro that starts at $1,399. The MacBook Air seems to be sticking around as well.
We also got a sneak peek at the upcoming iMac Pro (the most powerful Mac Apple has ever created). Will ship with 8-Core, 10-Core, or 18-Core Xeon Processor options. This workstation will be a blast for photo and video editing. The new iMac Pros will ship at the end of the year, starting at $4,999.
iOS 11 is Crazy Good
On the iOS front, ApplePay will now work for person to person payments. Siri will be using on-device learning to start suggesting things that we would like.
The Camera in iOS also gets an upgrade. On the photo front, HEIF provides better compression and quality (still sharable). Better low light capability for the camera as well.
Photos for iOS sees plenty of improvement. We can select the frame we want in Live Photos to be the key image. Apple has also added effects, like long exposure, loop, and bounce, to our image editing options for Live Photos. Memories movies can be viewed in portrait orientation as well as landscape. And Apple has added more categories to Memories, such as pets, sporting events, night out, anniversary, and more.
The introduction of AR kit will provide developers with sophisticated augmented reality tools, enabling them to develop apps and incorporate this technology into their existing software.
iPad Pro 10.5"
A new tablet joins the family, the 10.5" Retina Display iPad Pro. Lots of performance improvements, including the new ProMotion, with refresh rate at 120Hz. You will be able to choose the refresh rate you want, depending on the task at hand and how much battery you want to use. This also makes the Apple Pencil even more responsive and natural.
The Serif software chief walked into the spotlight, with an iPad Pro demo showing off their Infinity Photo software that performed every bit as well as something that you would see on a desktop workstation, but with the portability and tactile experience of a tablet. Serif demonstrated blend modes, lighting effects, and object selection (including hair!).
The new iPad Pro will start shipping soon for $649 to $949. And with iOS 11 for the iPad, which is coming this Fall, users will get a Dock, a new App Switcher, and drag and drop functionality. A new app called Files will make organization so much smarter, not only on the device itself, but across iCloud and the other file sharing systems. And the Notes app gets a huge upgrade as well, thanks in large part to the enhanced integration of Apple Pencil.
Apple Reinvents Music for the Home
Phil Schiller returned to the stage to introduce HomePod. "Just like iPod reinvented music in our pockets, HomePod will change it in our homes." Crazy speaker technology controlled by an Apple A8 chip, that provides real-time acoustic modeling. No matter the design of the room, the HomePod will provide a tailored music experience.
The speaker system can interact directly with Apple Music via audio commands ("Hey Siri"). It can provide all sorts of music-related information, what Apple calls a built-in Musicologist. Additional, the HomePod can play our podcasts, control our home, and provide general information. HomePod will set you back $349 when it ships.
All in all, it was a marathon keynote presentation (2.5 hours), will plenty for photographers to sink their teeth in to.
Book or Videos: Photos for macOS
Explore the world of modern photography with my The Apple Photos Book for Photographers that features insightful text and beautiful illustrations.
And if you'd like to cozy up to a video at the same time, watch my latest lynda title, Photos for macOS Essential Training
You can share your thoughts at the TDS Facebook page, where I'll post this story for discussion.