Recently in Photos for OS X

  Page 4 of 12 in Photos for OS X  

Spots, blemishes, and scratches are easily fixed using the Retouch Tool in Photos for macOS. Because it's so easy to use, some downplay its power. Watch this video to see what Retouch is great at, and the corrections that may require a different approach.

Eliminate flaws with Retouch from Photos for macOS High Sierra Essential Training by Derrick Story

And for those pesky jobs that are a bit challenging for Photos' Retouch Tool, you can still remain in your workflow by using the Erase Tool and Clone & Stamp in the Luminar Editing Extension that comes bundled with the standalone application.

retouch-tool.png The Retouch Tool in Photos for macOS can handle most jobs. But if your need more, add Luminar to your workflow.

Regardless of which approach you take, these tools are very powerful and non-destructive.

New Photos for macOS High Sierra Training!

Is it time for you to learn the ins and outs of the latest version of Photos? Take a look at Photos for macOS High Sierra Essential Training on LinkedIn Learning, or on lynda.com. Maximize your iPhone photography and complement the work you do with your mirrorless cameras as well. You'll love your cameras even more...

You can share your thoughts at the TDS Facebook page, where I'll post this story for discussion.

Photos for macOS High Sierra has many functions that might surprise enthusiast photographers who underestimate its power. One of my favorite timesavers is Copy and Paste Adjustments. Here's a video that shows how to use it.

Copy and paste adjustments from Photos for macOS High Sierra Essential Training by Derrick Story

This function is particularly helpful when you have a series of images captured under similar lighting conditions. Edit the first photo in the sequence, copy the adjustments (Image > Copy Adjustments) then navigate to the next shot to paste them (Image > Paste Adjustments).

copy-adjustments.png

I find it helpful to turn on thumbnails (View > Show Thumbnails) so I can navigate from one shot to the next while remaining in Edit mode. You don't have to click the Done button until you've finished with the entire batch.

Using Copy and Paste Adjustments is a great way to speed up your workflow. Give it a try.

New Photos for macOS High Sierra Training!

Is it time for you to learn the ins and outs of the latest version of Photos? Take a look at Photos for macOS High Sierra Essential Training on LinkedIn Learning, or on lynda.com. Maximize your iPhone photography and complement the work you do with your mirrorless cameras as well. You'll love your cameras even more...

You can share your thoughts at the TDS Facebook page, where I'll post this story for discussion.

Blue skies that aren't blue enough, office lighting that makes the walls a funny color, a shirt that's just a shade off - these are all perfect scenarios that can be addressed by the new Selective Color tool in Photos for macOS High Sierra. And I have a free video to show you exactly how it works.

Use Selective Color for specific areas from Photos for macOS High Sierra Essential Training by Derrick Story

Start by choosing a color well in Selective Color that is closest to the color that you want to adjust. Then use the eyedropper to fine tune your selection. Now you can adjust Hue, Saturation, Luminance, and Range. And you can perform these acts of magic on multiple colors in your photograph. And the best part is that this is a non-destructive edit. So experiment! You can do no harm.

selective-color.png This walkway was once yellow. Now it's green. That's Selective Color.

And once you know that you have this tool at your disposal, you can keep it in mind when you shoot. "I love this scene, just wish the car was a little brighter." Shoot the scene, then make the car brighter by using Selective Color - super handy, and fun.

New Photos for macOS High Sierra Training!

Is it time for you to learn the ins and outs of the latest version of Photos? Take a look at Photos for macOS High Sierra Essential Training on LinkedIn Learning, or on lynda.com. Maximize your iPhone photography and complement the work you do with your mirrorless cameras as well. You'll love your cameras even more...

You can share your thoughts at the TDS Facebook page, where I'll post this story for discussion.

Photolemur 2.2 Spectre is a next-generation picture enhancement application for both Mac and Windows. It uses image recognition technology that understands different components of a photo, then applies up to 12 different algorithms in an attempt to improve it. And in many instances, it does this quite well. Photolemur is available as a standalone app, as a plugin for Lightroom, and my favorite method, as an editing extension for Photos for macOS.

before-and-after.jpg 
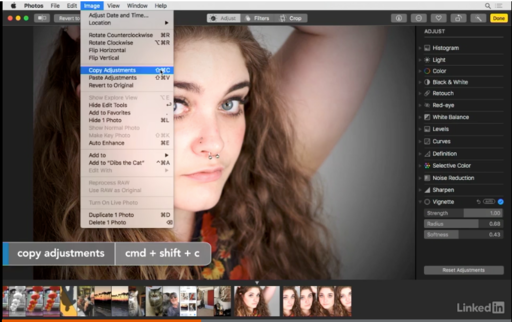
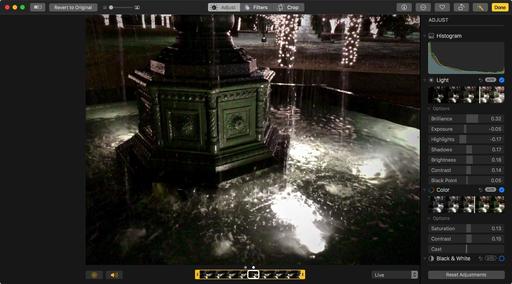
Photolemur editing extension running with Photos for macOS High Sierra.

Regardless of how your access the software, it couldn't be easier to use. Simply open a RAW file or Jpeg in Photolemur, then let it work its magic. After 15 seconds or so, you're presented with an edited image. During that time, the software analyzed your shot and applied some or all of the following corrections.

  • Color recovery - Automatically restores the natural beauty of the blues, yellows, and reds.
  • Sky enhancement - Recognizes clouds of all kinds - cirrus, cumulus, stratus and nimbus - and makes them look as lifelike as possible.
  • Exposure compensation - Senses the inaccurate exposure settings and enhances them by lightening or darkening.
  • Natural light correction - Knows what time of the day is and how to adjust the tones, exposure, and contrast of mornings, evenings, dusk, and dawn.
  • Foliage enhancement - Neutralizes the lost of colors of nature shots emphasizing the trees, leaves, plants and makes them as true-life beautiful as possible.
  • Noise reduction - Identifies and reduces digital noise.
  • Smart dehaze - Detects and fixes distracting elements such as haze, fog, mist, dust, and smog.
  • Tint perfection - Finds a pleasing balance between colors depending on image itself and its composition.
  • Raw processing.
  • JPG fix - Detects imperfections in JPEG files and brings them back to a clear, clean, and crisp state.

original-landscape.jpg 
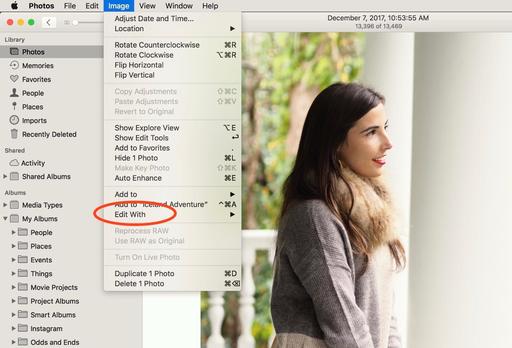
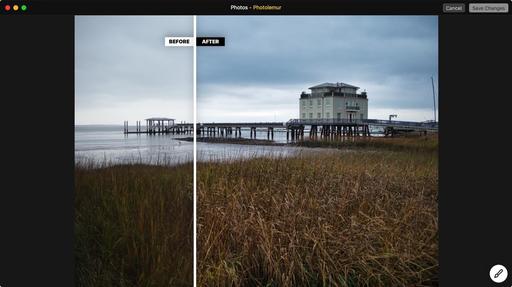
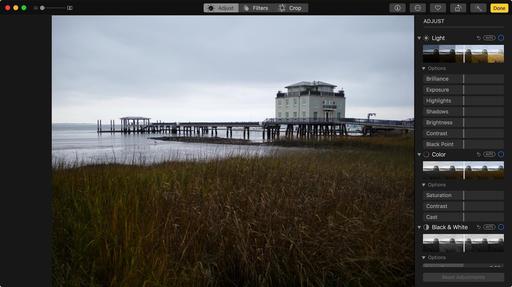
Original, unedited landscape in Photos for macOS.

===============================

finished-landscape.jpg 
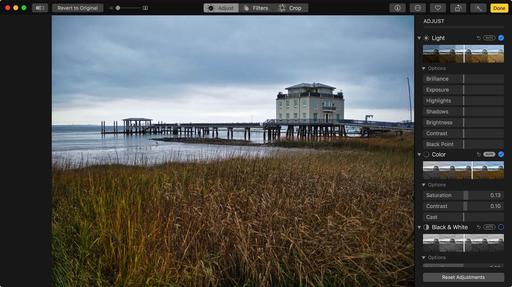
Finished version after Photolemur processing and a few small tweaks in Photos for macOS. Notice the improvement in the sky and how the building and foliage have been brightened. Photos by Derrick Story.

The only user-controlled adjustment in Photolemur is the Boost slider. This is available after the image has been processed, and it allows you to fade the effect if you wish. The Boost slider is helpful, but I really like using Photolemur as a plugin for Lightroom or as an editing extension for Photos because I can make my own final adjustments once the image has been AI enhanced.

This is the best of both worlds. Photolemur serves as a foundation auto-enhance tool that I can then customize to my own tastes.

using-boost.jpg 
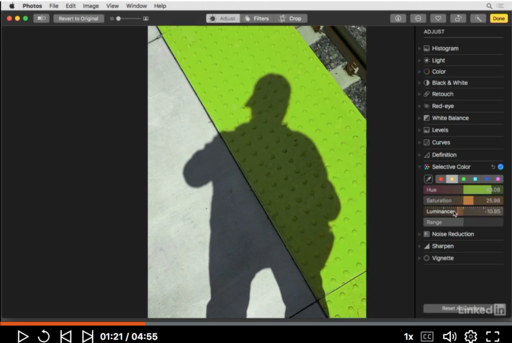
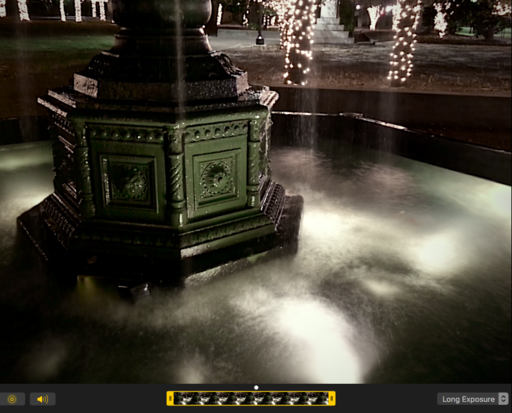
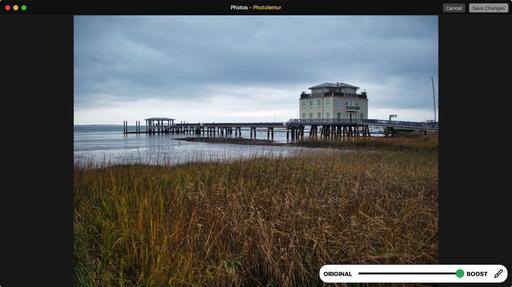
The Boost slider allows you to back-off the enhancement to a percentage that looks right to you.

As you would expect, the technology works better with some shots than others. I was particularly impressed with how Photolemur reads a sky and improves it automatically. It's also quite good with foliage. It can handle multiple images at once, so you can run a batch of vacation shots through Photolemur and turn them around quickly.

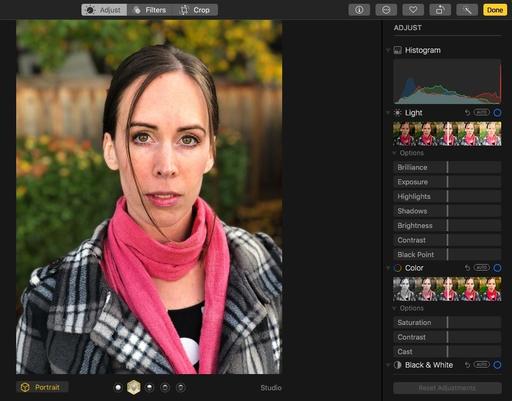
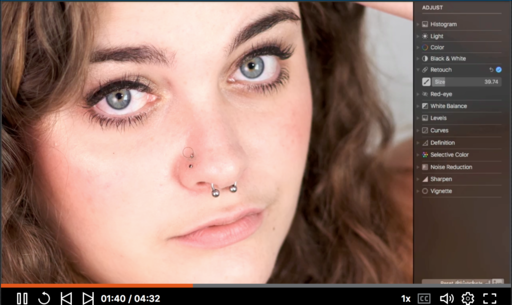
Photolemur does an admirable job with portraits as well, although sometimes your subjects might not want to be as sharp and crisp as the application might render. Here's where the Boost slider is very important.

Overall, I'm impressed with the results of this app. In my workflow, it can serve as a first-step edit in Photos, allowing me to fine-tune the image after the initial pass. That being said, I would trust the standalone version to a quick-process batch of vacation photos to prep them for a on-the-fly slideshow.

I tested the downloadable version of Photolemur that's offering a family license and bonuses for $45 (limited time, Mac or Windows version). A single license version is also available in the Mac App Store for $14.99, which seems like a great price for this software.

New Photos for macOS High Sierra Training!

Is it time for you to learn the ins and outs of the latest version of Photos? Take a look at Photos for macOS High Sierra Essential Training on LinkedIn Learning, or on lynda.com. Maximize your iPhone photography and complement the work you do with your mirrorless cameras as well. You'll love your cameras even more...

You can share your thoughts at the TDS Facebook page, where I'll post this story for discussion.

One of the things that I love about Photos is that it automatically backs up my content to iCloud and makes those images available to all of my devices. But when you have big shoots, such as a travel adventure, you probably don't want every outtake using up space in your online storage. That's when a secondary, sorting library is very handy.

photos-refined-library.jpg I captured hundreds of images on my trip to South Carolina. But I'm only using cloud storage for my selects. Here's how.

The way Photos works is that only your System Library is connected to the cloud. But you can create as many standalone libraries as you want, and switch among them. So, if you create a standalone library to sort your big shoots, then only move your selects to the System Library, you have the best of both worlds. First, here's how to create a standalone library.

Create additional Photos libraries from Photos for macOS High Sierra Essential Training by Derrick Story

One you have your standalone "sorting library," upload the entire shoot. You can mark your selects using the heart icon (favorite), or you can use the star-rating system that I describe in my Photos for macOS High Sierra Essential Training on LinkedIn Learning, or on lynda.com.

Once you have your selects, export them as Unmodified Originals (File > Export > Export Unmodified Original), switch to your System Library, then import those selects. You still have all of the outtakes in the standalone library that you'll want to keep and backup. But your working library is far more refined and efficient.

I've been using this system for my personal work since the introduction of Photos for macOS High Sierra that included the new filtering function. It's really easy. All of my essential images are archived and shared across devices. Those outtakes live on my backup drives. It's a nice workflow.

New Photos for macOS High Sierra Training!

Is it time for you to learn the ins and outs of the latest version of Photos? Take a look at Photos for macOS High Sierra Essential Training on LinkedIn Learning, or on lynda.com. Maximize your iPhone photography and complement the work you do with your mirrorless cameras as well. You'll love your cameras even more...

You can share your thoughts at the TDS Facebook page, where I'll post this story for discussion.

For those projects that require that you use Photoshop or another specialized imaging application, you can summon the Edit With command in Photos for macOS High Sierra.

Edit-with-command-2.jpg

By doing so, you can continue to use Photos as your organizing library, but take advantage of the extensive toolset in Photoshop. The trick is to apply Edit With outside of the normal editing mode in Photos. Here's a video that walks you through all of the steps.

Edit With for external editors from Photos for macOS High Sierra Essential Training by Derrick Story

In my testing, Edit With worked great with Photoshop. But performance varied with other applications. So some trial and error will be required. But when everything falls into line, this adds helpful roundtripping to your Photos app. And sometimes that's just what you need.

New Photos for macOS High Sierra Training!

Is it time for you to learn the ins and outs of the latest version of Photos? Take a look at Photos for macOS High Sierra Essential Training on LinkedIn Learning, or on lynda.com. Maximize your iPhone photography and complement the work you do with your mirrorless cameras as well. You'll love your cameras even more...

You can share your thoughts at the TDS Facebook page, where I'll post this story for discussion.

Live View on an iPhone is fun, but the Long Exposure mode that you can tap afterward is even better.

To create dreamy water effects, just make sure that Live Photo is on with your iPhone. Hold the camera very steady during exposure, and keep your position for a few seconds afterward. This ensures that the stationary objects in the composition will be sharp.

live-view-mode.jpg Choose your "view" of Live View in Photos for macOS. Image by Derrick Story.

llong-exposure-applied.png Water is far more interesting after Long Exposure is applied.

Then, open the image in Photos for macOS High Sierra. Go to Edit mode (press the Return key to do so), and edit the image as your normally would. Adjust color, contrast, etc. Once you're finished, click on the Live popup menu in the lower right corner and choose Long Exposure. Then just sit back and admire.

The combination of Live Photo and Long Exposure enables you to capture flowing water shots without a tripod. It's really something.

New Photos for macOS High Sierra Training!

Is it time for you to learn the ins and outs of the latest version of Photos? Take a look at Photos for macOS High Sierra Essential Training on LinkedIn Learning, or on lynda.com. Maximize your iPhone photography and complement the work you do with your mirrorless cameras as well. You'll love your cameras even more...

You can share your thoughts at the TDS Facebook page, where I'll post this story for discussion.

Changing Portrait Mode on the Fly

The last thing that photo subjects want when we're taking their picture is for us to waste a lot of time fooling with our camera. If you're using Portrait Mode on a recent model iPhone, you may be tempted to scroll through the options at the point of capture. There's really no need to... that is if you're using Photos for macOS High Sierra to manage your images.

portrait-mode.jpg

When you open your Portrait Mode image in Photos, and go to editing mode, you'll see all of the same options that were available at capture. So if you recorded in Natural, but decided later that you wanted Studio, you can make that change in Photos. No pressure, no problem.

So, just make sure you're in any Portrait mode, then fire away. Your photo subjects will thank you.

New Photos for macOS High Sierra Training!

Is it time for you to learn the ins and outs of the latest version of Photos? Take a look at Photos for macOS High Sierra Essential Training on LinkedIn Learning, or on lynda.com. Maximize your iPhone photography and complement the work you do with your mirrorless cameras as well. You'll love your cameras even more...

You can share your thoughts at the TDS Facebook page, where I'll post this story for discussion.

Great New Screenshot Tool in iOS 11

iOS 11 is a robust update for iPhone and iPad users. One of my favorite surprises is the improved screenshot tool.

screenshot-tools.jpg

The capture process is still the same: you simultaneously press the power and home buttons to record a screen. But now, instead of sending the image directly to your Camera Roll, a mini-thumbnail appears in the lower left corner.

Tap on the thumbnail, and the image appears with cropping guides around it, plus a markup toolbox below it. You can choose from a variety of writing and highlight instruments with some basic ink colors to annotate the screenshot. When finished, tap Done to send it to your Camera Roll.

But wait, there's more! In the upper right corner is an Undo command. Lower right has a + symbol, that tapped on, reveals a text tool, signature option, magnifier, and more. You can go crazy adding callout arrows, text and even cartoon dialog bubbles. The Share button in the lower left lets you send the image off to a friend directly from this screen.

If you have iCloud sharing on, the image will appear on all of your connected devices inside the automated Screenshots album in Photos for iOS and Photos for macOS.

If you haven't checked out the new screenshot function in iOS 11, do so now. Become familiar with the tools. That way, you'll put it to use. It's another great way to document our world and catalog the information.

You can share your thoughts at the TDS Facebook page, where I'll post this story for discussion.

macOS High Sierra Release Today

Photographers who have been patiently waiting to see the final version of Photos for macOS High Sierra should get their opportunity today. We anticipate the latest OS from Apple to be available by 6PM.

macOS-high-sierra.png

Changes to the Photos app include a refreshed UI with persistent sidebar, new filtering options to find your images faster, new editing tools (curves and selective color), and a host of minor refinements.

In my testing with the beta version of the new Photos, I found it to be a good iCloud citizen with no disruption to my multi-Mac and iOS workflow. In fact, in general, High Sierra feels like an upgrade that you can embrace sooner than later. Some exceptions include those with Fusion drives and older versions of Final Cut, who should to do some research first.

I'll report more on the upgrade process as soon as Apple posts it, and I have a chance to go through the standard process.

Book or Videos: Photos for macOS

Explore the world of modern photography with my The Apple Photos Book for Photographers that features insightful text and beautiful illustrations.

And if you'd like to cozy up to a video at the same time, watch my latest lynda title, Photos for macOS Essential Training

You can share your thoughts at the TDS Facebook page, where I'll post this story for discussion.