If you have a full frame DSLR, you can easily digitize your favorite 35mm slides at home. I'm using a Canon 5D, Sunpak 444D flash, and a 1980s slide copier. That's all you really need.
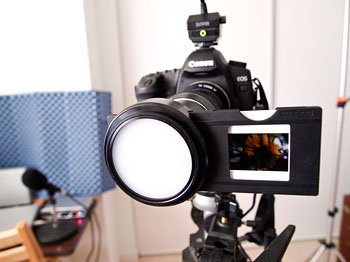
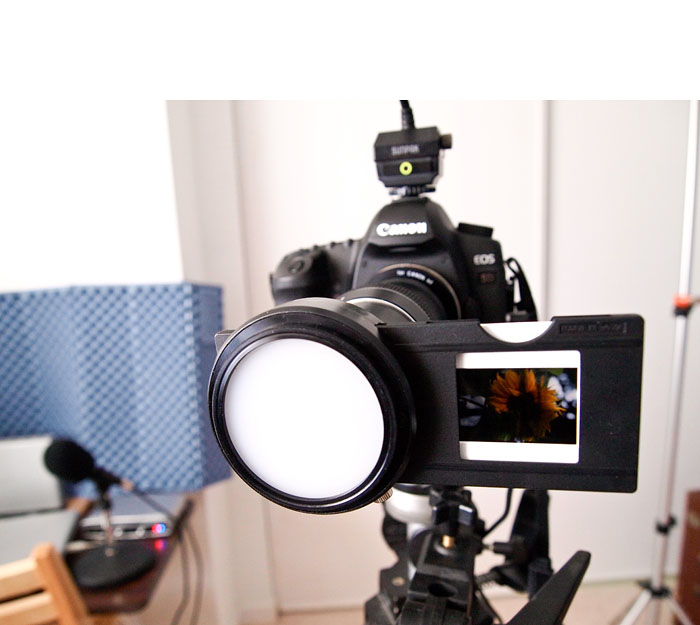
Like many long time photographers, I have a collection of 35mm slides. Some of these images are prized shots that I would love to have digitized. I tested a few outside services, but after viewing the results, really wanted to have more control over the process. So in about an hour, I rigged up the home slide digitizer using the following parts.
Photo of Canon 5D 35mm slide digitizer by Derrick Story. See complete set of images on the Digital Story Flickr page.
- Canon 5D DSLR
- Sunpak 444D flash in manual mode
- Vintage 35mm slide copier attachment
- Tripod
- Photoflex arm to align the flash
- Photoflex flash diffuser
- Cable release
I had a Canon T-ring adapter for the slide copier so it would mount to the 5D. All exposure settings are manual. So I set the ISO to 100 and shutter speed to 1/60th. There's no aperture setting on the slide copier. Instead, you control exposure by how much light you output from the flash. That's why I dug out an old Sunpak 444D flash. It has manual exposure settings (1/16th through full), and I had an extension cord for it too. I set the flash on 1/8 power for dense slides, and 1/16 power for those a bit lighter. I position the flash a few feet from the front of the slide copier and align it so the light evenly illuminates the image.
One of the advantages of this approach is that I can shoot in Raw mode. So once I digitize the image, I can use Aperture, Lightroom, Adobe Camera Raw, or even iPhoto to tweak tone and color. With the 12MP 5D, the file resolution is 3929 x 2619. If I use the 5D Mark II, then I get 5616 x 3343, enough to make a 12" x 19" print at 290 ppi.
I wouldn't recommend this approach if you have hundreds of slides to scan -- an outside service makes more sense in those situations. But when you want to digitize a handful of your favorite images, this method works great. And for Canon shooters who have upgraded from the 5D to the 5D Mark II, you can put your old 5D to work and just leave the rig set up permanently in your studio. In fact, why not tether it to a laptop for a slick digitizing production rig?
I have sample images and lots of shots of the rig itself on the Digital Story Flickr page, including a comparison scan from DigMyPics and this method.
For more interesting home projects, be sure to check out the Photography DIY section on The Digital Story.
-


This is such a great article. Thanks for sharing.
Have you used this apparatus to digitized negatives? In photoshop, you can reverse the images from true to negative view. I am assuming that you can use the same tool to reverse a negative to a positive. But I don't like to spend money on assumptions.
Have you tried copying color or b&w to a positive in photoshop?