Portrait mode on current iPhones is incredible. Just open the Camera app, slide the options to Portrait, and shoot away. And as impressive as the results initially look, you can make them even better with just a few clicks. Here's how.
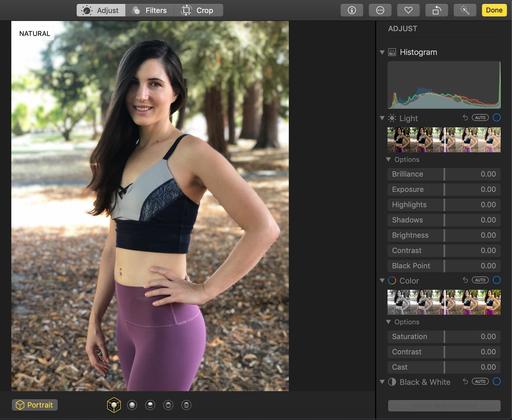 The original photo is good. But we can make it better.
If you have iCloud enabled (and why wouldn't you?), your picture is automatically saved to Photos on the Mac and your other iOS devices. With just a few clicks in Photos, you can take that good image to then next level.
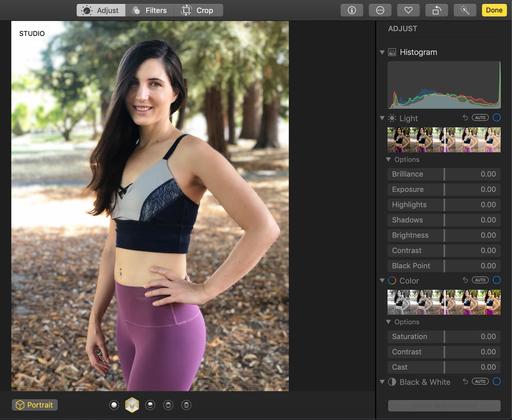 Choose the right lighting scheme. I captured in Natural, but I think Studio looks better.
Regardless of which lighting scheme you captured in, you have the option of switching in Photos. In this case, I think the Studio lighting scheme is more flattering. (Notice the options displayed at the bottom of the image.)
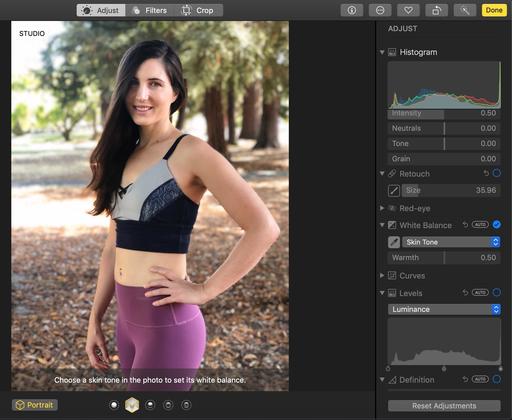 Improve skin coloring.
iPhones are generally pretty good with image color. That being said, I've found that there's room for improvement as well. Because we took this portrait in the shade, her coloring was still a bit cool.
I selected White Balance in Photos for macOS, choose Skin Tone from the popup menu, and enabled the eye dropper. I then clicked on her face to adjust the white balance for her particular skin tones in this environment. They looked much better afterward.
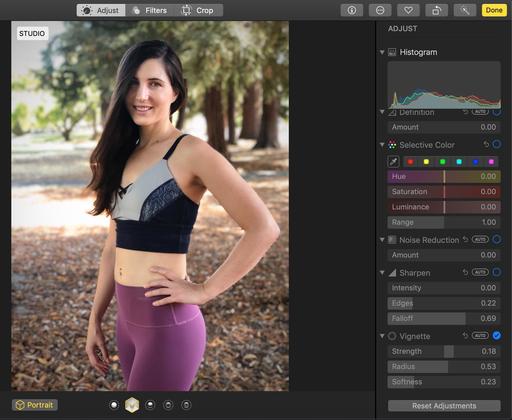 Adding a soft vignette puts more emphasis on the subject.
One trick that many portrait photographers use is to add a soft vignette to put more emphasis on the subject. The technique is to start with full Strength, adjust the Radius and Softness, then back off Strength until the vignette isn't detectable to viewer. However, even as a subtle effect, it makes a noticeable improvement in the image. (Here I only needed about 20 percent strength for this portrait.)
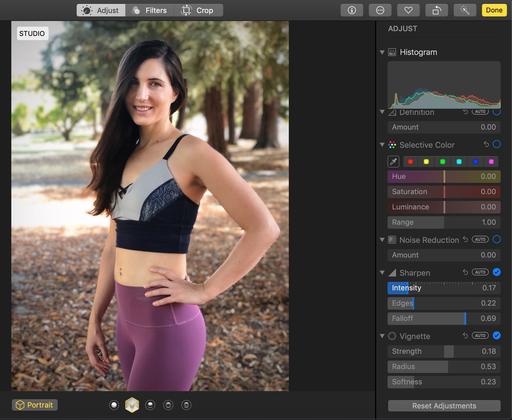 Finally, just a bit of sharpening to clean things up.
The last step is add a dash of sharpening as well. Move the Intensity slider (don't worry about Edges and Falloff - they are fine where they are) to about 20 percent. You don't want to over-sharpen portraits, just restore crispness to the overall image.
If you're in Photos for macOS, press the M key to see your before and after. Using Photos in iPadOS, while still in editing mode, just tap on the image to see the original version.
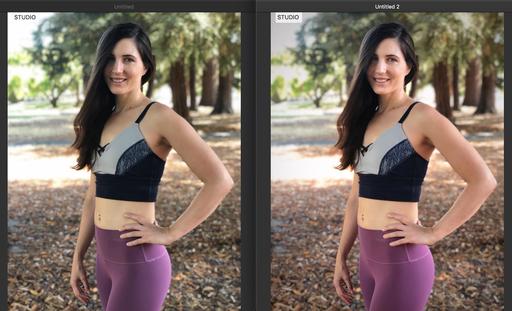 Side-by-Side: A good portrait gets even better. Photos by Derrick Story.
Now, thanks to iOS 13 and iPadOS, all of these techniques can be applied on the iPhone and iPad as well, with the exception of White Balance. When in Photos for mobile devices, use the Warmth and Tint adjustments instead.
Portraits captured with iPhones are truly impressive thanks to computational photography. But the artist in you can take them to the next level. Your subjects will thank you.
And stay tuned for my upcoming training on LinkedIn Learning and lynda.com titled, Photos for macOS Catalina and iPadOS that shows you all the amazing things you can do with this new software. Hope to release this title in November. Stay tuned! In the meantime, you can watch Photos for macOS Mojave right now. It will provide you with the info you need for making great slideshows!
You can share your thoughts at the TDS Facebook page, where I'll post this story for discussion.


