Recently in Photography

  Page 132 of 382 in Photography  

after-drobo-upgrade.jpg

My Drobo 5D was on the edge. It was nearly out of space.


Here's the configuration after the upgrade with four 3 TB drives, one 1 TB HD, and the SSD chip.


My first Drobo setup featured two 3 TB hard drives and three 1 TB drives. And they held me nicely for a number of months. But recent checks of the Drobo Dashboard made me realize that it was time to upgrade a couple of those HDs. So I purchased a pair of Toshiba 3TB 7200 RPM SATA drives and began the nerve-wracking swapping process. (Nerve wracking only because when I tried this with my first Drobo, it wouldn't accept the upgrade. My hope was that things would be better with the 5D.)

The good news was, not only was I able to successfully add more space, but I was increasing speed too. The new Toshiba drives spin at 7200 RPM, replacing the slower 5400 RPM Segate Barracudas.

capacity-before-upgrade.jpg 
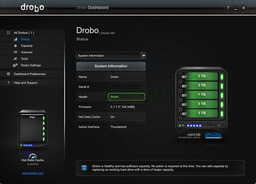
This is what my Drobo Dashboard looked like before the upgrade. Just a few more RAW files, and I would begin to see the yellow warning message.

The process was fairly simple. I shut down the Drobo, ejected the first 1 TB hard drive, replaced it with a 3 TB Toshiba, then rebooted. The Drobo formatted the new drive for me, then went about its business of adding it to the fold. Seven hours later, all the lights were green, and I was ready to go.

I did a little testing and was pleased with how it responded. So I went for round 2. Once again I shut down the Drobo, replaced a 1 TB drive with a 3 TB Toshiba, and waited another 7 hours for the process to run its course. This is what I was greeted with when I reopened the Drobo Dashboard.

capacity-after-upgrade.jpg 
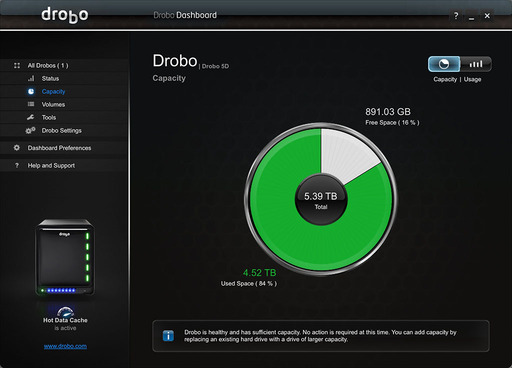
Here's the capacity chart after the 6 TB upgrade.

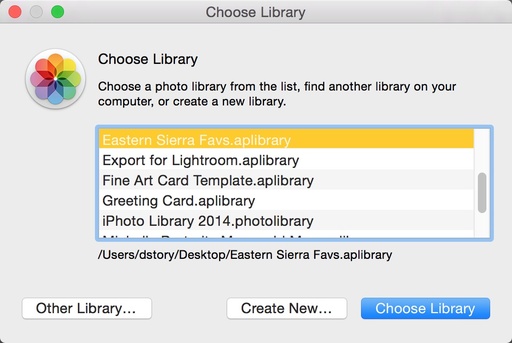
I tested the new units by opening a large Aperture library that I store on the Drobo. Everything worked great. Browsing was fast, zooming was smooth, and image editing was performed without a hitch.

When you look at the Drobo capacity pie chart, you'll see that there's 9 TBs of available storage, even though I have 13 TBs of hardware in there. The other 4 TBs are used as part of Drobo's backup system. That's how you're protected if a drive goes bad. You won't lose any data. This same system allows you to upgrade the drive bays, as I've explained in this article.

The Drobo 5D can hold a maximum of 32 TBs of storage. For now, I'm happy with the four 3 TB drives and the lone 1 TB Seagate. I'll probably upgrade that bay with a 5 TB 7200 drive once the prices drop a bit more.

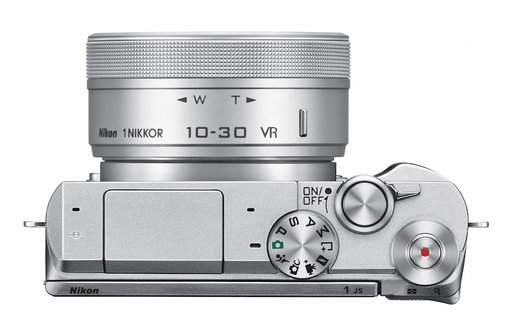
In the meantime, I'm back to backing up my Aperture and Lightroom libraries. In fact, with all of this additional storage space, I should go out and shoot a few more pictures.

Want to Comment on this Post?

You can share your thoughts at the TDS Facebook page, where I'll post this story for discussion.

aperture-photos-libraries.jpg

You can open your current Aperture or iPhoto libraries in Photos for OS X. The command to do so isn't part of the Photos for OS X menu system. Rather, you close the Photos app, then relaunch holding down the Option key. By doing so, you can switch to a new library or convert an existing iPhoto or Aperture library.

Photos will create its own version of the library, leaving the original Aperture or iPhoto library intact (as shown above). Keep in mind that the converted Photos library is different than your Photos System Library that's located in your Pictures folder. The System Library is the default Library that also communicates with iCloud services and allows you to share images across devices.

The Converted Library might be best considered a special project that's its own container. You can switch back and forth between the System Library and the Converted Library by relaunching Photos for OS X while holding down the Option key.

Option-Open.jpg Launching Photos with the Option key pressed presents you with a dialog box similar to this.

If you want to test this feature, I recommend that you use a small library that will allow you to practice the ins and outs of this procedure without processing gigabytes of information. There is no easy way to merge the Converted Library with the existing System Library. There's an advanced technique that's really a workaround, but I haven't tested it enough to write about at this time.

However, if you want to practice converting an iPhoto or Aperture Library, here are the steps.

  • Quit Photos for OS X and make sure Aperture and iPhoto are closed too.
  • Hold down the Option key and relaunch the Photos application.
  • Look for the Library you want to convert in the Choose Library dialog box.
  • Click on the Library you want to convert, then click on the Choose Library button.
  • Photos for OS X will prepare the converted library for you and place the container in the same directory as the original library.

Aperture Tips and Techniques

To learn more about Aperture, check out my Aperture 3.3 Essential Training (2012) on lynda.com. Also, take a look at our Aperture 3 Learning Center. Tons of free content about how to get the most out of Aperture.


Want to Comment on this Post?

You can share your thoughts at the TDS Facebook page, where I'll post this story for discussion.

I have a stash of DIY reflectors that I've collected over the years. That's right, I like shiny objects.

Recently I used the salvaged guts from a non-working portable lightbox (see illustration at bottom of the article) to help illuminate this popular gear shot of an Olympus OM-D E-M5 Mark II. I wanted to show off a few accessories for the camera to illustrate the journal post, Pimp My Ride.

I could have gone the standard softbox route, after all, I do work in a photography studio. But I wanted a different look, something that better connected the camera to the outside world.

"Olympus OM-D E-M5 Mark II Decked Out" by Derrick Story on Flickr

So I put the OM-D in a window box (you know, the kind for flowers and herbs) and used two of my funky reflectors to kick light back to the front of the camera. Often I find myself propping up these fill lights with coffee cups, rolls of gaffer's tape, and anything else that happens to be within reach.

I then increased the exposure compensation to +1 to ensure a good rendering of the highlights, and squeezed off a few frames with my original E-M5 sporting the 25mm Leica f/1.4 prime set to f/5.6 (to ensure enough depth of field).

diy-reflectors.jpg

Since publishing the shot on Flickr, the image was picked up by Explore and has garnered more than 28,000 views and 345 likes.

I first learned about these do-it-yourself reflectors when I was apprenticing for a commercial photographer in Southern California, Dennis Tannen, who wrapped empty Polaroid boxes in aluminum foil and used them as kick lights for his product photography. I was so impressed by his cleverness, and the quality of his work, that I've continued the tradition of using "shiny objects" for my product work.

Want to Comment on this Post?

You can share your thoughts at the TDS Facebook page, where I'll post this story for discussion.

This week on The Digital Story Photography Podcast: Street Photography Ethics with Gordon Lewis, Travel Photography in London with David Hobby, Nikon 1 J5, and the Phhhoto App - All of this and more on today's show with Derrick Story.

Weekly Update - "Meet Phhhoto" - If you haven't heard of the app Photo you're certainly not alone. Phhhoto is a mobile GIF/cinemagraph/image sequence creating and sharing platform that was released last year on iOS and will be coming to Android in the future. As of this week it now has over a million registered users and is really starting to take the world by storm.(Source: Fstoppers)

Nikon 1 J5

In other news... "Nikon 1 J5" The Nikon 1 J5 mirrorless camera has been announced as the latest member of Nikon's mirrorless lineup. It offers a more traditional shape and feel with a contoured grip and secondary command dial. Its 1"-type 20.8MP BSI-CMOS sensor - which does not have an anti-aliasing filter - offers a boost in resolution over its predecessor, and is also capable of 4K video capture at 15 fps. Intact from the previous model is a 171-point hybrid AF system with 105 phase-detect points. Also included is built-in Wi-Fi with NFC.

The Nikon 1 J5 will be available in late April in several kit options: with the 1 Nikkor 10-30mm f/3.5-5.6 PD-Zoom for $499.95, with 10-30mm and 1 Nikkor VR 30-110mm f/3.8-5.6 for $749.95, and with 1 Nikkor 10-100mm f/4-5.6 for $1049.95. (Source: DP Review)

And finally... Issue 19 of c't Digital Photography is out. In-depth articles include: Stills from 4K Video, Samsung NX1 vs Canon 7D Mark II, How to Digitize Slides, 10 Shoe Mount Flashes Compared, and everything you need to know about Food Photography. We have a Spring Offer for TDS listeners only: 30 percent off subscription price (over 40 percent off the newsstand). Go to http://bit.ly/ds1530 to sign up. Special price expires 4/13/15.

Story #1 - "Street Photography Ethics with Gordon Lewis" - If you like street shooting you're probably going to love this conversation. Gordon has a new book, Street Photography: The Art of Capturing the Candid Moment, and you can win a copy by clicking on this link.

Story #2 - From the Screening Room - The Traveling Photographer: London with David Hobby. Long time photojournalist and "Strobist" David Hobby takes you to the streets of London and talks shop.

You can watch David in action by visiting the TDS Screening Room at lynda.com. While you're there, you can start your 7 day free trial to watch all of David's movies, plus every other title in the library (including over 20 by yours truly).

Virtual Camera Club News

News from SizzlPix: For April, We'll make it easy to delight your friends and relatives with SizzlPix of your or their favorite photographs with a Digital Story exclusive! Take a 20 percent discount; 25 percent on 2 or more shipped together. Just put "TDS April" in the comments space on the SizzlPix.com ordering page.

Thanks to everyone who recently reviewed the TDS Podcast in iTunes!

BTW: If you're ordering through B&H or Amazon, please click on the respective ad tile under the Products header in the box half way down the 2nd column on thedigitalstory.com. That helps support the site.

Download the Show

In addition to subscribing in iTunes, you can also download the podcast file here (45 minutes). You can support this podcast by purchasing the TDS iPhone App for only $2.99 from the Apple App Store.

More Ways to Participate

Want to share photos and talk with other members in our virtual camera club? Check out our Flickr Public Group. And from those images, I choose the TDS Member Photo of the Day.

Podcast Sponsors

lynda.com - Learn lighting, portraiture, Photoshop skills, and more from expert-taught videos at lynda.com/thedigitalstory.

Red River Paper -- Keep up with the world of inkjet printing, and win free paper, by liking Red River Paper on Facebook.

SizzlPix! - High resolution output for your photography. You've never seen your imagery look so good. SizzlPix.com. SizzlPix! now is qualified for PayPal "Bill Me Later," No payments, No interest for up to 6 months, which means, have your SizzlPix! now, and pay nothing until May!

Want to Comment on this Post?

You can share your thoughts at the TDS Facebook page, where I'll post this story for discussion.

Fujifilm X20

I've been testing the eyefi mobiPRO 32 GB SDHC card with a variety of WiFi-less cameras, and have settled on using it regularly with the Fujifilm X20 compact. (Jump here to see the full report on the eyefi mobiPRO.)

But through my testing I've discovered that the user experience is much better if I follow a specific set of steps when using the new mobiPRO. So I'm sharing that "magical" sequence with you now, because it most likely works for other cameras too.

  • First, set the preferences for your eyefi mobiPRO card by using its bundled USB reader. (More on that here.) For mobile device usage, I recommend that Selective Transfer is on, and that RAW Transfer is off. Eject the card and put it in your camera.
  • In the camera menu, Turn Eye-Fi Transfer to "off." This saves precious battery power while you're out shooting.
  • When it's time to take a break and send your favorites to a mobile device, enable Eye-Fi Transfer on your camera (via the menu) and "Protect" the first photo you want to send to your device.
  • On your device, go to the Wi-Fi settings and log in to the personal network that the eyefi mobiPRO card is transmitting. Then go to the iOS or Android Eyefi Mobi app and receive the first photo.
  • With everything still connected, "Protect" the other images that you want uploaded to your mobile device. They should flow over instantly.
  • Once all the images have been transferred, go to your camera's menu and turn off Eye-Fi Transfer.

At this point, you can play with your photos on the mobile device, upload them to social network sites, or display them for others. I recommend that when you return home, copy all of the pictures off the eyefi mobiPRO card to your computer, and organize them in your standard photo management application.


More Help on Managing Your Mobile Photos

In my lynda.com title, Managing Your Mobile Photos, I cover a variety of backup solutions for both iOS and Android users. These tutorials will help you build the perfect backup solution for you, so that you never lose a single memory.

Want to Comment on this Post?

You can share your thoughts at the TDS Facebook page, where I'll post this story for discussion.

When I returned from Cuba, I had many requests for pictures of classic American cars. The thinking being that once the embargo is lifted (if indeed that happens), the streets of Havana will soon look much different.

Instead of putting a gallery online, I decided to make fine art notecards to give as gifts and to sell in the Nimble Photographer store. This was a good choice because the images on paper feel more like my experiences in Cuba than they would as a gallery on a computer display.

Fine Art Notecards of Classic American Cars in Cuba

After selecting a handful of pictures to feature, the next step was to decide the "look" for the prints. I wanted something that felt like traditional Havana. I played with various color palettes and opted for a rendering that had a mild tobacco tint. I then added an old style film edge as the finishing touch.

The Lone Freeway - Cuba "The Lone Freeway, Cuba" - We traveled on this quiet highway from Havana to Trinidad. Photo by Derrick Story.

Red River Paper

The paper selection was also important. I chose 72lb. GreenPix Photo Matte 7x10 by Red River Paper. GreenPix Photo Matte is made of 100 percent post-consumer recycled content (this felt consistent with Cuba's judicial use of resources). Plus it has a subtle warm tone that complemented the tobacco palette I was using for the photos.

Producing these prints feels far more satisfying than a web gallery. During my time in Cuba, I interacted with many artists and often purchased their work to bring home. I remember how carefully I guarded the items until I returned to my room that night.

Producing prints that I can hand to others keeps those good feelings alive. And now, I feel more connected than ever to the artists who inspired me during my visit.

More About Cuba

I've also published the following articles about Cuba:

Want to Comment on this Post?

You can share your thoughts at the TDS Facebook page, where I'll post this story for discussion.

For the Feb. 2015 gallery, TDS shooters waved farewell to 9 years of photo assignments. Join them for one last showing: Goodbye.

farewell-br-feb2015.jpg


Photo by Brian Reynolds. Brian writes, "Since October 2007, I've participated in 42 Photo Assignments. This is my 43rd and last Photo Assignment. It shows prints of the previous selected entries along with some of the cameras and equipment used to make them. In the back (propped up by just a few of my camera bags) you can see the Sizzlpix from the "Eyes" assignment. So long, and thanks for all the fish." See all of the great images from this month's assignment by visiting the gallery, Goodbye.


Want to Comment on this Post?

You can share your thoughts at the TDS Facebook page, where I'll post this story for discussion.

It's probably no coincidence that the impressive Alpha a7 II mirrorless full frame camera features 5-axis sensor-based image stabilization, which arrives not too long after Sony's substantial investment in Olympus (who developed the technology for their Micro Four Thirds bodies). And like any good marriage that produces beautiful offspring, everyone just counts their blessings.

sony-a7ii-front.jpg

Unlike the earlier a7 that uses optical stabilization only, the a7 II can, according to DP Review, "When shooting with Sony FE lenses that are already stabilized, denoted by 'OSS' on the lens, the a7 II will use both the sensor-based and lens-based IS together, to get the optimal image stabilized performance. The affects of image stabilization can be seen in a live preview when looking through the EVF or LCD." Talk about the best of both worlds, at least when it comes to IS.

This also opens the door for using practically any optic that can be mounted to the camera, while still enjoying top-notch stabilization. That's one way to fill out your lens roadmap in a hurry.

For me personally, the 1.3 pound, 5" x 3.78" x 2.36″ body is a bit heftier than I like to carry for my mirrorless shooting. But then again, if I didn't already have a full frame camera, this $1,700 beauty might just turn my head.

Want to Comment on this Post?

You can share your thoughts at the TDS Facebook page, where I'll post this story for discussion.

This week on The Digital Story Photography Podcast: Nifty Street Shooting Trick, Hands On with the Olympus SH-2 compact zoom, Color Calibration - All of this and more on today's show with Derrick Story.

Weekly Update - Uploader for Instagram in Mac App Store - Now you can send images to your Instagram account from a Mac. (Source: The Digital Story)

In other news... "X-Transformed? Fuji film X30 Review" The lovely X30 didn't fare as well as its predecessors, largely because its 2/3" sensor seems to be falling behind the competition. Other cons included:

  • Vigorous noise reduction at higher ISO settings destroys detail
  • Colors can be a little odd especially in overcast conditions
  • Takes too long to wake from sleep mode
  • Control ring could be made more use of for menu navigation and play back
  • Limited exposure compensation because of physical dial design

(Source: DP Review)

Story #1 - Double Your Street Shooting Pleasure - Unless you're in the state of Arkansas operating under the potential dark cloud of the Personal Rights Protection Act (not law yet, thankfully), I have a few techniques for you to consider during your next street shoot.

Assuming that you'll be using a mirrorless or other non-DSLR camera, dust off your favorite fast aperture prime lens, and tune in to the first feature story of today's show. Cameras that I've tested these techniques on include the Fujifilm X-20, Olympus OM-D E-M10, and the Samsung NX3000.

olympus-sh-2-front.jpg

Story #2 - "First Look at the Olympus SH-2 RAW Shooting Compact" - This pants-pocketable compact features an impressive 25-600mm zoom, one-touch WiFi, and RAW format. Other goodies include:

  • 16MP 1/2.3" BSI CMOS Sensor
  • TruePic VII Image Processor
  • 3.0" 460k-Dot Touchscreen LCD Monitor
  • 5-Axis Sensor-Shift Image Stabilization
  • Full HD 1920 x 1080p Video at 60 fps
  • Live Composite, Filters, and Photo Story

I've been carrying one around for about a week, and I have a hands-on report for you in today's second feature.

Story #3 - From the Screening Room - Advanced Color Workflows for Photographers with Joe Brady. Do you want to demystify color calibration for your monitors and mobile devices. Joe explains it all in this informative lynda.com title.

You can watch Joe in action by visiting the TDS Screening Room at lynda.com. While you're there, you can start your 7 day free trial to watch all of Joe's movies, plus every other title in the library (including over 20 by yours truly).

Virtual Camera Club News

News from Red River Paper: Have you made your archive 6 prints yet for 2015? The best backup system in the world is high quality prints properly stored. I recommend that photographers do a print run of their best twice a year. Here's why.

Thanks to everyone who recently reviewed the TDS Podcast in iTunes!

BTW: If you're ordering through B&H or Amazon, please click on the respective ad tile under the Products header in the box half way down the 2nd column on thedigitalstory.com. That helps support the site.

Download the Show

In addition to subscribing in iTunes, you can also download the podcast file here (38 minutes). You can support this podcast by purchasing the TDS iPhone App for only $2.99 from the Apple App Store.

More Ways to Participate

Want to share photos and talk with other members in our virtual camera club? Check out our Flickr Public Group. And from those images, I choose the TDS Member Photo of the Day.

Podcast Sponsors

lynda.com - Learn lighting, portraiture, Photoshop skills, and more from expert-taught videos at lynda.com/thedigitalstory.

Red River Paper -- Keep up with the world of inkjet printing, and win free paper, by liking Red River Paper on Facebook.

SizzlPix! - High resolution output for your photography. You've never seen your imagery look so good. SizzlPix.com. SizzlPix! now is qualified for PayPal "Bill Me Later," No payments, No interest for up to 6 months, which means, have your SizzlPix! now, and pay nothing until May!

Want to Comment on this Post?

You can share your thoughts at the TDS Facebook page, where I'll post this story for discussion.

Now it's easier than ever to move images from your Mac to Instagram. A new app, Uploader for Instagram ($4.99), allows you to right-click on a photo and send it to your account.

upload-to-instagram.jpg

The app isn't going to win any awards for design, but it does work. Once you control-click or right-click on the picture, choose Share to Instagram from the Services popup menu, then you're greeted with a spartan interface that lets you zoom and position the picture.

uploader-interface.jpg

There are also filters available, but I wasn't impressed with them (especially compared to the native IG filters). You can add a caption and hashtags, however, and performance is snappy. Within a few seconds my photo was displaying happily in my Instagram feed.


Join me on my Instagram site as I explore the world of mobile photography. And now Instagram features 15-second movies too.

Want to Comment on this Post?

You can share your thoughts at the TDS Facebook page, where I'll post this story for discussion.