Recently in Photography

  Page 244 of 382 in Photography  

Model Shoot with the Olympus E-P3

We know that the Olympus E-P3 is capable in the field (see the latest DP Review test). That's the first environment that most think of when considering a micro four-thirds system camera. But what about in the studio? Could you use an E-P3 with the kit 14-42mm zoom (f/3.5 - 5.6) for a model shoot? I decided to find out.

ashley_full_portrait.jpg 
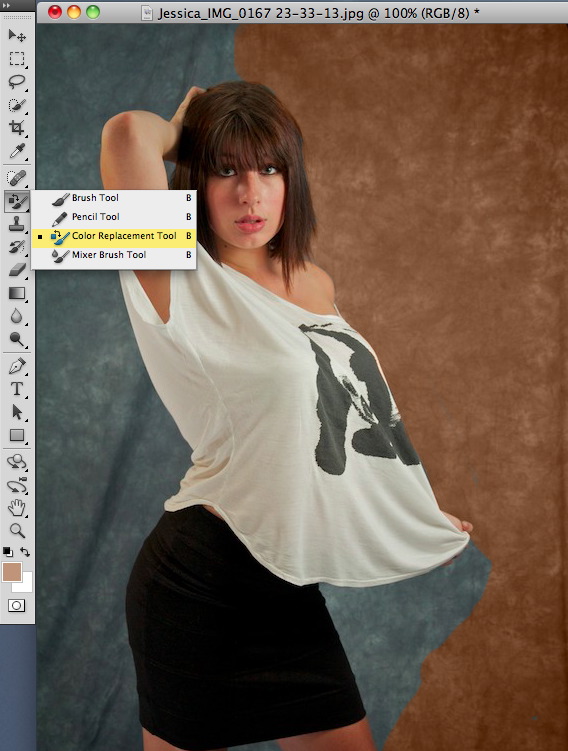
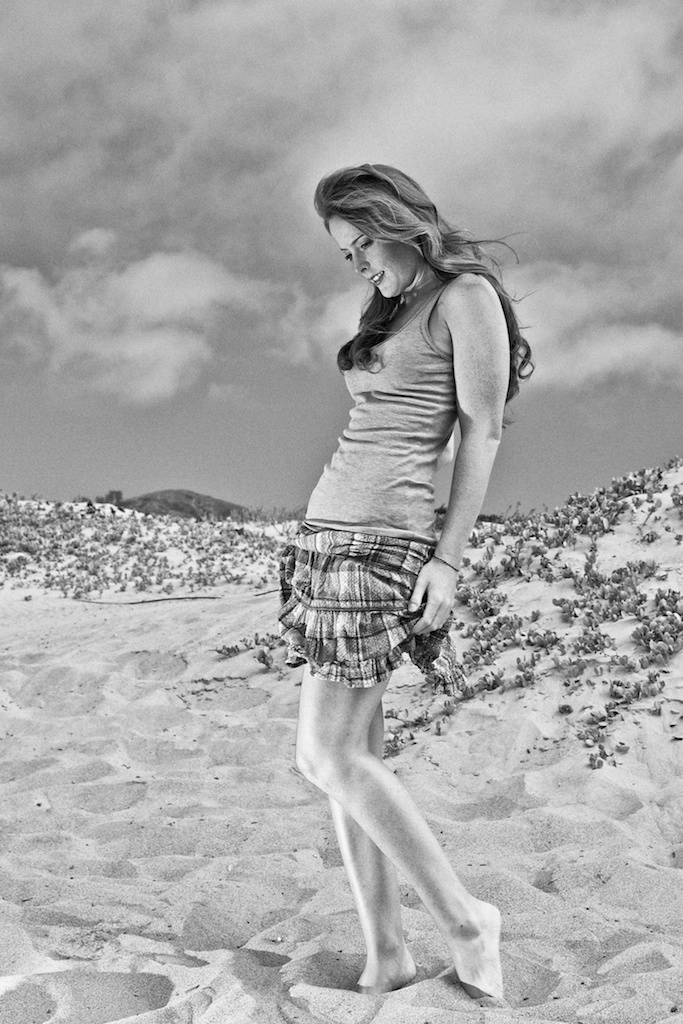
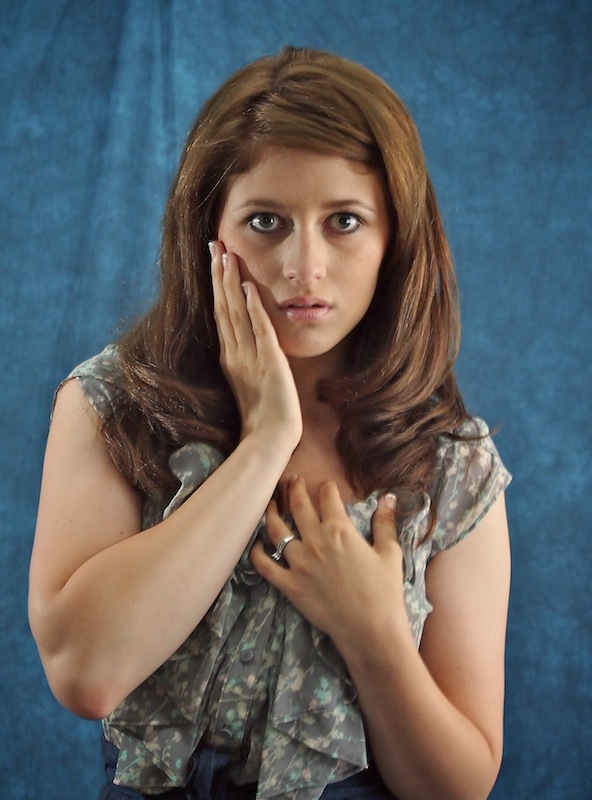
Ashley Tuttle photographed by Derrick Story using an Olympus E-P3 with stock 14-42mm zoom. Click on image for larger size.

The Set Up

I set an appointment with Ashley Tuttle, who will be one of the models for the TDS Sonoma Coast Workshop on Aug. 25th, to test the E-P3. I set a Olympus FL-50R flash in a softbox as the main light, then added an Olympus FL-36R as a fill light using a Rogue FlashBender to help shape the environment. I controlled both flashes wirelessly using the E-P3 - no additional lighting accessories were needed.

I added the Olympus Electronic Viewfinder VF-2 to the E-P3 during the shoot so I wouldn't have to use the LCD to compose. Quite honestly I did this for two reasons: 1) it's easier to compose during live action, and 2) it looks more professional than holding the camera like a regular point and shoot. What I liked about the viewfinder was the ability to really concentrate on the subject. What I didn't like was that the image was artificial looking in terms of exposure and color, especially for review. So I would switch to the wonderful 614,000 dot, 3" LCD to gauge the quality of the shots.

The autofocus was extremely fast during the shoot. The E-P3 had no problem keeping pace with Ashley and me. The flash system also worked quite well, and the FL-50R fired consistently, even when in the softbox.

Camera Settings

I set ISO to 640, and had a typical speed/aperture setting of 1/15th at f/5. I would have liked to push the ISO a bit higher to give me more speed. But since this was a portrait, I wanted to maintain as much image quality as possible. I used Jpeg/Fine mode, mainly because my imaging software doesn't support RAW yet from the E-P3. The picture size was 4032 × 3024 (12.2 MP).

The Image Results

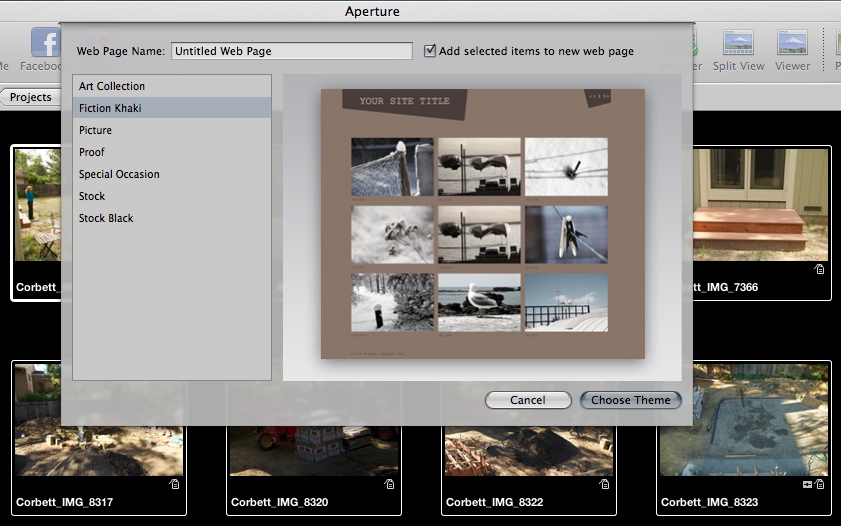
I processed the Jpeg as I normally would in Aperture 3. As expected, the color balance and exposure from the E-P3 was consistently good. At 100 percent (as shown below), I did notice some smearing of detail in the hair and on the skin. There was also some slight ghosting on the finger nails and other edges. I attribute the ghosting to the kit lens, and the detail to having to use Jpeg mode instead of Raw.

ashley_zoom_100.jpg 
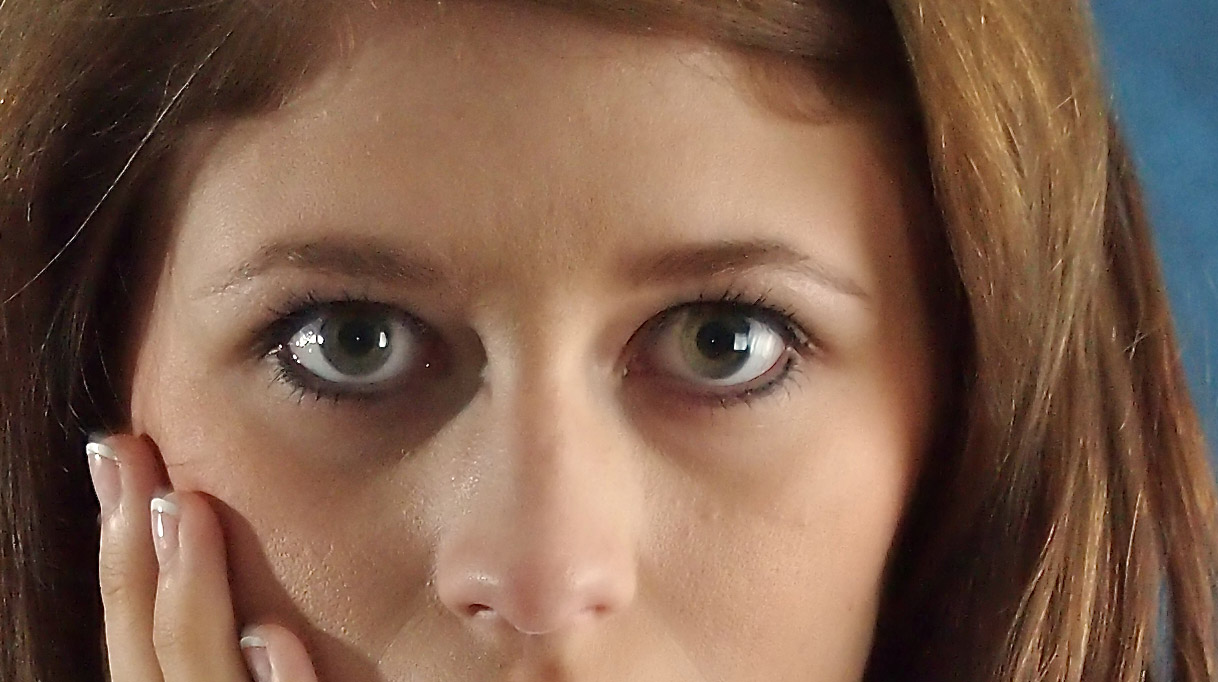
100 percent enlargement of portrait. Click on image for full view.

The Bottom Line

For a casual portrait, I thought the E-P3 with stock zoom performed OK. The autofocus speed was terrific, off-camera flash system was reliable, and overall exposure and color was quite good.

But this is not a set up that you would want to use for professional portraits, at least without a few modifications. I would switch to one of the prime lenses (12mm, 17mm or 45mm) to give me a faster aperture and more detail. I think RAW would also be essential to retain as much detail and image quality as possible, especially at the higher ISOs.

The Olympus E-P3 is what I carry in my backpack when I'm traveling light, but still need the versatility of a system camera. And it's nice to know that in a pinch I can also use it for portraits with controlled lighting. I want to get my hands on the new 45mm f/1.8 prime. I'm also looking forward to RAW support in both Aperture and Lightroom. There's a lot of potential here.

More on the Olympus E-P3

New 14-42mm Kit Lens

Pricing and Availability Announced for Olympus E-PL3

Touchscreen Photography Moves Beyond iPhone with Olympus E-P3

Olympus PEN E-P3 with 12mm f/2.0 Prime Lens


The Digital Story on Facebook -- discussion, outstanding images from the TDS community, and inside information. Join our celebration of great photography!


epson_r2000_front.jpg

I've been testing the Epson Stylus Photo R2000 inkjet printer, using it for a variety of images from saturated color compositions on glossy stock to B&W on matte surfaces. It's a printer that I like a lot because it combines high quality with convenience. But I've noticed that it has different strengths than the Epson R2400 that I've been using since 2006.

The R2000 uses Epson UltraChrome Hi-Gloss 2 ink ( 8 cartridges: photo black, matte black, cyan, magenta, yellow, red, orange, and gloss optimizer) while the R2400 uses the UltraChrome K3 ink (8 cartridges: cyan, magenta, yellow, light cyan, light magenta, photo (or matte) black, light black, and light light black). It's interesting how these two ink combinations play out when viewing prints over the course of weeks. (You can read more about these Epson inks here.) Since I know the R2400 so well, I became curious about UltraChrome Hi-Gloss as I watched how the R2000 performed in comparison.

In short, the R2000 color output on luster and gloss surfaces is impressive. The gloss optimizer is an excellent finishing touch that appears to increase saturation while helping to protect the image during handling. The R2400 produces better B&W output, and I like how matte prints look emerging from this printer.

Both ink sets have excellent archival rating. The UltraChrome Hi-Gloss 2 color prints should hold up for 80 years if treated well. UltraChrome K3 ink output is rated over 100 years for color, and under the right conditions, up to 200 years for B&W. (I'm using commonly accepted statistics that are based upon Wilhelm Imaging Research.)

Bottom line for me is this: For color printing on gloss or luster surfaces, I like the convenience and appearance of prints from the Epson R2000 that uses the UltraChrome Hi-Gloss 2 Ink set. You might be interested to know that the gloss optimizer is the first cartridge to run dry because it's used on every print. That's probably why Epson puts two of those cartridges in a box while only single cartridges for the color inks. (For extra credit, guess which cartridge ran dry next? It was the cyan, followed by the yellow.)

I'll continue to use the R2400 with the UltraChrome K3 Ink for my B&W work, mostly on matte surfaces. I love the way fine art paper feels, and I really hate changing the photo black/matte black cartridges in the R2400. So I'm sticking with matte for most of my B&W prints.


The Digital Story on Facebook -- discussion, outstanding images from the TDS community, and inside information. Join our celebration of great photography!


There comes a point when photo management software, such as Aperture or Lightroom, just makes sense. In this week's podcast, I share my top 5 reasons for adopting one of these two great applications. I also talk a bit about how they work their magic. In other news, I provide a preview to the upcoming August Sonoma Coast Photography Workshop that 8 lucky members of our community will be participating in. Can you image have your photography workstation in a beautiful library with doors open directly to the beach? That's what we're in store for.

Listen to the Podcast

You can also download the podcast here (30 minutes). Or better yet, subscribe to the podcast in iTunes. You can support this podcast by purchasing the TDS iPhone App for only $2.99 from the Apple App Store.

Monthly Photo Assignment

Reflection is the August 2011 Photo Assignment. You can read more about how to submit on our Member Participation page. Deadline for entry is August 30, 2011.

TDS Nov. Aperture Workshop

I've an Aperture Workshop on Nov. 12th and 13th. If you want your name on the reserve list, or just more information, drop me a line. BTW: We include a professional model shoot as part of this workshop. Just saying...

More Ways to Participate

Want to share photos and talk with other members in our virtual camera club? Check out our Flickr Public Group. And from those images, I choose the TDS Member Photo of the Day.

Podcast Sponsors

Red River Paper -- The $7.99 Sample Kit is back! And with free shipping.

Make Your Photos Sizzle with Color! -- SizzlPix is like High Definition TV for your photography.

Need a New Photo Bag? Check out the Lowepro Specialty Store on The Digital Story and use discount code LP20 to saven 20% at check out.


Technorati Tags:
, , , , ,


Photoshop's Color Replacement Tool

Color Replacement Tool

I just read a helpful tip on Rick Sammon's blog about the Color Replacement Tool in Photoshop. I thought this would be a good opportunity for me to brush up on the technique, so I practiced on a few studio portraits I had recently shot.

You can find it in the Brush Tool options on the left side tool bar. Option-click on a color you want to brush in, and start painting. I usually turn on Find Edges to help me stay within the lines. One additional tip is to create a new layer for your brush work. It's much easier to make adjustments up the road.

Thanks Rick for reminding me of this great Photoshop technique.


The Digital Story on Facebook -- discussion, outstanding images from the TDS community, and inside information. Join our celebration of great photography!


Ever since I can remember, Aperture has had the same five templates for creating web galleries. But thanks to Themes for Aperture by Graphic Node, we have 51 more visual possibilities to choose from when building online galleries.

Themes for Aperture

You download the program from the Mac App Store, then browse the various templates they've designed. You do the browsing in the Themes for Aperture application. Once you find something that catches your eye, mouse over it to reveal the "Save Theme" button. Click on it, and you get a dialog box asking if you want to save the template to the default location in the Aperture container. Click OK, and you're set.

Now, when you choose Web Page from within Aperture, the new template is available right along side the standard offerings from Apple. I tested a handful of them, and they created fresh looking, workable galleries, just as promised. The only difference I noticed was that the Graphic Node themes took a bit longer to export than the standard Apple selections, sometimes up to twice as long. For example, a gallery that began with 37 Raw files took 5 minutes to export on my MacBook Air using the stock black Apple theme, but took 10 minutes when I selected the Precision Camouflage template from Graphic Node. But once the export was complete the theme worked flawlessly.

I was able to remove a theme I didn't want by quitting Aperture, going into the Aperture application container, drilling down to Content > Resources > Web Themes, and dragging the particular web theme to the trash.

Graphic Node is offering an introductory price of $19.99 for Themes for Aperture through August 15th. Some fun stuff in there!

More Aperture Tips and Techniques

My next Aperture Workshop is Nov, 12-13, 2011 in Santa Rosa, CA. Write me if you're interested in attending.

To learn more about Aperture 3, check out my Aperture 3 Essential Training on Lynda.com. Also, take a look at our Aperture 3 Learning Center. Tons of free content about how to get the most out of Aperture.


The Digital Story on Facebook -- discussion, outstanding images from the TDS community, and inside information. Join our celebration of great photography!


Time Saving Lightroom Tips

dp_school_logo.png

Here are 5 Tips That Will Save You Time in Lightroom 3 by Scott Williams. My favorite of the bunch is Copy and Paste Settings, just like one of my favs in Aperture is Lift and Stamp. Love that stuff!


The Digital Story on Facebook -- discussion, outstanding images from the TDS community, and inside information. Join our celebration of great photography!


Tips for Posing Teenage Guys

mcp_actions.jpg

If you shoot senior portraits, then you know there are just as many guys as gals. Yet, most articles focus on posing young women. In this post, photographer Cherie Hogan provides us with 7 easy tips for posing guys. She has some good stuff here. This is one you might want to bookmark.


The Digital Story on Facebook -- discussion, outstanding images from the TDS community, and inside information. Join our celebration of great photography!


Recently I commented in one of my podcasts that I wasn't finding much of interest in the Photography category of the Mac App Store. I must not have been looking close enough. Because hiding there, just waiting to be discovered, is FX Photo Studio ($9.99 US) and FX Photo Studio Pro ($39.99 US). Each brings a ginormous collection of easy to apply photo effects, snappy performance, and an easy to use interface.

fx Photo Studio Click on image for larger version.

Import and Export

The Import Photo button lets you tap your Aperture, iPhoto, or Lightroom library. It's well implemented, allowing you to browse folders, projects, albums, and collections. The file size that gets handed off to FX Photo Studio is the preview resolution that you establish in your photo management application.

Also, this is not a roundtrip. Once you import the file into FX Photo Studio, you have to save it to a destination, that is, unless you use iPhoto. In that case, you can export directly from FX Photo Studio (either version) back to iPhoto.

With the Pro version, you can import Raw files directly into the app. This is along with the Tiff, Jpeg, PNG, and BMP files that both versions accept. Direct import (of any file type, not just Raw) using the Load Image command also allows you to export larger files out of FX Photo Studio, because you are no longer constrained by the imported preview size from the photo management application that prepared the photo for hand off. In other words, if you want big files to come out of FX Photo Studio, then bring them in directly and not through Aperture or Lightroom. (Unless of course, you have really big previews set for those apps.)

The application also allows you to import directly from a device, such as your digital camera.

Lots of Effects

Both versions of FX Photo Studio have 172 effects organized into 21 categories. As you might imagine, this is the strength of the program. It provides thumbnail examples of each effect applied to the image that you're working on. Once you choose one, it renders a larger version fairly quickly. You can then fine tune the look with adjustment sliders that accompany the effect. There were many that I liked a lot.

You can apply multiple effects to a single image. And if you come up with something that you really like, you can save it as a preset for later use, or for sharing with a friend.

Adjustment Sliders

The Pro version includes a number of image adjustment sliders that include the controls that you'd expect such as exposure, temperature, saturation; plus highlights, shadows, sharpening, and more. These work fine on both Jpegs and Raw files, but they are for fine tuning your image rather than replacing your primary image editor. Photoshop and Aperture will still sleep well at night.

Nice Touches

Both versions include some nice touches such as an attractive full screen mode, real time zooming (including trackpad gestures), side by side comparison, and direct sharing to the major social network sites including Flickr, Facebook, and Twitter. You can also email a photo directly from FX Photo Studio using Mail.app.

Bottom Line

Unless you need to process Raw files in FX Photo Studio, the standard version for $9.99 should provide you with all that you need. It interacts with iPhoto, Aperture, and Lightroom (using their previews), has all 172 effects, plus includes the above-mentioned goodies, except for the additional image adjustment sliders. If you want to open Raw files directly in the app, then you will need the the $39.99 Pro version.

I think FX Photo Studio is worth the ten bucks for the effects alone. Plus I very much enjoyed the speed of this application on my MacBook Air, not to mention the handsome, easy to use interface. FX Photo Studio is a gem awaiting your discovery in the Mac App Store.


The Digital Story on Facebook -- discussion, outstanding images from the TDS community, and inside information. Join our celebration of great photography!


Matt Kloskowski has published his Insta-Lightroom Nashville-like Preset for Lightroom as a free download from the Adobe Photoshop Lightroom Killer Tips blog.

 Insta-Lightroom Nashville-like Effect

He writes, "Every time I turn around, I see photos from the Instagram app that have that old vintage look to them. It's kinda funny, because it can throw up a photo of someone's shoes, but it always seems to look good when it has a old-vintage style with a really strong vignette added to it. Anyway, here's a free preset that mimics the style."

It's cool, and it's free. What more could you ask for?


The Digital Story on Facebook -- discussion, outstanding images from the TDS community, and inside information. Join our celebration of great photography!


Off Camera Flash at the Beach

For this shot of Danielle Winkler at San Buenaventura State Beach in Ventura, I set a Canon 320 EX on the ground pointing upward at her, then triggered it with a Canon 60D using the 15-85mm EF-S zoom set to 31mm. The built-in flash trigger on the 60D is very handy when you're traveling light, but still want to experiment with lighting.

I mounted a polarizer over the lens to maintain the tone in the sky. Exposure was 1/250th at f/5.6. The photo was processed in Aperture 3 with the Silver Efex Pro 2 plug-in. The image grain was added during processing. The original picture was captured at ISO 160 and is virtually noise free.

I had a blast during the entire shoot experimenting with different lighting configurations. Don't underestimate the results you can get with a single flash, a great setting, and a talented subject.

More Off Camera Flash Tutorials

If you want to learn more about getting pro results from simple flash units, be sure to check out my Off Camera Flash title on Lynda.com. I show you all sorts of helpful lighting techniques that are especially good for portraits.

Off Camera Flash - Basic Techniques for Pro Results

Light Modifiers for Off Camera Flash

Off Camera Flash - The Single Light Portrait

Control Background and Subject with Off Camera Flash

"More Off Camera Flash" - Digital Photography Podcast 233

twitter.jpg Follow me on Twitter