This week on The Digital Story Photography Podcast: Special Edition: Amazing Holiday Gift Guide for Photographers - All of this and more on today's show with Derrick Story.
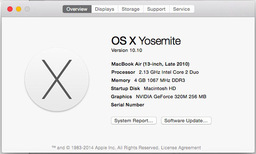
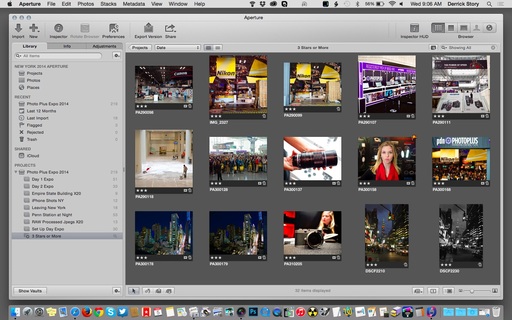
Snapshot - Elissa writes, "I'd say I'm a very intermediate photographer at best, so I was disappointed when Apple announced they were going to stop developing Aperture a while ago. Since then, I've learned a lot about Lightroom (thanks to Lynda.com!) because iPhoto didn't have enough editing tools, and it didn't make sense to invest any time learning Aperture. But I also hate the cumbersome workflow that comes with Lightroom, and miss the simplicity of the Aperture/iPhoto combo. Can you shed some light on this?"
Story #1 - Amazing Holiday Gift Guide for Photographers. Here's a hand-selected list for photographers ranging from $5.95 to $249. And I even wrangled a few special deals for our listeners.
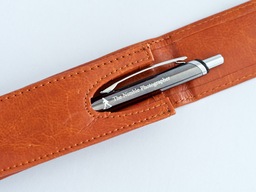
- Nimble Stylus Pen Gift Set ($5.95) - The popular dual-function Nimble Stylus Pen in a handsome leather case - It's the perfect holiday gift for that special tablet-toting someone in your life. One device, two functions. Soft stylus tip works great on iPads, iPhones, and Phablets of all sizes. Keep the glass surface clean, yet tap and drag just like with your finger. Handy for restaurant reading. When it's time to sign the check, just click the top button and a black-ink pen tip emerges from the stylus.
- Focus Digital Grey Card Set & Lanyard ($6.50 )- Here's a terrific stocking stuffer. This set of white, gray, and black laminated cards with lanyard are perfect for white balance settings and exposure readings. They hardly take up any space in the camera bag.
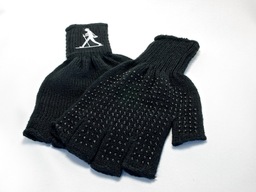
- Nimble Fingerless Gloves ($12.99) Soft, 100 percent acrylic gloves with exposed fingertips enabling you to adjust devices and keep your hands warm. Rubberized dots on the palm side assist with gripping tripods and light stands. High-wrist design ensures that gloves stay within jacket sleeves, even during activity.The Walking Man logo is embroidered on top of each wrist with silver thread providing a classic look. Designed for men's hands, all sizes.
- 2-for-1 Subscription of c't Digital Photography Magazine with eBook Chapter One from "The Essence of Photography" by Bruce Barnbaum - Engineered in Germany, this quarterly photographic publication provides deep dives into gear reviews, techniques, and artists. There's no publication like it in North America, and for a limited time, you can give a subscription and garner one for yourself. The best deal of the year!
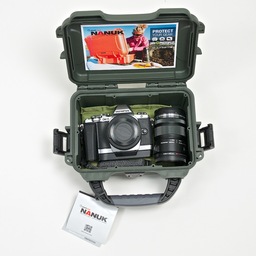
- Nanuk 903 Case ($30) - It's like a mini-Pelican case that you can carry inside backpacks and duffels. The Nanuk is waterproof and impact resistant with 100 percent stainless steel hardware and automatic pressure release valve. The cases come in a variety of sizes and colors. I'm using the 903 to protect my Olympus OM-D E-M10 with pancake zoom lens on camera and the 12-50mm zoom by its side.
- Olympus 9mm f/8.0 Fisheye Body Cap Lens ($99) - Mounts on both Olympus and Panasonic Micro Four Thirds cameras, this petite lens takes very big pictures. It features a constant f/8 aperture and a 35mm equivalent focal length of 18mm. I carry one with me everywhere.
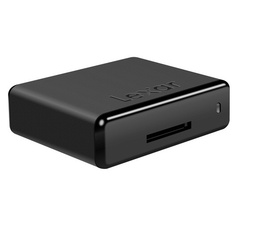
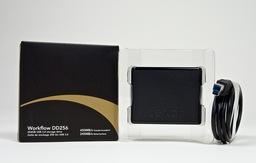
- Lexar Professional Workflow 256GB SSD USB 3.0 Storage Drive ($129) - Leveraging USB 3.0 speeds, the drive provides read transfer speeds up to 450MB/s and write speeds up to 245MB/s. I copied a 37GB Aperture library to the Lexar and the process only took 2 minutes, 46 seconds. Once the library was copied to the drive, I ran Aperture from it, and the performance was terrific. Small size (2.9" x 2.4" x 0.9") and very light. Kit includes USB 3.0 cord. Integrates with Workflow HR1 and HR2 USB and Thunderbolt 2 hubs. PC and Mac compatible.
- 35 Percent Off Rocky Nook eBooks - Choose from an extensive library of great photography books and download and give instantly. The perfect "last minute" gift idea. Use discount code: Thanks2014 at checkout.
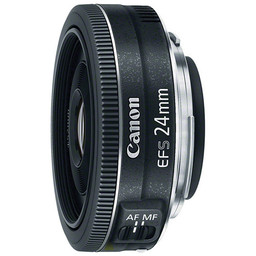
- Canon EF-S 24mm f/2.8 STM lens ($149) - Providing a 38mm-equivalent focal length, this lens takes on a slightly wider-than-normal perspective to benefit its use in a broad variety of shooting situations. A stepping motor AF system pairs well with cameras featuring the Movie Servo AF mode, where it will deliver fast, smooth, and nearly silent focusing performance that can instantly be manually overridden at any time. It's not often we can photographers a lens as a gift, this is a terrific one at an amazing price.
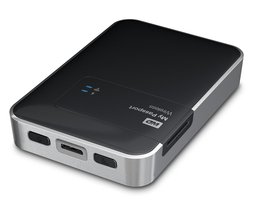
- WD 1TB My Passport Wireless hard drive ($179) - Incredible device that includes an SD card reader, 1 TB of storage, and a built-in WiFi access point. Works with iPad, iPhone, and Android mobile devices, as well as Mac and Windows computers. Allows for photo backup on the road, even without a computer. Plus it wirelessly serves and can receive content using its built-in WiFi - one cool hard drive.
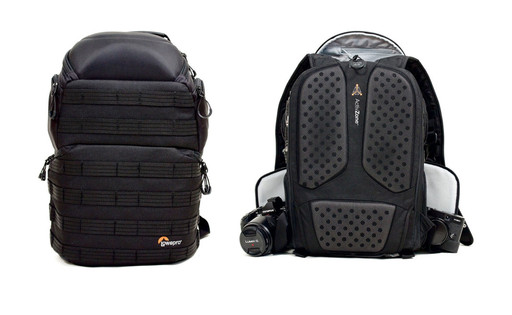
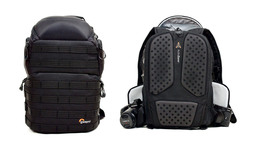
- The Lowepro ProTactic 350 AW ($199) camera/laptop backpack. The real standout feature of this backpack is its versatility. Lowepro has designed access to your gear from the top, back, and both sides. Everything stays organized and easy to get to. Great for mirrorless and DSLRs. Accommodates a 13" laptop. One of the best backpacks I've ever tested. (You can read my full review of the ProTactic 350AW here.)
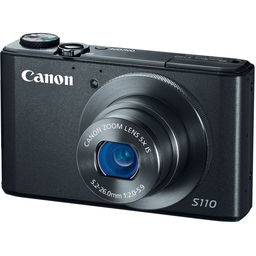
- Canon PowerShot S110 compact camera ($249) - The PowerShot S110 is an advanced compact digital camera with a 12MP resolution 1/1.7" CMOS sensor, redesigned high speed autofocus, built-in WiFi, and 3" touchscreen display. It also shoots Full HD video and RAW files in several aspect ratios. Its 5x optical zoom lens has the 35mm equivalent of a 24-120mm focal length, while the built-in Control Ring allows for easy access to functions and settings. It's a wonderful camera.
Story #2 - Book of the Month: Photography as Meditation - Tap the source of your creativity. Use discount code: PMED at RockyNook.com
Virtual Camera Club News
Photo Assignment for November 2014 is "Layers".
Pano Cards from Red River
Inkjet Pano Cards are guaranteed to turn heads and get friends, family, and clients to take notice of your work. Pano Cards are perfect for your your landscapes and wide angle shots. Try something new and make a tall crop for your work printing on the card vertically. Unfolded, the pre-scored sheets are 8" x 9". When folded, the Pano Card is 9" x 4". The Pano Card uses a standard #10 business envelope. Learn more at Pano Card FAQ page.
A Note from SizzlPix
They've ramped up their capacity, so we can go for volume for the holidays.
Special for TDS listeners, a 20% discount on all SizzlPix ordered, now through end of November! Using the comment space on the newly streamlined SizzlPix order page, write "TDS 20 percent discount."
SizzlPix! is qualified for PayPal "Bill Me Later," No payments, No interest for up to 6 months, which means, have your SizzlPix! now, and pay nothing until May 2015! "Hang your SizzlPix before Christmas, and pay nothing until Mothers Day!"
And Finally...
If you haven't done so already, please post a review for The Digital Story Podcast in iTunes.
BTW: If you're ordering through B&H or Amazon, please click on the respective ad tile under the Products header in the box half way down the 2nd column on thedigitalstory.com. That helps support the site.
Download the Show
In addition to subscribing in iTunes, you can also download the podcast file here (36 minutes). You can support this podcast by purchasing the TDS iPhone App for only $2.99 from the Apple App Store.
More Ways to Participate
Want to share photos and talk with other members in our virtual camera club? Check out our Flickr Public Group. And from those images, I choose the TDS Member Photo of the Day.
Podcast Sponsors
lynda.com - Learn lighting, portraiture, Photoshop skills, and more from expert-taught videos at lynda.com/thedigitalstory.
Red River Paper -- Keep up with the world of inkjet printing, and win free paper, by liking Red River Paper on Facebook.
SizzlPix! - High resolution output for your photography. You've never seen your imagery look so good. SizzlPix.com. SizzlPix! now is qualified for PayPal "Bill Me Later," No payments, No interest for up to 6 months, which means, have your SizzlPix! now, and pay nothing until May!
Want to Comment on this Post?
You can share your thoughts at the TDS Facebook page, where I'll post this story for discussion.