This is The Digital Story Podcast #581, April 25, 2017. Today's theme is "Single Frame Story" I'm Derrick Story.
Opening Monologue
When you press the shutter button, what is your goal for that fraction of a second? Are you recording a slice of life? Capturing something beautiful? Not sure really why you took the picture? One exercise that I find useful is trying to tell a complete story within one frame. Everything the viewer needs to know is right there within the boundaries of your viewfinder. And we explore this concept in today's TDS photography podcast.
Single Frame Story
Here are five techniques to help you tell a story within a single frame.
-
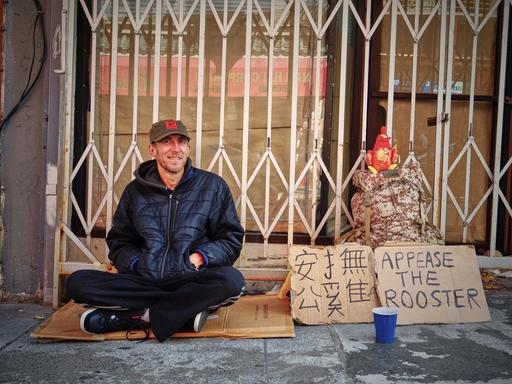
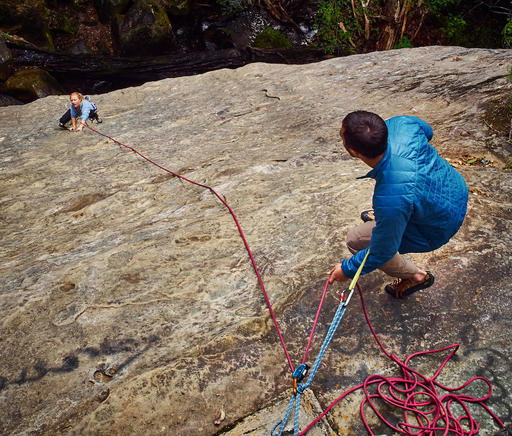
Look for Action and Reaction - One person is doing something, and another is reacting to it. In writing we called it man vs man. Variations on this technique is man vs nature, and man vs him or herself.
-
Crop out Extraneous Elements - If the viewers are going to engage with the image, then they need to identify the main activity quickly. Cropping helps you direct the viewer's eye to the main action.
-
Work with Lighting, not Against it - I'm not saying that you have to be so obvious to illuminate the principle character and darken everything else. But you certainly want lighting on your side.
-
Be on the Lookout for Drama and Humor - Dramatic tension, such as the rock climber struggling up a steep incline, or the humor expressed in a facial expression can speak volumes.
-
Look for Dramatic Angles - Capturing the image from a low or high angle can energize the narrative and draw the viewer into the image.
Perfect Panoramas with the MeFOTO Roadtrip Air
This week's three-legged adventure with the MeFOTO Roadtrip Air is to help me create perfect panos with my iPhone. Here's how:
- Mount the iPhone in the vertical position on the MeFOTO and align it as straight as possible.
- Enable the Compass App and swipe to the second screen which is the built in level. Square up your iPhone to 0 degrees and test your alignment by panning from left to right.
- Loosen the panning knob on the MeFOTO so there's just a slight tension.
- Enable the Camera app and go to Pano mode. Tap the shutter button and pan slowly from left to right.
- Enjoy your beautifully aligned panorama!
Just to give you a bit of background about this super nimble tripod, it's distinguishing features include:
- Super Fast Setup with the new HyperLock Leg System. Setup is as easy as 1,2,3: 1 - Hold tripod leg and twist counterclockwise until it stops (4 clicks), 2 - Pull the leg to the desired length, 3 -Twist leg clockwise until it stops. (How easy is that?)
- Perfect for Selfies - removable telescoping center column converts to a Selfie Stick with included smartphone holder and Bluetooth remote!
- Ultra lightweight - 30 percent lighter than classic MeFOTO models
- Available in Backpacker, RoadTrip, GlobeTrotter models and 7 colors.
If you want to learn more about the MeFOTO line of tripods, look for the colorful tile on all the pages of the thedigitalstory.com. And if you decide that you want one for yourself, use coupon code THEDIGITALSTORY to save 10 percent and receive free shipping.
Why Printing Your Photos Will Make You a Better Photographer
In the article, Why Printing Your Photos Will Make You a Better Photographer, the author quotes Peter Mikinnion:
Photography, he says, used to be a two part process--Part 1: take pictures; Part 2: develop and print them. With the advent of digital photography, that second part was warped into post-processing and online sharing, but McKinnon believes something was lost in the transition.
"Where I love Instagram, and I love digital, and I love where everything's gone," says McKinnon. "It got me thinking: 'People don't print their work enough, and there are SO many benefits that come from printing your stuff out.'"
The two benefits McKinnon touches on in this video are (1) Printing helps you understand your photography much better, and (2) Printing your photos lets you 're-discover' that second half of the photographic process.
Both of these things help you to improve your own photo taking and, as a bonus, draw more joy out of your photography.
Updates and Such
Big thanks to all of our Patreon members! I was able to pay for the podcast server and the backup system from last month's pledges. Your contributions are making a positive impact.
Registration invitations have gone out to Reserve List members for the Autumn in Wine Country Photography Workshop. If you are on the Reserve List, but didn't get your invite, please contact me. You can learn more about the workshops by visiting the TDS Workshops Page.
B&H and Amazon tiles on www.thedigitalstory. If you click on them first, you're helping to support this podcast. And speaking of supporting this show, and big thanks to our Patreon Inner Circle members.
And finally, be sure to visit our friends at Red River Paper for all of your inkjet supply needs.
See you next week!
More Ways to Participate
Want to share photos and talk with other members in our virtual camera club? Check out our Flickr Public Group. And from those images, I choose the TDS Member Photo of the Day.
Podcast Sponsors
MeFOTO Air Tripods - MeFOTO Air Tripods are a nimble photographer's dream.
Red River Paper - Keep up with the world of inkjet printing, and win free paper, by liking Red River Paper on Facebook.
The Nimbleosity Report
Do you want to keep up with the best content from The Digital Story and The Nimble Photographer? Sign up for The Nimbleosity Report, and receive highlights twice-a-month in a single page newsletter. Be a part of our community!
Want to Comment on this Post?
You can share your thoughts at the TDS Facebook page, where I'll post this story for discussion.
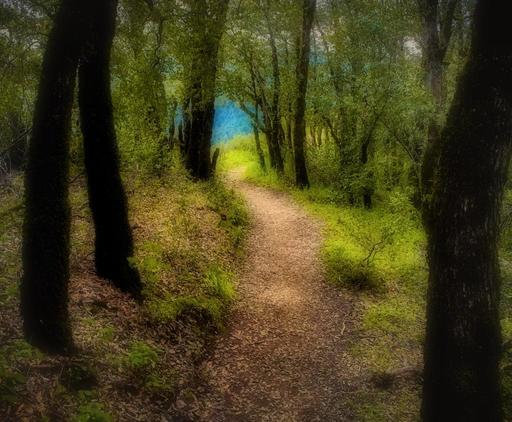
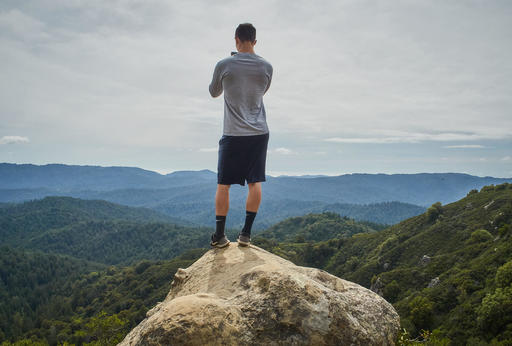 "Top of the Ridge" - Olympus PEN-F with 14-42mm EZ zoom. Photo by Derrick Story.