iPhoto enables you to send pictures via email... sort of. As long as you use Mac Mail, Entourage, AOL, or Eudora, and realize that you can't send directly from iPhoto; it just opens your email app for you. And none of this helps all of those Gmail users out there.
Good news though. Thanks to Juan Ignacio Leon, Gmail fans can download iPhoto2Gmail and send pictures directly from iPhoto without ever opening their email client.
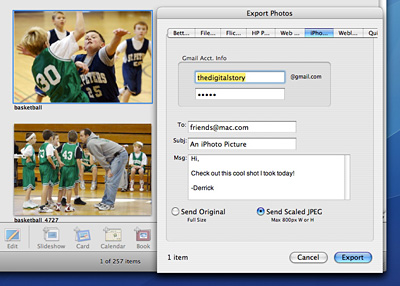
iPhoto2Gmail is an export plug-in that you access via File -> Export. All you have to do is select your picture(s) in iPhoto, open iPhoto2Gmail via Export, address your letter, and click the Export button. Your images will immediately be delivered via your Gmail account.
Currently you have the option to send full size pictures or scale them down to 800 pixels. But Juan says he'll have more resizing options in the next release. Plus, he's also working on integrating Gmail Contacts into the plug-in. Hopefully we'll see the new version before long.
In the meantime, you can download iPhoto2Gmail today and start sharing pictures. The application is donationware. So if you like it, please put a few bucks in the jar.
Technorati Tags: digital photography, The Digital Story