Lynda.com just announced the release of my latest title, Digital Photography Principles: The Camera. And they've made 14 movies from the title available for free. That's more than 40 minutes of instruction that you can go watch right now. I hope you check them out, because they are useful and fun. But what I really want to talk about today is how we made this movie. I think it's a real departure from what you normally see on Lynda.
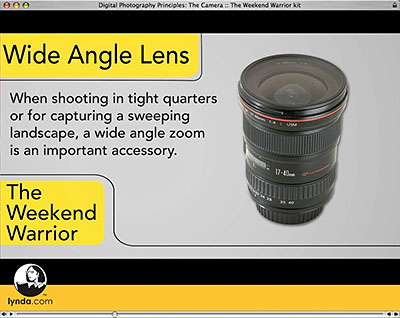
First of all, this isn't your standard screencast type training. As I mentioned in an earlier post, we were able to use Samy's Camera in Santa Barbara as the set for many of our live action movies. It's quite fun having the run of a camera store after hours. During the shoot in Samy's, they lost some of the B-roll footage that showed the close-up shots of equipment that I was explaining. To compensate for this, the next day they photographed every piece of equipment I discussed in the Chapter 13 movies in the Ventura studio, then inserted the stills where the B-roll was supposed to go. The upshot? I think the still photos work better than the B-roll would have. It was more work, but in the end the viewer benefits.
Then, for other pieces, such as discussing flash mode options, we connected digital cameras via their video output jacks to the recorder. Doing this allowed us to show in real time the various camera menus just like you'd see them on you LCD. I wanted pretty backgrounds while demonstrating the function controls that show the live image as you made adjustments, so I rigged up a light booth and focused the camera on mounted photographs while I discussed the controls.
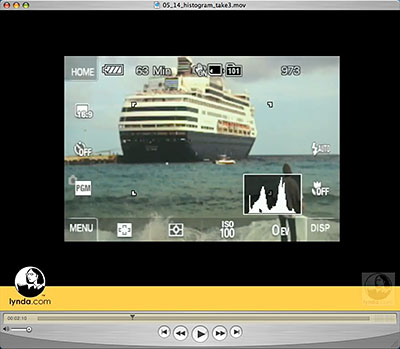
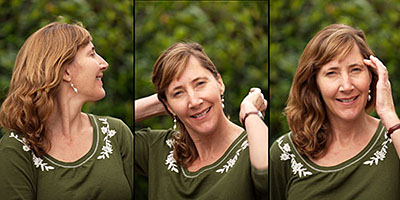
You can see an example of this technique above. The picture of the cruise ship is a mounted photo in my rigged-up light booth. I have a camera on a tripod (Sony T200) with a live histogram showing on the LCD. We took the video feed off the LCD from the camera and plugged it into our recorder. Meanwhile, I'm in a closed sound booth with controlled audio to make sure my voice comes across clean and clear. As I said, this isn't your standard Lynda.com training.
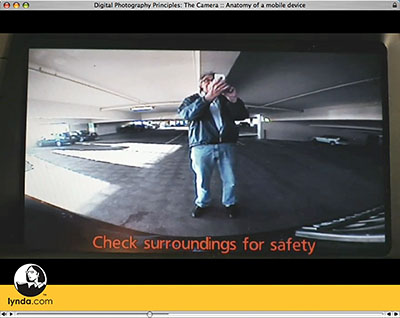
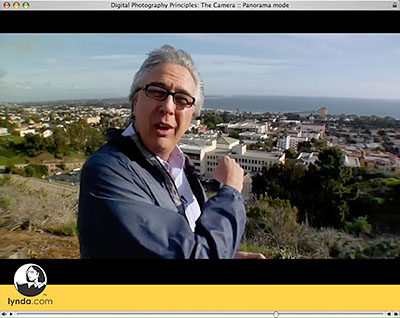
We also did fun stuff such as going to a mountain top to shoot a panorama, recorded live face detection demos in the lobby of Lynda.com, and even visited a parking garage to talk about the usefulness of mobile devices. My favorite part in the parking garage is where they shoot me teaching through the back-up video camera on a Toyota Prius.
Yeah, that's me behind the Toyota. Here's another fun insider story. I mentioned the panorama movie earlier shot on a mountain top. Well, the wind was really whipping that day, as you can see by my tussled hair. There was no way we could capture clean audio. But we really wanted to keep this piece in the title.
So our solution was to make a written transcript of my monologue on the mountain top, then send it to me after I had returned home. I went into the Digital Story podcasting studio and read the transcript while watching the video. I sent my new audio back to Lynda headquarters in Ventura, and they synced up the studio audio with the video. If you watch closely, you'll notice it's a little like a dubbed Japanese horror flick. But it's also fun. I'm really glad we kept the panorama piece in the title.
There's plenty of other goofy stuff too, but I think you get the idea. When it's all said and done, Digital Photography Principles: The Camera will help lots and lots of people master their camera and take better photos. It's the first installment of a trilogy. I'll be heading down south soon to begin work on the second title. Stay tuned.
Technorati Tags:
Derrick Story, digital photography, Lynda.com, Technology, The Digital Story, Digital Photography Principles
 Now Available! The Digital Photography Companion. The official guide for The Digital Story Virtual Camera Club.