This is The Digital Story Podcast #615, Dec. 26, 2017. Today's theme is "You Are the Keeper of Memories." I'm Derrick Story.
Opening Monologue
My father loved family history and spent countless hours researching every branch of our family tree. Now that he's moved on, I'm the family historian. Chances are, that's a role that you have for your clan, whether you realize it or not. And that's the focus of this week's TDS photography podcast.
You Are the Keeper of Memories
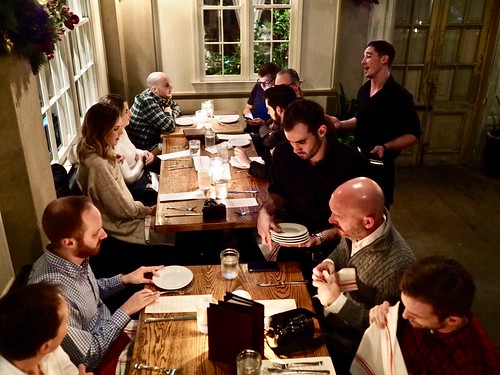
My sister-in-law arrived at our Christmas Eve gathering with a slide project under one arm, and a carrousel of family pictures under the other.
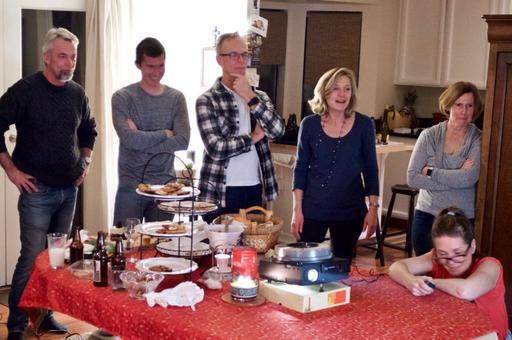
About half way through the evening, everyone gathered around the dining room table to watch their family history projected on glossy white closet door. Many of the images were amazing.
I watched the siblings react to images of them as children. I marveled at pictures of their mom when she was a young woman, raising a family of four on her own. I saw beautiful classic cars, outdated furnishing, and plenty of vintage clothing.
Most of these images were captured on 35mm slide film by a talented grandmother who has long since passed away. But thanks to her, an entire family was able to journey back in time and see glimpses of the world that shaped their lives.
Even though cameras have changed, the value of the images they record remain as important as ever. And chances are good that you're the one who will provide the family history for your children, their offspring, and the generations that follow. So here are a few tips to ensure the story lives on.
- Capture people, places, and things. The portraits are vital, but so are the homes and the cars that are part of our current lives.
- Record a few shots with your phone as well as your camera. The location data that the phone captures will apply to every shot with a nearby timestamp. And that can prove very important up the road.
- It's essential that you shoot a group shot at family gatherings. They are the most important images.
- Share images immediately after the event. Even though you may be the primary keeper of the family history, diversifying this content helps ensure its survival.
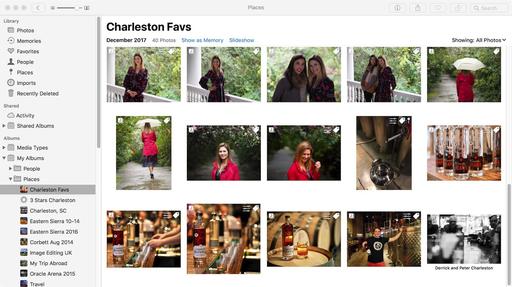
- Organize your work so it makes sense to others. Use albums with logical names, take advantage of face detection, and add as much descriptive text as you have time for.
And if you have access to family history now, consider sharing it at the next gathering. I promise you that it will be worth the effort.
3 Libraries, 1 Low Price
So I've been talking about all of the royalty free content I can download via my videoblocks account. They help expand your horizons by constantly introducing you to new items in their library. This week, however, I want to talk about the special offer for TDS Listeners: 3 Libraries, 1 Low Price - $149 for the entire year provides you with unlimited access to 615,000+ Videos, Audio Tracks, and Images.
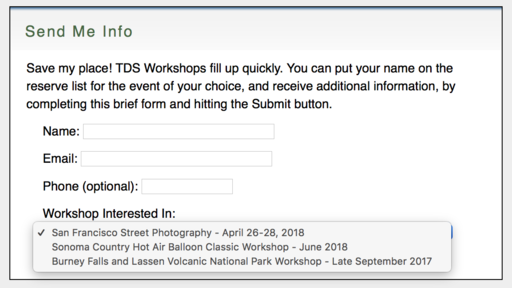
San Francisco Street Photography Workshop
On April 26 through 28, we will be gathering in San Francisco for one of our most popular workshops. You can reserve your place now by visiting our Workshops page.
Updates and Such
Big thanks to all of our Patreon members!
B&H and Amazon tiles on www.thedigitalstory. If you click on them first, you're helping to support this podcast. And speaking of supporting this show, and big thanks to our Patreon Inner Circle members.
And finally, be sure to visit our friends at Red River Paper for all of your inkjet supply needs.
See you next week!
More Ways to Participate
Want to share photos and talk with other members in our virtual camera club? Check out our Flickr Public Group. And from those images, I choose the TDS Member Photo of the Day.
Podcast Sponsors
Videoblocks - Go to videoblocks.com/digitalstory to get all the stock video, audio, and images that you can imagine for just $149. Save on millions of studio-quality clips, tracks, and graphics.
Red River Paper - Keep up with the world of inkjet printing, and win free paper, by liking Red River Paper on Facebook.
The Nimbleosity Report
Do you want to keep up with the best content from The Digital Story and The Nimble Photographer? Sign up for The Nimbleosity Report, and receive highlights twice-a-month in a single page newsletter. Be a part of our community!
Want to Comment on this Post?
You can share your thoughts at the TDS Facebook page, where I'll post this story for discussion.