This is The Digital Story Podcast #636, May 22, 2018. Today's theme is "The True Summer Advantage" I'm Derrick Story.
Opening Monologue
Summer is the season of family vacations, solo adventure, BBQing, baseball games, picnics, and bare feet. But for photographers, there's another benefit that might not be immediately apparent, but can be wildly useful and enjoyable - and that's the subject of today's TDS photography podcast.
"The True Summer Advantage"
Light is the one thing that we need for photography, and there's plenty of it during the summer. And it's not so much the warmer days that I'm talking about, but the longer ones.
Even if you can't take as many photo vacations or workshops as you wish, with a little planning, you can substantially increase your captures. Here's how.
Let's say that you have a job that requires your presence from 8:30 am to 5:30 pm daily. If you're lucky, your workplace isn't far from home. Typically, that's not the case, however. But you can use this to your photography advantage.
If the commute to work is 30 minutes, for example, then that puts you in a new environment away from the house. In prime summer, there's working light until roughly 8:30 pm. Using your workplace as a jumping off point, you have 3 extra hours for creative pursuits that you did not have in the winter.
Open a map and draw a 1-hour radius from your work. What are the photo opportunities within that circle? Conceivably, you could bring your camera gear to work, leave the office at 5:30 pm, travel to one of these locations within radius, shoot a series of images, and be home by 9 pm.
That is one extra shoot that didn't require you to use any of your weekend or vacation time. And what if you identified numerous locations within this radius? (And that's not to mention revisiting the ones that you liked the first time.)
If you set this up to do just twice a month during the summer, you could add 6 or more quality photo shoots to your library without disrupting family obligations or daily routine. Think about the possibilities here.
The Portfolio Project - Week 3 - Wandering
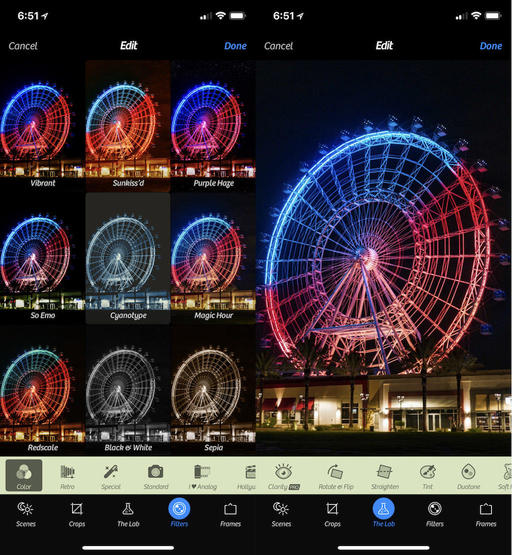
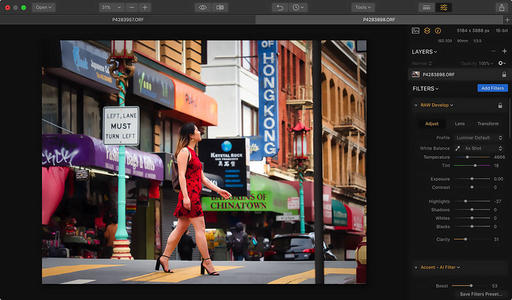
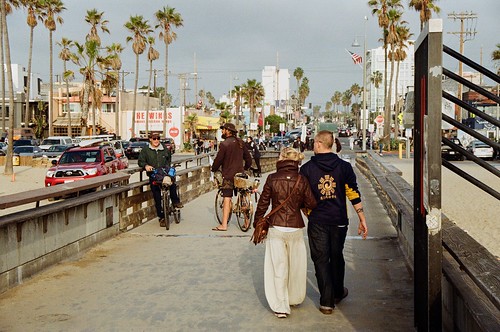
The latest gallery that I added to my Portfoliobox project is Wandering. And the process that led me to this topic is quite interesting (as explained during the podcast).
I also tried a new feature. Mouse over any of the images on the gallery page, and a very attractive screen appears show the location for the shot. This allows me to add context to the image without cluttering up the gallery.
One of things that I really noticed when assembling this collection was how important it was for the images to work together on the page. I started with over 60 candidates, and experimented with many combinations before I settled on the 16 that's displayed there now.
I love using Portfoliobox for these reasons:
- My images look great, both on my computer and on my mobile devices.
- It's easy to use. Without any instruction, I'm adding a high quality page in just minutes.
- It's affordable. There's a free plan and a Pro version. The Pro version is only $82.80 per year or $8.90 per month USD, and that's before the 20 percent TDS discount.
Highlights with the Pro Plan
In addition to unlimited pages, you get a personalized domain name, web hosting, and up to 1,000 images.
Get Started Today
Just go to the TDS Landing Page to get started with your free account, or to receive the 20 percent discount on the Pro version. And if you want to see the page that I've begun, visit www.derrickstoryphotography.com.
Panasonic Lumix TS7/FT7 is the first rugged compact camera with a built-in EVF
DP Review reports: "Panasonic has announced its Lumix DC-TS7 (FT7 outside of North America) which is the first waterproof/rugged compact to have an electronic viewfinder. The viewfinder is 0.2" in size and has an resolution equivalent to 1.17 million dots and a magnification of 0.45x equivalent. Obviously, you won't be able to use the EVF if you have a scuba mask on, but for shooting in bright light on land it could come in handy. There's also a 3" non-touch LCD available for composing and reviewing your photos."
"The TS7 has a 20.4MP, 1/2.3" BSI CMOS sensor and an F3.3-5.9, 28-128mm equiv. lens. It's able to go 31m/102ft underwater, can take a fall from 2m/6.6ft and can withstand 100kg / 220lb of crushing force. It's also freezeproof to -10C / +14F."
Great Online Training Titles for Efficient Learning
I have some terrific photography titles on both LinkedIn Learning and lynda.com. You may want to visit my lynda.com Author Page or my LinkedIn Learning Author Page. Here's a look at some of the titles waiting for you.
- Capture One Pro 11 Essential Training
- Luminar Essential Training
- Photos for macOS High Sierra Essential Training
- Dropbox for Photographers
- Sharing Photos with Flickr
- A Photographer in Cuba
- High School Seniors Portrait Photography
Signed Print Giveaway - If you watch one chapter for any of my training videos on lynda.com or LinkedIn Training during the month of May, send me a notification after the viewing via the Contact Form on The Nimble Photographer. (You can sign up for a free trial on lynda.com.) Just say, "I watched a chapter on lynda.com or LinkedIn Learning!"
You name will be entered into a drawing for a signed print from the Maui Project. The lucky recipient will be announced on the June 5, 2018 podcast. (Promotion ends on May 31, 2018. Void where prohibited.)
Reservation Forms have been sent for the Burney Falls and Lassen Volcanic National Park Workshop
We have our cabin reservations secured for Sept. 27-29, 2018 for the Burney Falls and Lassen Volcanic National Park Workshop. I sent out reservation forms this last weekend. So if you are on the reserve list, you should have received an invite.
Updates and Such
You can become a member of our Inner Circle by clicking on this link or by clicking on the Patreon tile that's on every page of The Digital Story.
B&H and Amazon tiles on www.thedigitalstory. If you click on them first, you're helping to support this podcast. And speaking of supporting this show, and big thanks to our Patreon Inner Circle members:
And finally, be sure to visit our friends at Red River Paper for all of your inkjet supply needs.
See you next week!
More Ways to Participate
Want to share photos and talk with other members in our virtual camera club? Check out our Flickr Public Group. And from those images, I choose the TDS Member Photo of the Day.
Podcast Sponsors
Red River Paper - Keep up with the world of inkjet printing, and win free paper, by liking Red River Paper on Facebook.
Portfoliobox - Create the site that your best images deserve by visiting Portfoliobox. And get a 20 percent discount by using our landing page!
The Nimbleosity Report
Do you want to keep up with the best content from The Digital Story and The Nimble Photographer? Sign up for The Nimbleosity Report, and receive highlights twice-a-month in a single page newsletter. Be a part of our community!
Want to Comment on this Post?
You can share your thoughts at the TDS Facebook page, where I'll post this story for discussion.