This is The Digital Story Podcast #726, Feb. 18, 2020. Today's theme is "Hands-On Review of the Olympus OM-D E-M1 Mark III." I'm Derrick Story.
Opening Monologue
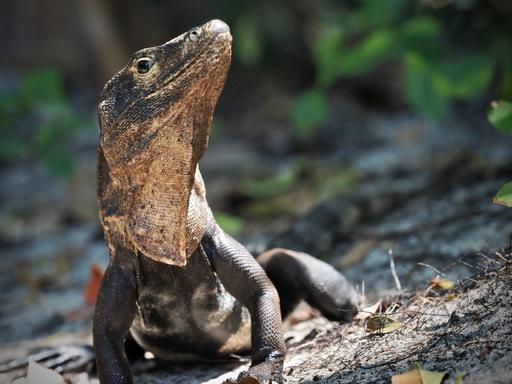
After spending 4 days in Costa Rica and continuing to shoot with the camera since then, I can comfortably say that I have a good feel for the Olympus E-M1 Mark III. It is neither the manna from heaven that many users hoped for, nor is it the disappointment that some reviewers have complained about. It's a solid semi-professional camera for nimble photography that's only limited by the user's imagination. I'll explain my views on today's TDS Photography Podcast.
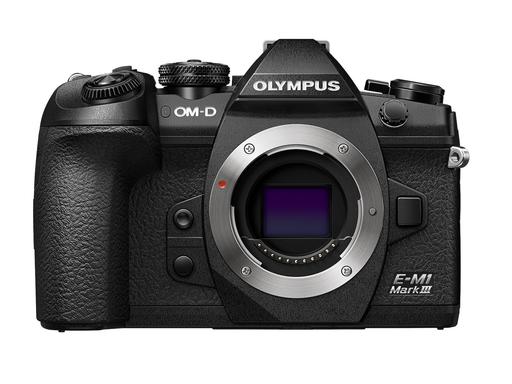
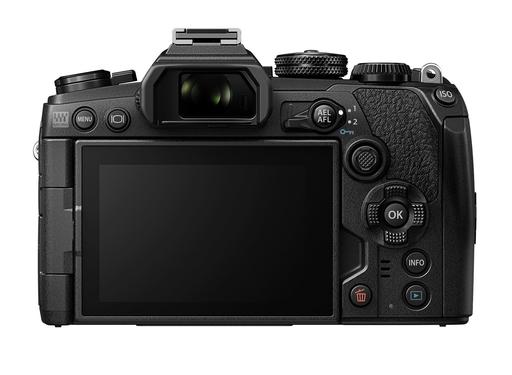
Hands On Review of the Olympus OM-D E-M1 Mark III
There was a moment on the bus while talking with a fellow journalist, that I realized how the reviews were going to go for the Olympus E-M1 Mark III. He was disappointed with the not-updated sensor (as are many reviewers), the comparatively low resolution LCD (1 million dots), non-state-of-the-art EVF (2.36 M dots), the lackluster performance of AF tracking, and the relatively high price for a small sensor camera ($1,799).

Since I'm not an apologist for Olympus nor any other brand, I offered a few tips and left it at that. But I've decided to lead off this review addressing those five comments, because I have seen them in more than one review. We'll get to what I like after that.
Before we get into the specifics, however, I want to comment about the Olympus mindset when it comes to camera design. They take a very wholistic approach, and they will live and die by those choices. In other words, they don't so much look at the individual components; rather, how everything works together to create the experience they're striving for. I sum it up as the 3-Cs: Compact, Creative, and Capable. With that in mind, lets move forward.
The Most Common Criticisms of the Mark III
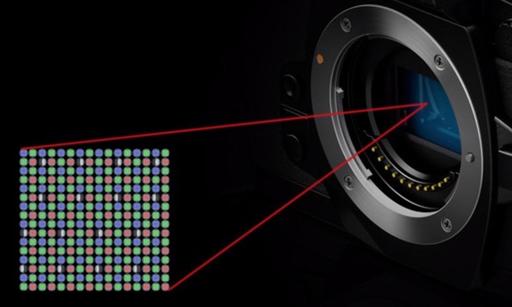
- Non-Updated 20.4MP Live MOS Micro Four Thirds Sensor - When Olympus debuted the 20.4 MFT sensor in Sept. 2016, it scored the highest according to DxO Mark of any Four Thirds sensor, edging out the Panasonic competition and the 20.3 sensor in the PEN-F that was released earlier that year. That same 20.4 chip is in the E-M1 Mark III, but with a TruePic IX Image Processor compared to the TruePic VIII found in the E-M1 Mark II and the TruePic VII housed in the PEN-F. After shooting with all three cameras, my view is that it's the processor, not the sensor, that we should focus on with the Mark III. I discussed this in last week's podcast. Just think about the evolution of smartphone cameras and where the real progress is made. It is in computing power and software, and that's where the upgrade is for the Mark III.
- 3.0" 1.037m-Dot Vari-Angle Touchscreen - I will agree that reviewing images on the E-M1 Mark III is not as lovely as on the Sony A7R Mark IV with its 3.0" 1.44m-dot rear LCD. But there's a price difference as well. And there's a trick to getting the most from your E-M1 LCD that a lot of users don't know. What you want to do is review pictures at 1:1. When doing so, the screen works remarkably well. The setting is Gear D2 > Default Setting > Equally Value. On the LCD that's 7X, and you can really evaluate your image well as such.
- 2.36m-Dot 0.74x Electronic Viewfinder - Again, let's compare it to the flagship Sony that has a UXGA OLED Tru-Finder EVF with 5.76m-dot resolution with 120 fps refresh rate. The Olympus default is also 120 fps, and with the lag time a minuscule 0.005 sec for smooth display that allows capture of fast-moving subjects. So, depending on your needs and preferences, if similar refresh rates and low latency get the job done for your photography, then the resolution might not be as much as an issue. This one is up to you.
- Continuous AF + Tracking - I agree with everyone on this setting: it under performs. We've known that for some time, and most serious Olympus shooters use Continuous with their preferred set of sensors. With the E-M1 Mark III, there is a much better option. In my case, I used C-AF with the 3X3 array giving me 9 sensors to track moving objects (called Group 9-Point Target Mode). With the new joystick on the back of the camera, you can move the array quickly to any part of the frame. I had my best success rate ever in Costa Rica.
- $1,799 Price Tag - The Mark III, with all of its upgrades, launches $200 cheaper than the Mark II. Enough said there.
5 Features that I Think are Really Terrific
So, with all of that out of the way, what am I excited about with the Mark III? There's plenty. Here are five of my favorites.
- Live ND - Live ND results in blurred subject movement by compositing exposures to replicate the look of a single image taken at a slower shutter speed. Particularly suitable for photographing moving water, five modes are available: ND2, ND4, ND8, ND16, and ND32 to vary how movement is portrayed.
- Handheld High Res Shot - Like the Tripod mode, produces a 50MP JPEG or raw file by compositing sequentially recorded files into a single image. The Handheld High Res Shot mode differs from the Tripod mode by recording 16 independent frames, opposed to eight, and the slight movement caused by hand-holding provides the range of movement needed to produce the larger final image. It's brilliant.
- 120 FPS FHD Video Capture - Not talked about much, but I love this capability and wish it were on my E-M1 Mark II. You can capture Full HD at 120 fps, then have it set to playback at 60p, 50p, 30p, 25p, and 24p. So, if you set it to playback at 30p, you have this lovely slow-motion video at .25 speed. And it looks great. No post production headaches. Plus, there's handheld 4K video as well. Nice!
- AF Joystick (Multi-Selector) - With 121 cross-type sensors and a wide variety of AF patterns, the joystick is the perfect complement to this system. It is well-designed and works great. And speaking of autofocus, Starry Sky (new AF algorithm fully dedicated to night photography) AF really works. If you're an action shooter, you're going to love the Multi-Selector.
- Improved Supersonic Wave Filter - The E-M1 Mark III added a coating to the SSWF (Supersonic Wave Filter), which was evolved with OM-D E-M1X. It's design is to repel dust. It allows for lenses to be swapped even at dusty outside, the high reliability makes possible to concentrate on shooting.
If I had to pick one thing that really impresses me about this camera, is the flexibility and speed of the autofocusing. The ability to customize AF point arrays, then quickly move them with the multi-selector, really increased the number of successful shots I captured of moving objects.
But Wait, There's More!
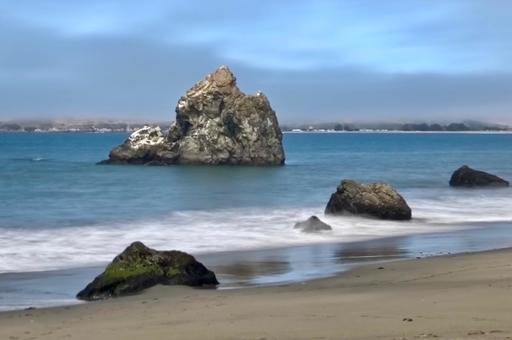
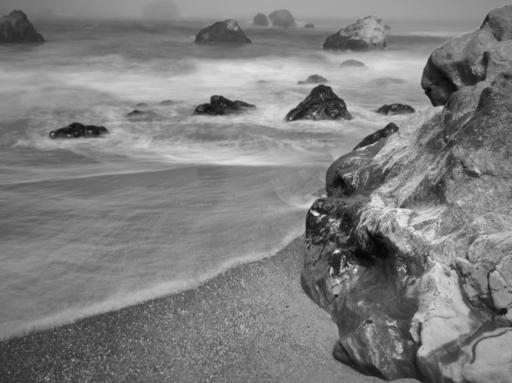
I should also mention that I did not use a tripod once on the Costa Rica trip. That included using focal lengths as long as 600mm, long exposures for moving water, and even focusing on stars at night. Think about it: a camera that provides super-fast AF, long reach, and minimal equipment weight at this price point.
USB-C charging was a welcome addition as well. I used the included cable with a 10-watt iPad USB charger and was able to replenish the E-M1 Mark III. My advice is to always have a cable with you when you travel. You just never know.
There are many very nice touches that seem to be overlooked as well, such as the Anti-Flicker setting where the camera detects the frequency (flicker) of artificial lighting such as fluorescent light, and activates the shutter at peak brightness to smooth out any exposure and color differences between frames. Not a big deal, that is, unless you shoot indoor sports.
And then you get features that aren't even on the E-M1X (yet) such as advanced face/eye AF detection and Starry sky AF. Plus the things we already know about including dual card slots and 400,000 shutter life.
I fully understand that the Olympus E-M1 Mark III isn't for everyone. But it certainly is for me. I was relying on the 40-150mm PRO and the 12-45mm PRO zooms for the bulk of my work, and was traveling as light as a feather. My shots look incredible. And I never got tired during the long days. It's a heck of a camera, heck of a camera system.
Two thumbs up for me.
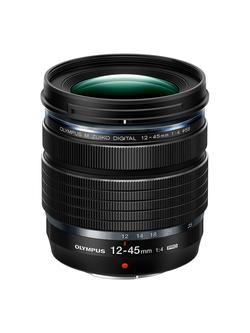
The M.Zuiko Digital ED 12-45mm f/4 PRO Zoom
Amid the understandable excitement surrounding the OM-D E-M1 Mark III, Olympus also debuted a new optic specially designed for Nimble Photographers desiring the highest quality in a compact package - the M.Zuiko Digital ED 12-45mm f/4 PRO zoom ($649). This lens is a gem.
Here are the spec highlights:
- 12 to 45mm (35mm Equivalent Focal Length: 24 to 90mm)
- F/4 constant aperture
- Minimum focusing distance of 4.72" / 12 cm with 1:2 Macro Reproduction Ratio
- 12 Elements in 9 Groups with 7 rounded aperture blades
- 2.5 x 2.76" / 63.4 x 70 mm and weighs only 8.96 oz / 254 g
It mounts beautifully on the PEN-F, E-M5 Mark III, and E-M1 Mark III. The autofocus is fast. But what I really like about it are the images it produces - colorful, sharp, and with excellent contrast. I also like that it features a nicely dampened manual focusing ring that feels great - a welcome feature in pro AF lens.
Other niceties include a ZERO (Zuiko Extra-low Reflection Optical) coating that has been applied to individual elements to minimize lens flare and ghosting for improved contrast and color fidelity when working in strong lighting conditions. Plus it's dust, freeze, and drip-proof design ensures the lens performance in inclement and harsh conditions.
The M.Zuiko Digital ED 12-45mm f/4 PRO zoom will begin shipping on Feb. 24th. You can pre-order is now... just in time for our travel season!
Update for the TDS 2020 Photography Workshop Season
Those of you on the registration list for the Humboldt Redwoods Workshop, keep an eye out for the registration packet that will go out later this week. We have a great event for you, and I'll be working with you to ensure that you are fully prepared to take advantage of this wonderful opportunity. Plus, we had one seat open up (moved to another workshop), so if you want to join us, hop over to the 2020 Workshops Signup Page and get on the Reserve List.
If you have questions about the other workshops, feel free to drop me a line using the Contact Form on www.thenimblephotographer.com.
When you decide which event is best for your, jump over to our 2020 Workshops Signup Page and place a $100 deposit to secure your place. Only participants on the Reserve List who have placed a deposit will be eligible to register for a workshop. If you have questions or need more information, fill out the "Send Me Info!" request form. I'll get back to you asap.
- LA Street Photography Experience - March 13-15, 2020 - 1 Seat Remaining - This hands-on workshop guides you on an exploration of classic Los Angeles locations and architecture. Our excursions will take us as far west as Venice Beach, as well as famous movie spots and the back streets of this fascinating Southern California area. Limited to 9 participants and featuring two instructors (Derrick Story and Mike Boening), you will enjoy great photography, food, and friendship with our fellow enthusiasts. Three days, $749. You can place your deposit here.
- Humboldt Redwoods and Coast Workshop - May 12-14, 2020 - 0 Seats Remaining -- Our home base for this experience is in the hospitable town of Fortuna that's on the banks of the Eel River. From there we explore the magnificent redwood groves of Humboldt County and the rugged coastline of Northern California. This workshop explores three distinct ecosystems in a satisfying 3-day event. Limited to just 9 participants, you can reserve your spot and learn more about this event here.
- Lassen Volcanic Park Photo Workshop - July 16-18, 2020 - 2 Seats Remaining -- We'll convene at a spacious cabin at Lake Almanor that serves as our HQ. From there we explore the stunning Lassen landscape, peaceful shores of Lake Almanor, and the magnificent mountain night skies. This hands-on photo workshop is limited to 8 participants and is a wonderful blending of experience, camaraderie, and artistry. Limited to just 8 participants, you can reserve your spot and learn more about this event here.
- The Eastern Sierra Photography Workshop - Oct. 1-3, 2020 - 2 Seats Remaining - Our event is headquartered at the Silver Maple Inn in Bridgeport, CA - gateway to Bodie, Mono Lake, and June Lake. We'll take advantage of the magical morning light to photograph some of the most unique landscape in North America. We'll photograph the sparkling night skies of the Sierra and explore rustic urban environments. Limited to just 9 participants, you can reserve your spot and learn more about this event here.
Updates and Such
Inner Circle Members: A big thanks to those who support our podcast and our efforts!
How to Watch Photos for macOS Catalina and iPadOS - Learn everything you need to know about Photos for the Mac and iPad by checking out my latest course on LinkedIn Learning and on lynda.com. This course is perfect for Mac and iPad based photographers who shoot with iPhone, Mirrorless, and DSLR cameras. It covers both photography and movies. And if I say so myself, it's a lot of fun.
B&H and Amazon tiles on www.thedigitalstory. If you click on them first, you're helping to support this podcast. (The Digital Story is supported by its audience. When you purchase through links on our site, we may earn an affiliate commission.) And speaking of supporting this show, and big thanks to our Patreon Inner Circle members:
Affiliate Links - The links to some products in this podcast contain an affiliate code that credits The Digital Story for any purchases made from B&H Photo and Amazon via that click-through. Depending on the purchase, we may receive some financial compensation.
And finally, be sure to visit our friends at Red River Paper for all of your inkjet supply needs.
See you next week!
More Ways to Participate
Want to share photos and talk with other members in our virtual camera club? Check out our Flickr Public Group. And from those images, I choose the TDS Member Photo of the Day.
Podcast Sponsors
Red River Paper - Keep up with the world of inkjet printing, and win free paper, by liking Red River Paper on Facebook.
The Nimbleosity Report
Do you want to keep up with the best content from The Digital Story and The Nimble Photographer? Sign up for The Nimbleosity Report, and receive highlights twice-a-month in a single page newsletter. Be a part of our community!
Want to Comment on this Post?
You can share your thoughts at the TDS Facebook page, where I'll post this story for discussion.