Recently in Photography

  Page 236 of 381 in Photography  

No matter how digital I get, there are a few cameras that I will never part with. Today's analog favorite: the Hasselblad 500C with Zeiss Sonnar 150mm f/4 lens. And to house it all, another classic: the Lowepro Magnum 35 camera bag.

Lowepro Magnum 35 with Hasselblad 500C

A couple times a year, I pull out older cameras that I haven't used for a while and fire off a few frames -- just to keep them in good working order. This particular 500C was serviced about 8 years ago, and it sounds like an expensive Swiss watch when I wind the film advance crank.

I still have roll film and Polaroid packs. What I really wish I had was a digital back for this camera. That would be so amazing...


twitter.jpg Follow me on Twitter


And to house it all, another classic: the Lowepro Magnum 35 camera bag.

Michelle Vinay by Derrick Story

One of the most common complaints I hear from photo subjects is that the photographer doesn't communicate during the shoot. I can see both sides to this equation. On one hand, shooters are ofter absorbed in figuring out lighting, camera settings, and composition and forget to talk. Yet, imagine being a subject just standing there wondering what's going on. In this week's podcast I share tips on how to build rapport for your people shots. These tips will help you with a variety of assignments... just about anything that involves another person.

Listen to the Podcast

You can also download the podcast here (30 minutes). Or better yet, subscribe to the podcast in iTunes. You can support this podcast by purchasing the TDS iPhone App for only $2.99 from the Apple App Store.

Monthly Photo Assignment

Black & White is the Nov. 2011 Photo Assignment. You can read more about how to submit on our Member Participation page. Deadline for entry is Nov. 30, 2011.

More Ways to Participate

Want to share photos and talk with other members in our virtual camera club? Check out our Flickr Public Group. And from those images, I choose the TDS Member Photo of the Day.

Podcast Sponsors

Red River Paper -- The $7.99 Sample Kit is back! And with free shipping.

Make Your Photos Sizzle with Color! -- SizzlPix is like High Definition TV for your photography.

Need a New Photo Bag? Check out the Lowepro Specialty Store on The Digital Story and use discount code LP20 to saven 20% at check out.


Technorati Tags:
, , , , ,


Free Rick Sammon Webinar This Thursday

Professional travel photographer and teacher Rick Sammon is conducting a free webinar on Nov. 17, 12:00 - 1:00 PM PST. You can reserve your seat now by pre-registering.

Rick Sammon Webinar

I've learned much from Rick over the years (he's a good friend of mine), and I think you will too.


The Digital Story on Facebook -- discussion, outstanding images from the TDS community, and inside information. Join our celebration of great photography!
5 Printing Tips from My Latest Workshop

We spent Sunday afternoon at the TDS Workshop creating prints from the edited images we had been working on. During this session, I helped participants fine tune their workflow to get the best images possible out of the Epson R2000 we had set up in the classroom.

The Printing Room My personal printing room when not teaching workshops.

Here are five tips that resulted from the workshop:

  1. Turn off auto brightness in your Displays preferences. Then manually set brightness to two notches below full. Some participants had their displays set too dark which would adversely affect their print output. You may need to further adjust this for your particular computer and work environment. But this is a good starting point.
  2. Review your output under a daylight balanced light source. I use natural light from a nearby window when possible. Non-balanced light sources, such as tungsten lights, fluorescents, etc. make it difficult to accurately judge what comes out of the printer.
  3. Keep the workflow as simple as possible. Modern printers, such as the Epson R2000 have very intelligent software. In Aperture, we used "Printer Managed" in the Aperture print dialog box, then simply chose the correct paper surface in the ensuing Epson Print Settings dialog: Epson dialog > Print Settings > Media Type. Modern printers are much smarter than they used to be.
  4. Find a printing paper that you really like. We were printing our portraits on a luster surface that looked and felt great -- Red River Arctic Polar Luster. There are a variety of papers our there. Find one that you love.
  5. Improve your image editing skills. By knowing how to fine tune the color and luminance in your images, you'll get more satisfying output when you print. Keep in mind that your computer is backlit, and that paper is reflective. So prints often don't "glow as much." You can help compensate for this by fine tuning your settings in the print dialog box. Get familiar with these options so you feel more in control.

Printing your own work can be a very satisfying experience. By following these tips, and practicing with your equipment, you can produce some great artwork.


The Digital Story on Facebook -- discussion, outstanding images from the TDS community, and inside information. Join our celebration of great photography!


TDS Aperture Workshop in Full Swing

Our crew of photographers wrapped a full day of classroom instruction and shooting on Saturday during the November TDS Aperture Workshop.

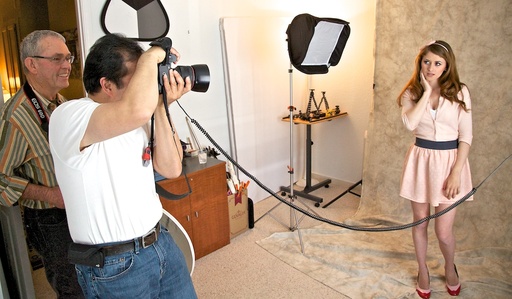
tds_aperture_workshop_11-11 One of three model shoots on Saturday that will provide fresh content for the image editing modules on Sunday.

For today, which is the second session of the event, we'll use the portraits we shot yesterday for the image editing modules where we perfect basic adjustments, such as color correction, plus advanced techniques such as skin smoothing, brush work, and more.

We'll also make prints today with the Epson R2000 photo printer. The day will wrap up with professional slideshow authoring where we combine video and stills to create presentations that can be published online or viewed in person.

Currently we have two Aperture Intensive workshops in the 2012 schedule. You can learn more about them, and the other events, by visiting the TDS Workshops page.


The Digital Story on Facebook -- discussion, outstanding images from the TDS community, and inside information. Join our celebration of great photography!


Apple released Digital Camera RAW Compatibility Update 3.9 that provides support for 11 new cameras, including the Canon S100, Nikon 1, Sony NEX 5N, and the new Olympus PENs. It's available via Software Update on your Mac.

New Yorker with Olympus E-PM1 New Yorker hotel shot with an Olympus E-PM3 (Mini) in Raw and processed in Aperture 3. Click on image for larger size. Photo by Derrick Story.

This means that Raw files from the following cameras can now be processed in Aperture 3, iPhoto 9, and Preview for Mac OS X Lion.

  • Canon PowerShot S100
  • Nikon 1 J1
  • Nikon 1 V1
  • Nikon COOLPIX P7100
  • Olympus PEN E-PL1s
  • Olympus PEN E-PL3
  • Olympus PEN E-PM1
  • Panasonic LUMIX DMC-FZ150
  • Sony Alpha NEX-5N
  • Sony Alpha SLT-A65
  • Sony Alpha SLT-A77

I've been shooting Raw files with my Olympus PEN Mini, so I now can convert those images from this in Aperture:

unprocessed_raw.jpg

To fully processed images that look like this. All I have to do is open the Adjustments tab, and click on the thumbnail. Aperture will automatically process the Raw file for you, once you have the update installed.

processed_raw.jpg

The workflow that I recommend for photographers who buy new cameras that are not supported yet in Aperture, is to shoot Raw+Jpeg in the beginning. Upload the Raws and Jpegs separately in Aperture and keep the in separate Albums, as I've done here. (Check the Library pane in the middle illustration to see the set up.) You can use the Jpegs immediately. Once the Raw update is available, you can then process the Raw files and switch over to them.

I've taken many good shots with the E-PM1 prior to the Raw update. If I didn't use this technique, I'd have only Jpegs from those weeks of shooting. Now I have both.

More Aperture Tips and Techniques

To learn more about Aperture 3, check out my Aperture 3 Essential Training on Lynda.com. Also, take a look at our Aperture 3 Learning Center. Tons of free content about how to get the most out of Aperture.


The Digital Story on Facebook -- discussion, outstanding images from the TDS community, and inside information. Join our celebration of great photography!
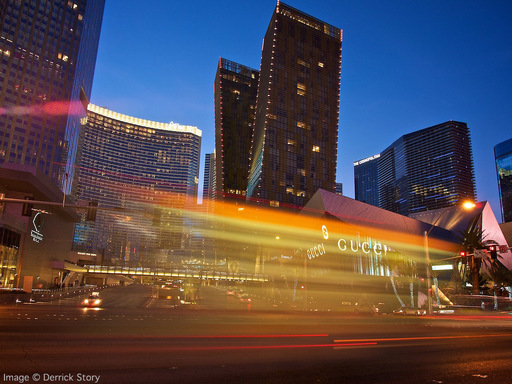

I ran across this article, Panheads Vs Ballheads, and it got me thinking about how my preferences for tripod mounts has swung back and forth over the years.

GorillaPod Focus on 1" Pole Close Up

First of all, I do use tripods. Don't necessarily love them, but they are required for many of the shots I take. I began using panhead mounts because they were easy to use. But those darn handles sticking out moved me over to ballheads for hiking and other outdoor activities. Then video came along... and panheads are so much better for movie making. Or I should say, the ability to pan is what's required.

That need led to some good moments with Joby's Ballhead X. It provides the convenience of a traditional ballhead, yet gives me a separate knob for panning control. Plus, the clamp and plate are Arca-Swiss system compatible. (You can get the Ballhead Xby itself for $47 or in combination with the Gorillapod Focusfor $113, as shown in the illustration.) Then there are other days where I go with the monster Bogen aluminum tripod with ginormous panhead. I guess I'm not a "one tripod kind of guy."

So where do you stand? Panhead, ballhead, or hybrid? This is just for fun, but it does make a difference when you have a job to do.


Find great deals at the TDS Photography Store on Amazon.


Michelle for Aperture Workshop

Michelle Vinay will be the featured model this weekend for the Aperture Intensive Workshop in Santa Rosa, CA. Attending photographers will have three sessions with Michelle to build fresh content for their Aperture library. We will then use those photographs for our image editing tutorials where attendees will learn portrait techniques such as skin smoothing, blemish retouching, color adjustment, and more.

Michelle will be available for feedback as students work on images of her. I know she's looking forward to working with our TDS photographers.

If you'd like to treat yourself to a photography intensive, take a look at our TDS Workshops page and peruse the schedule for 2012. There's a sign-up form available too. And if you're in Northern California this weekend, consider joining the Aperture Intensive workshop. We're going to have a great time!


The Digital Story on Facebook -- discussion, outstanding images from the TDS community, and inside information. Join our celebration of great photography!
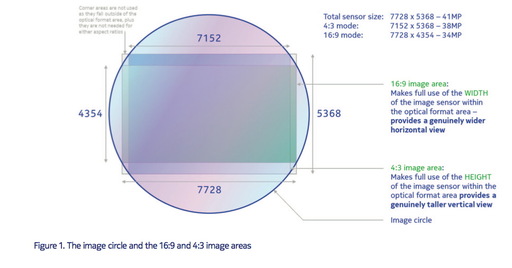

Some people vow to shed weight or drop an undesirable habit when the New Year rolls around. As 2012 approaches, I think this is also a great time to fine tune your photo organization and backup plan. When I recorded my lynda.com title, Organizing and Archiving Digital Photos, I always had the New Year in mind.

The most important concept is "Start where you are." What I mean by that, is build your improved system for 2012, then start using it for the new pictures you take. At first, don't worry about all those other images from previous years. Once you get the new system fine tuned with a manageable amount of photos, you can begin to bring in the old stuff a chunk at a time.

By taking the "start where you are" approach, you won't overwhelm yourself or your new system while you're still working out the kinks. This prevents frustration, and will give you better odds of success.

As for creating the system itself, take a look at Organizing and Archiving Digital Photos for some new ideas. If you start building your plan now, you should be ready to implement it on Jan. 1, 2012.

More on Organizing and Archiving Digital Photos

Organizing and Archiving Overview Movie

Choosing the Right Hard Drive for Your Photo Backup

Roundtripping from Lightroom to Photoshop

"Organizing and Archiving Your Photos" - Digital Photography Podcast 290

Quick Keywording Tips in Lightroom 3

Backing Up Aperture 3 Via My Local Network


The Digital Story on Facebook -- discussion, outstanding images from the TDS community, and inside information. Join our celebration of great photography!


Photo Stream is iCloud's free picture service that shares your mobile pictures with computers and iOS devices. Like many Apple products, this first version works well, but you don't have much control over it. In this week's podcast I provide a brief introduction to Photo Stream, then explain how to set up a "reservoir system" that allows you to better control its stream. The ideal appraoch uses iPhoto 9.2.1 as the reservoir and Aperture 3.2.1 as the filter. It's a cool setup, and I think worth a try.

photo_stream_welcome.jpg

Listen to the Podcast

You can also download the podcast here (31 minutes). Or better yet, subscribe to the podcast in iTunes. You can support this podcast by purchasing the TDS iPhone App for only $2.99 from the Apple App Store.

Monthly Photo Assignment

Black & White is the Nov. 2011 Photo Assignment. You can read more about how to submit on our Member Participation page. Deadline for entry is Nov. 30, 2011.

More Ways to Participate

Want to share photos and talk with other members in our virtual camera club? Check out our Flickr Public Group. And from those images, I choose the TDS Member Photo of the Day.

Podcast Sponsors

Red River Paper -- The $7.99 Sample Kit is back! And with free shipping.

Make Your Photos Sizzle with Color! -- SizzlPix is like High Definition TV for your photography.

Need a New Photo Bag? Check out the Lowepro Specialty Store on The Digital Story and use discount code LP20 to saven 20% at check out.


Technorati Tags:
, , , , ,