There are a lot of nifty tools stashed away in Adobe Photoshop Elements 9 (Win/Mac)that can help you improve your final output. I've been playing with Photomerge Exposure to draw the best tonal values from a set of bracketed images. It's so easy to use, and the results have been quite good.
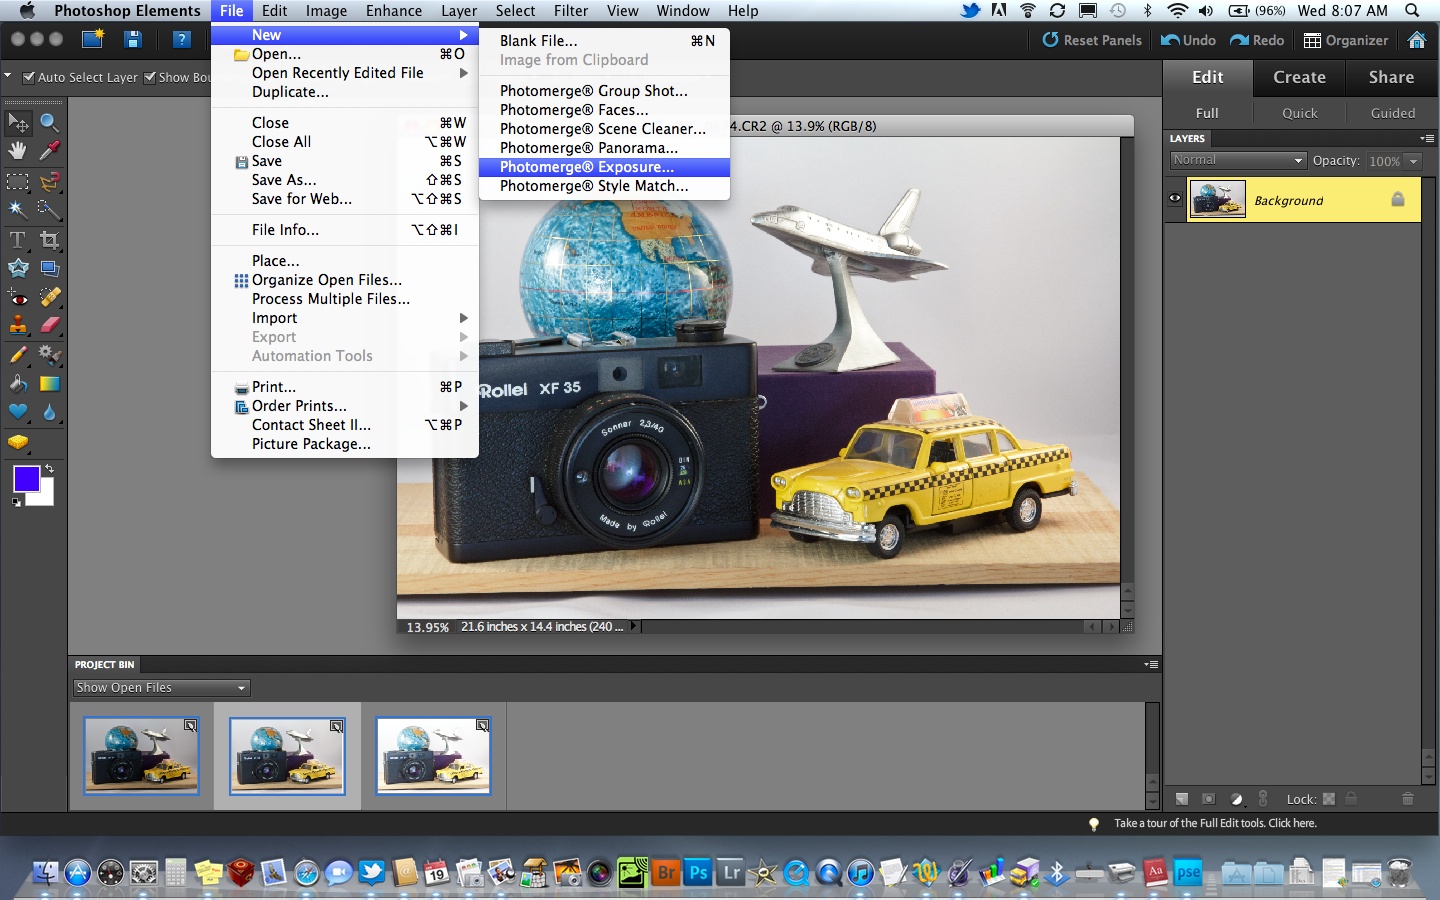 Choosing Photomerge Exposure in Photoshop Elements 9. Click on image for full screen version.
I usually start with a set of Raw files at varying exposures. I then use the Open command in Photoshop Elements 9. This first takes me to Adobe Camera Raw for initial processing. After that, the images move into the Project Bin in Elements. I select all three in the Project Bin, then go to File > New > Photomerge Exposure.
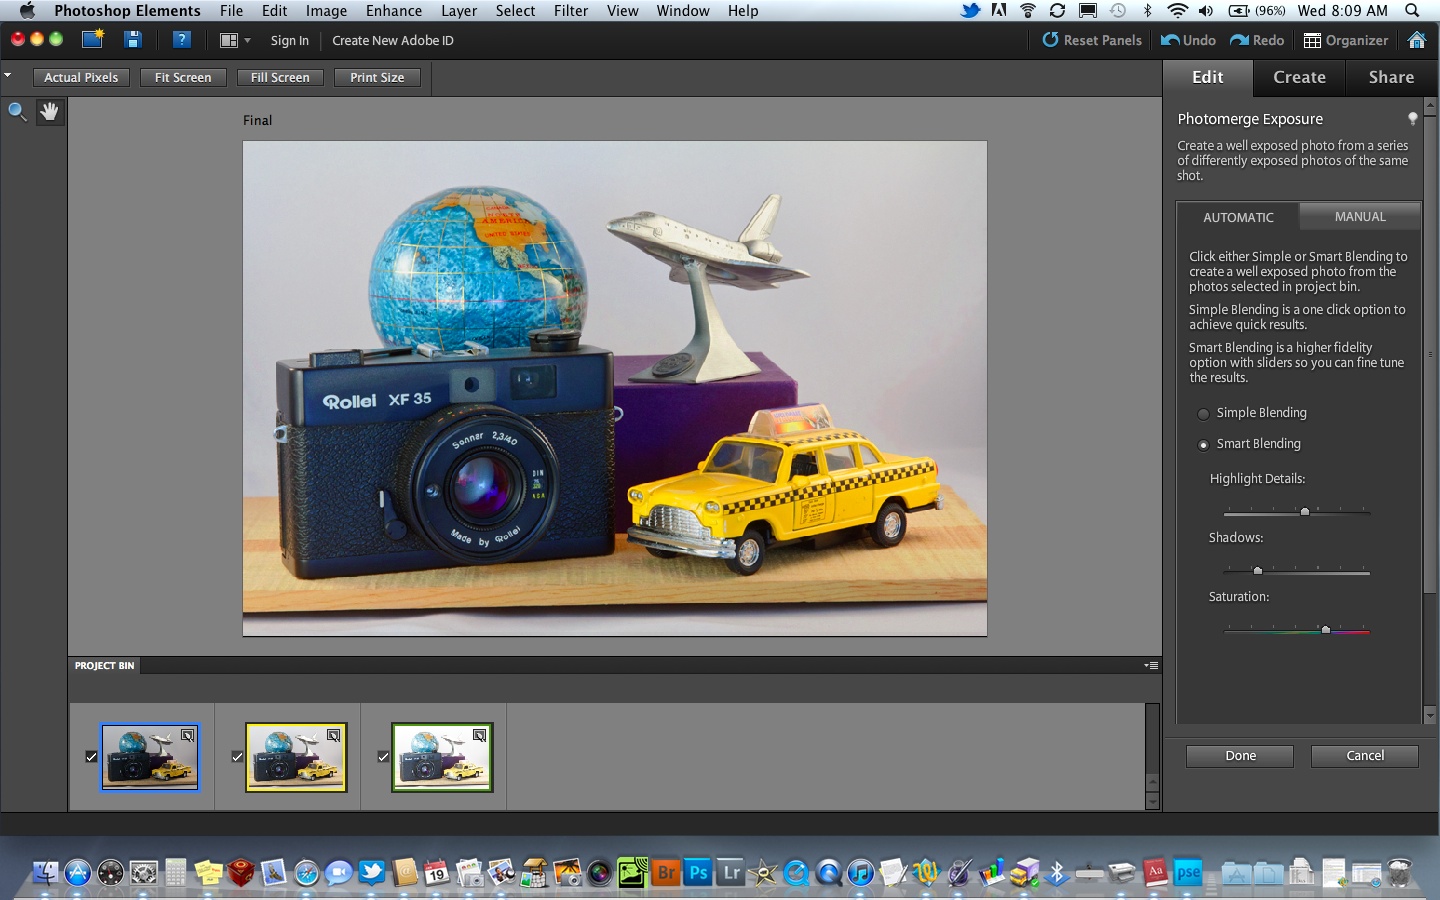 Using Smart Blending in Photoshop Elements 9. Click on image for full screen version.
I use Smart Blending in the Automatic tab to adjust highlights, shadows, and saturation. Then click Done, and the application does all of the exposure merging for me. The result is a Photoshop file that I can further play with if I want.
 Final output from using Photomerge Exposure in Photoshop Elements 9. Click on image for full screen version.
There are a total of six photomerging technologies in Photoshop Elements 9. All of this, plus standard image editing tools and Adobe Camera Raw support, in a package that sells for $79on Amazon. Not bad!
Image captured with a Canon 60D with a 24-105mm f/4 L zoom. ISO 1600 and custom white balance using an ExpoDisc.