Recently in Photography

  Page 373 of 382 in Photography  

Canon 30D

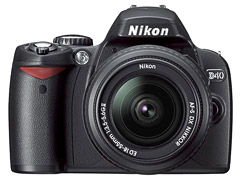
DP Review has published an exhaustive look at the new Canon 30D. Among their "pros," they cite excellent resolution with very good per-pixel sharpness, welcomed spot meter, low noise at high ISOs, great long exposure capability, spacious 2.5" LCD monitor, and excellent construction.

For the "cons," the auto white balance has only average performance, and the ISO sensitivity is not displayed on the top panel. Even though some people have complained that there wasn't a megapixel upgrade with this model, DP Review said there is really little "real world" difference between 8 and 10 megapixels.

You can read the complete report here.

Technorati Tags: , ,

Color Readouts in HUD

If you have Aperture already, version 1.1 is available right now via Software Update. If you haven't purchased it yet, Apple has lowered the price to $299 (down from the original $499).

I've been using Aperture on a PowerBook from the beginning, and have been waiting for the 1.1 release to provide better performance when working with big RAW files. That day is here. I downloaded the update and went to work.

Many people will comment on the new color values readout that's available in the HUD and the Digital Loupe. Nice addition, but the three truly important changes are improved RAW decoding, faster performance on a PowerBook G4, and UB compatibility on the new MacBook Pro. After just a morning of testing, Apple appears to deliver on all three counts.

When you first fire up 1.1, you're greeted with this screen (below). The library update went smoothly on one of my smaller libraries, and I'm going to test updating a bigger one later today. The workflow was smoother on the G4 that previously with the 1.0 version, and I'm looking forward to burning through a large project with this update, just so I can get to know how all the different functions perform.

Welcome Screen

As for RAW decoding... well, that's going to take some side by side testing with 1.0 decodes. I do like the new RAW Fine Tuning control in the HUD. It allows me to stick with my previous 1.0 decode, or switch to the new 1.1 interpretation with added controls. My first impression is that the new rendering of my .CR2 files from a Canon 5D and Digital Rebel XT look good. Very good.

RAW Fine Tune

Of course the real temptation is to get a MacBook Pro now that Aperture is Universal Binary. Alas, if only they had the 17" model ready. Overall, I think this is a fine upgrade, and I'm looking forward to testing all of its nooks and crannies.

Technorati Tags: ,

iPhoto 6

How would you like to own a complete, unaltered chapter from the just-released iPhoto 6: The Missing Manual that covers two of iPhoto's 6 newest features: photocasting and iWeb publishing? For free!

You can right now by visiting the O'Reilly iPhoto 6 catalog page and clicking on the Chapter 9: iWeb, Photocasting, & Network Sharing (PDF Format) link. This PDF download is 35 pages and a 7.4 MB download. You'll learn everything you need to know about sharing your images via RSS (photocasting), building iWeb pages from your iPhoto 6 library, and iPhoto's networking capabilities.

And remember, iPhoto 6 runs on the new Intel Macs too...

Technorati Tags: ,

iPhoto6 TMM

"Don't let the rumors fool you. iPhoto may be simple, but it isn't simplistic," say David Pogue and Derrick Story. "It offers a wide range of tools, shortcuts, and database-like features; a complete arsenal of photo-presentation features; and sophisticated multimedia and Internet hooks. Unfortunately, many of the best techniques aren't covered in the only 'manual' you get with iPhoto--its slow, sparse electronic help screens."

That's where their new iPhoto 6: The Missing Manual (Pogue and Story, O'Reilly) comes in: it's the iPhoto book that should have been in the box and a complete course in digital photography.

Dramatically faster than previous versions, iPhoto 6 can handle 250,000 photos and boasts dozens of new features for storing, searching, editing, publishing, and sharing digital pictures. In full color, this authoritative, witty guide delivers the technical expertise to take advantage of each and every iPhoto detail, as well as the artistic know-how to shoot consistently great photos--including professional tips for composition, lighting, and manual exposure.

Technorati Tags:

PhotoFocus Radio

iPhoto 6 continues to impress casual and serious photographers alike. In an recent interview with Scott Bourne on Photofocus Radio, Derrick Story, co-author of iPhoto 6: The Missing Manual discusses with Scott the new features in version 6, including Photocasting. The interview begins about half way through the show.

Scott also covers news in the world of photography and provides a hands-on review of Apple's MacBook Pro. Lots of good stuff to listen to. You can download the show here or visit Photofocus.com and click on the April 8 entry.

Technorati Tags: ,

Exposure Plug-In

The folks at Alien Skin Software market their latest Photoshop plug-in, Exposure, as a film simulator. That's right, they've analyzed dozens of film stocks and brought those unique characteristics to your digital photos. So if you're in the mood for the vivid colors of Velvia or those rich Kodachrome blacks, you can have them with just the click of a mouse.

Where Exposure really turned my head though was how effortlessly it handled Black & White emulation. Most of my favorite films were there -- Tri-X, T-Max, Delta 100, Neopan, and HP5 -- and they look great. Never has film grain been such a welcomed sight. And unlike the old days, I can control the grain in the shadow, midtones, and highlights... and even the size of the grain itself. The Alien Skin presets for the different film stocks are all you'll probably ever need, but if you really want to tinker, they can be the starting point for you creating your own film stock (and saving it for future use).

Needless to say, Exposure is a terrific B&W converter for your digital images. Not only will they look like "real" B&W photos, you have an array of "film looks" to choose from. Print one of these conversions on a quality B&W printer, such as the Epson R2400, and you'll never yearn for the stench of Rapid Fixer again.

You have all sorts of additional controls beyond film emulation, such as curves, sharpness, and toning. There are some nice UI features such as a variety of split preview panes to choose from, a toggle button to see the original photo, and a magnifier. All of this functionality and convenience comes at a price however; Exposure will set you back $199. To decide if you think it's worth the money, you can download it and play with a fully functional version for 30 days. I recommend that you give Exposure a try. It works on both Mac and Windows platforms.

Technorati Tags: ,

Epson R2400

The Epson R2400 is the new workhorse printer for the Story Photography studio, beating out the latest offerings from Canon and HP. I had a chance to get to know the R2400 during this past rainy weekend, and I thought I pass along my first impressions.

I based my buying decision on a few key factors. First, I was impressed with the new UltraChrome K3 inks. They are beautiful and take archival permanence to a new level... 100 years plus. Second, Epson's downloadable ICC Printer Profiles enable me to get perfect color matching right out of the box. Why every printer manufacturer doesn't provide these is beyond me. Third, Epson's printer software for both Mac and Windows is excellent and easy to use. And finally, the B&W output from the R2400 is gorgeous.

The R2400 comes with a FireWire cable, but since I'm often printing from a PowerBook that only has one FireWire 400 port, I opted to use my own USB cable. The printer works equally well via FireWire or USB 2.0. A full set of K3 cartridges comes with the unit, so you can fully set up and test without having to buy ink. I have an extra set, but after a weekend of printing both B&W and color, I haven't had to replace any of the 9 colors yet.

If you like to print on matte surface, as I do, keep in mind that you have to switch one of the cartridges to do so. I recommend that you batch your printing to reduce the need to swap out cartridges. It only takes a few minutes for the R2400 to go through the reset process when you make a change. That's not forever, but it sure feels like it when you're anxious to make a print.

The paper feed is wonderful, and I was able to easily print on a variety of surfaces without a single jam. The top loading feature, even for 13" x 19" papers, is a true convenience and space-saver.

Finally, the output is outstanding. Accurate color, no smears, true photo quality, and fast printing speed. The R2400 will set you back about $800 plus $14 per cartridge. That's a lot of money for casual printing. But if you like making your own fine art enlargements (up to 13" x 19") and want prints that last for a long, long time, this is a highly recommended printer.

Technorati Tags: , ,

Automate Aperture Presets Backup

Aperture Print Presets

Aperture enables you to create presets for many of its functions including saving custom print output settings, slideshow transitions, and creating your own file export configurations. Much in the same way that your Photoshop actions become invaluable assets, so will your Aperture presets. In fact, if you were to lose those presets, or move to a new installation of Aperture without them, you'd feel the pain of having to recreate all that work.

I recommend that you automate backing up your Aperture presets so that you always have the latest settings available. Since I have a .Mac account, I can use Backup to automatically store my latest presets online. I can then retrieve them for a new installation or for restoration after a crash.

The Aperture presets are located here: Your Home Folder > Library > Application Support > Aperture. Simply navigate Backup to this folder and set up daily backups. That way you'll always have your latest set of presets available... no matter what happens.

Aperture Presets Backup
Setting Up Backup

Technorati Tags:

History of Photoshop

Photoshop Look Back

Adobe shipped Photoshop 1.0 in February 1990. The story of one of the original "killer apps" begins in Ann Arbor, Michigan (USA) with a college professor named Glenn Knoll. Glenn was a photo enthusiast who maintained a darkroom in the family basement. He was also a technology aficionado intrigued by the emergence of the personal computer. His two sons, Thomas and John, inherited their father's inquisitive nature. And the vision for future greatness began with their exposure to Glenn's basement darkroom and with the Apple II Plus that he brought home for research projects.

What follows is one of the most interesting sequence of events in software history. When I was editor for a defunct online site called Web Review in 2000, I worked with Adobe to publish a "look back" at the development of Photoshop to celebrate its 10-year anniversary. The article was a big hit.

But the folks who took over Web Review did the unthinkable and actually took many of its pages off the Internet, including the Photoshop article. Fortunately I was able to reconstruct it and posted it on Story Photography. It became the most popular page on the site. In fact, if you Google "Photoshop History," that article will be the #1 result.

Even thought I've refocused Story Photography to concentrate on weddings and portraits, I've kept all of the original pages intact online with their original urls. I'll be pointing to some of them on occasion from here. Seems appropriate that I start with my article titled, From Darkroom to Desktop—How Photoshop Came to Light. Take a look at it. I think you'll enjoy the story.

Technorati Tags:

Lightroom and Aperture

What happens when you get three gregarious photographers together for chat about the state of digital photography including some of its most popular tools? Harris Fogel dares to enter these waters as he interviews authors Peter Krogh, Derrick Story, and Mikkel Aaland -- all at the same time in San Francisco.

You can listen for yourself by visiting Mac Edition Radio and firing up this 20-minute interview. You can enjoy it right there in your browser, or download the piece and put it on your iPod. Either way, I'm sure you're going to like this conversation.

Just in case you're not familiar with these authors, Peter Krogh wrote the The DAM Book: Digital Asset Management for Photographers, Mikkel Aaland wrote Photoshop CS2 Raw, and Derrick Story's latest books are iPhoto 6: The Missing Manual and the Digital Photography Pocket Guide, 3rd Ed.

Technorati Tags: ,