This is The Digital Story Podcast #818, Nov. 23, 2021. Today's theme is "Holiday Gifts Under $40 for Photographers." I'm Derrick Story.
Opening Monologue
Photographers aren't the easiest folks to buy for. They're picky about their gear, they already have more stuff than anyone realizes, and what they don't have usually costs a lot of money. But there are always a few hidden treasures that are bound to delight, and those goodies are the focus of this week's TDS Photography Podcast. I hope you enjoy the show.
Tune-In Via Your Favorite Podcast App!

Apple Podcasts -- Spotify Podcasts -- Stitcher
Podbean Podcasts -- Podbay FM -- Tune In
Holiday Gifts Under $40 for Photographers
I have 7 very cool gifts for photographers, each one costs less than $40.
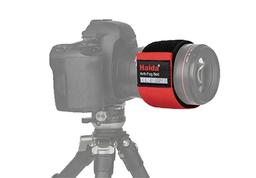
Haida Anti-Fog Belt / Lens Heater $20 - Haida has recently introduced an inexpensive USB-powered Anti-Fog Velcro belt that wraps around the exterior of a lens and keeps it warm, therefore preventing it from fogging as the temperature dips.
Think Tank TT737 Photo Lens Case Duo for DSLR/Mirrorless Lenses Cruz V2 Fresh Foam, 5 $21 - I've been using these for a couple years now, and I just love them. They come in different sizes, I like have the variety myself. This one is for mirrorless.
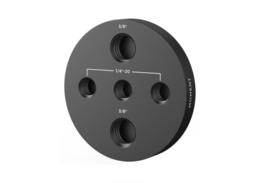
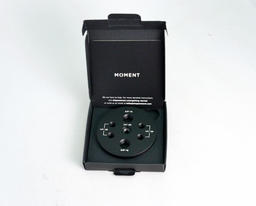
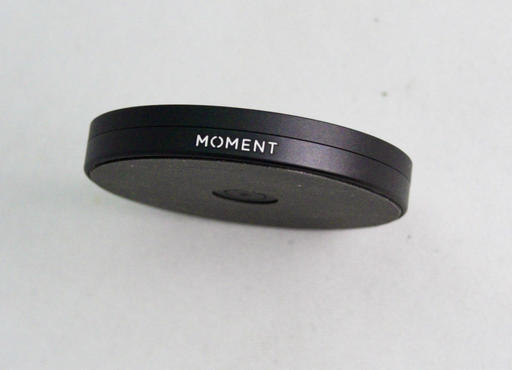
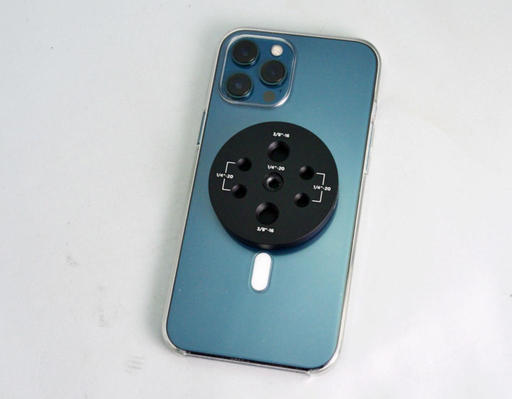
Moment iPhone 12/13 Multi-Threaded Cheese Plate Mount with MagSafe $30 - Increase your mobile mounting options with this iPhone 12 Multi-Threaded Cheese Plate Mount with MagSafe from Moment. The thin machined aluminum plate attaches to any iPhone 12 model, with or without a MagSafe-compatible case, via a strong (M)Force magnet array. When mounting without a case, the padded surface helps to prevent scratching. On the other side is a cheese plate with 5 threaded female connections. You get two standard 3/8" and three standard 1/4"-20 connections. This provides increased freedom in mount positioning, and in the types of tripods and mounts you can attach your iPhone to.
FRDM Vigor Lightweight Liner Gloves Touchscreen Hiking Running Fishing Photography Outdoor Activities, for Men and Women $30 - Touchscreen compatible e-tips and convertible slip-thru instant index finger and thumb access allows you to text, take the perfect photo, or adjust your music without removing your gloves.
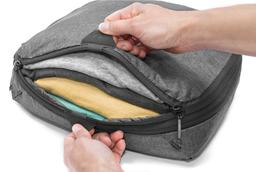
Peak Design Travel Packing Cube (Medium) $36 - I'm already a huge fan of packing cubes, and these are the best I've seen.
Cascade Mountain Tech Trekking Pole - Carbon Fiber Monopod Walking or Hiking Stick with Accessories Mount and Adjustable Quick Locks $39 - The Cascade Mountain Tech Carbon Fiber Monopod is the perfect tool for amateur or professional photographers and hunters who seek adventure in the great outdoors. The carbon fiber shaft is lightweight and durable, making it easy to pack without dragging you down.

Gift Certificate from Local Camera Shop - If you're lucky enough to have a camera store in your town, purchasing a gift certificate is a great way to support them during the holiday season. Not only can you provide maximum flexibility for the gift recipient, you're helping to support local business.
FotoMagico 6 Makes Pro Slideshows a Snap
You can read the entire article on The Digital Story
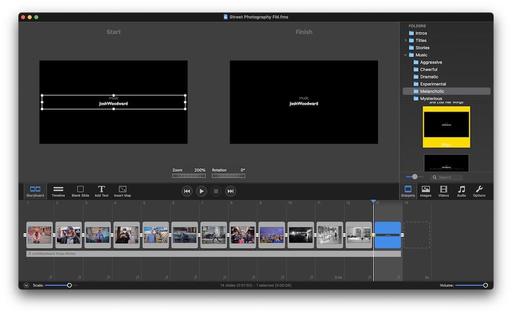
Boinx Software has released FotoMagico 6, the latest version of their top-drawer slideshow authoring software. The bundle includes applications for both the Mac and the iPad, plus tons of extras including templates and royalty-free music tracks.
FotoMagico 6 features professional Image Effects that allows you to quickly customize the appearance of a frame or frames in the presentation with color correction, monochrome, and more. You can apply similar enhancements to words with Text Effects.
Plus you have iPad integration via iCloud so that you can start a project on one device, then continue working on it with another. All of your changes are saved regardless of where you made them.
And there are new templates and music tracks as well.
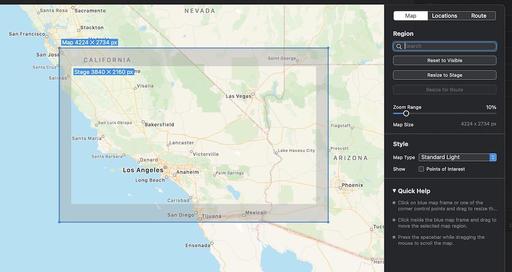
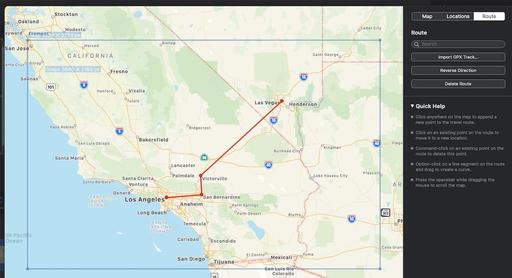
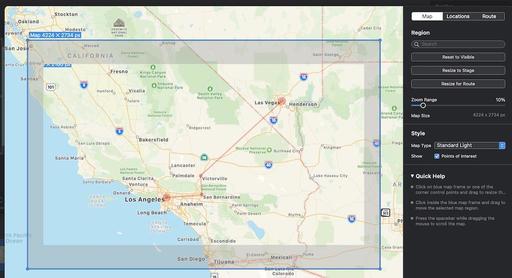
But my favorite new feature is Map Assist that lets you plot and animate your journey for a travel slideshow.
Availability and Pricing
You can download a free trial from the FotoMagico website and try out all the new features I covered here. If you want to purchase the software, it is available in the Mac App Store or directly from Boinx for $7.99 a month subscription or for $79.99 for a year.
If you want to create professional presentations for publishing online or in person, this is the most powerful and easy to use software available.
How Many Camera Bags Does a Photographer Need?
You can read the entire article on fStoppers.
Every photographer needs a camera bag. Preferably one that not only protects the equipment, but is also comfortable to use. It has to carry at least a camera and a couple of lenses, along with the necessary accessories. Unfortunately, there is not one camera bag that is perfect for every situation.
Camera bags come in all shapes and sizes. Every now and then a Kickstarter project comes up with a new bag that is said to be the ultimate solution for carrying your equipment. But what I discovered over the years is, that a perfect bag for every situation doesn't exist. What's perfect depends not only on the situation you're in, but also on personal preferences.
First of all, don't go cheap on a camera bag. Remember, it will carry the expensive equipment you own. It has to protect your camera and lenses while transporting it or during travels. The material has to be strong enough and durable. It doesn't mean a cheap bag is a bad bag. Just be careful when choosing one and don't get fooled when a perfect bag for everything is presented; It doesn't exist.
The author then goes into detail about the different kinds of camera bags.
So, how many camera bags does a photographer need? I think most photographers need at least two bags. One backpack and one shoulder bag. Do you agree?
Virtual Camera Club News
Inner Circle Members: A big thanks to those who support our podcast and our efforts!
My Writing on Medium.com: I now have 46 published articles on Medium.com. And if you haven't visited the site, and enjoy good writing on a variety of topics, I suggest that you may want to take a look. You can just go to the home page and enter "Derrick Story" in the search field. And if you like what you read, then follow me!
The New Donation Kit for Carefree Shipping of Found Film Cameras - If you've discovered a film camera that's no longer being used, our new Donation Kit makes it easy to pack and ship. Just visit the Contact Form on thenimblephotographer.com, click the box next to Donating a Film Camera, and let me know what you have. In your note, be sure to include your shipping address.
Red River Paper - And finally, be sure to visit our friends at Red River Paper for all of your inkjet supply needs.
See you next week!
Product Links and Comments
There are product links in this article that contain affiliate tags. In some cases, depending on the product, The Digital Story may receive compensation if you purchase a product via one of those links. There is no additional cost to you.
You can share your thoughts at the TDS Facebook page, where I'll post this story for discussion.