onOne Software announced today the availability of Perfect Layers for Aperture and Lightroom at a special intro price of $99.95. I loaded up this plug-in into Aperture 3 on my MacBook Air to take it for a quick test drive.
After installation, Perfect Layers is available via Photos > Edit with Plug-in. It takes a few seconds to create the Photoshop file and present it to you in a new window. You can select one file, or multiple images to open in Perfect Layers.
Once there, you have a streamlined, but very capable version of the layers functionality that was originally created by Adobe for Photoshop. If you're working with a single image, the first thing you'll want to do is copy it to create a new layer. Then you can play with blending modes and painting to create the effect you want.
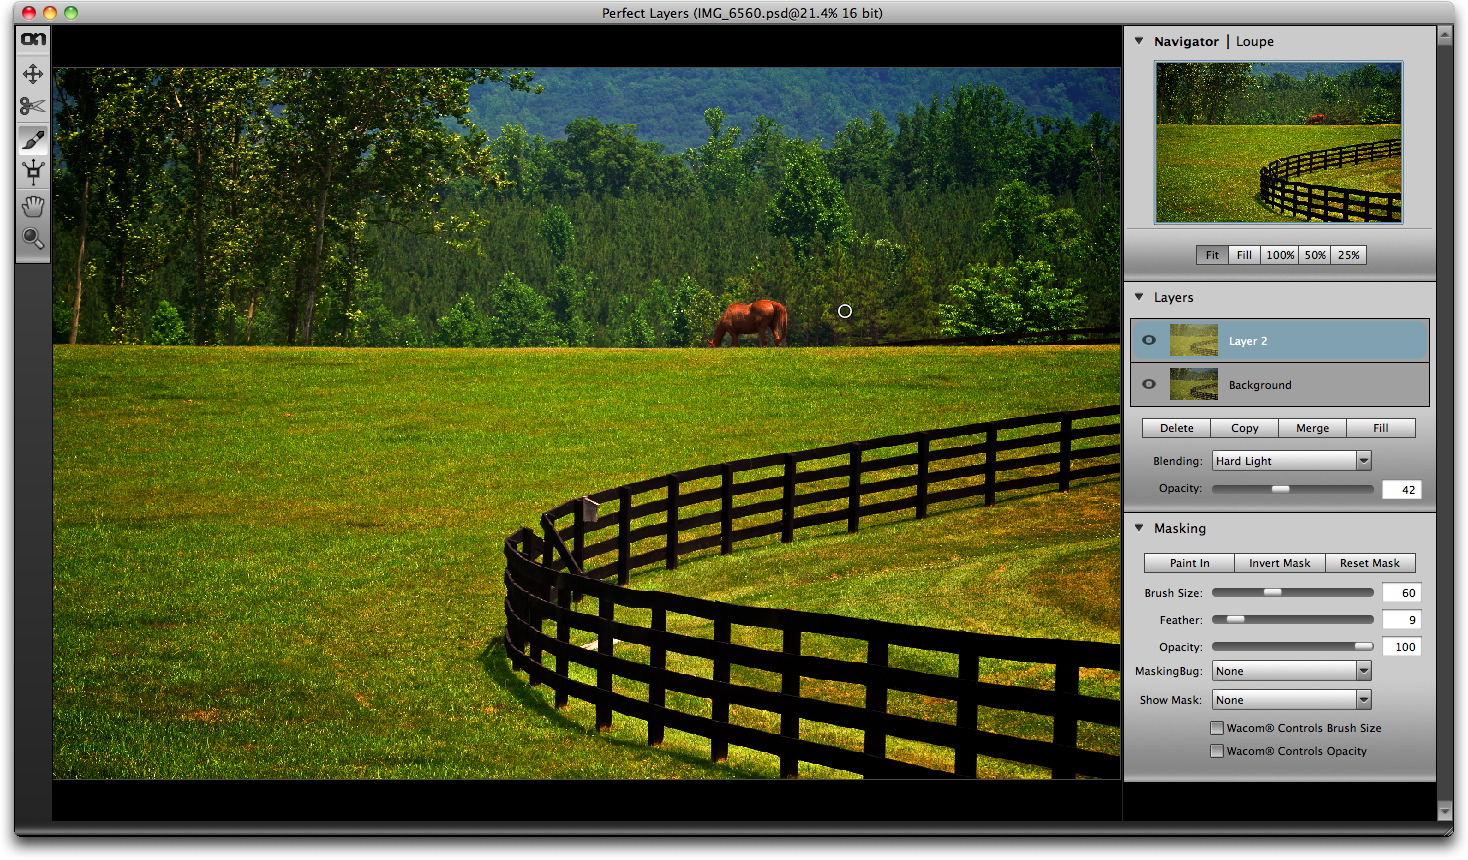
I wanted to add a little punch to this countryside shot from Virginia. So I used the Hard Light blending mode, then "painted out" the effect on the horse. That allowed me to pump up the landscape without overdoing it on the main subject.
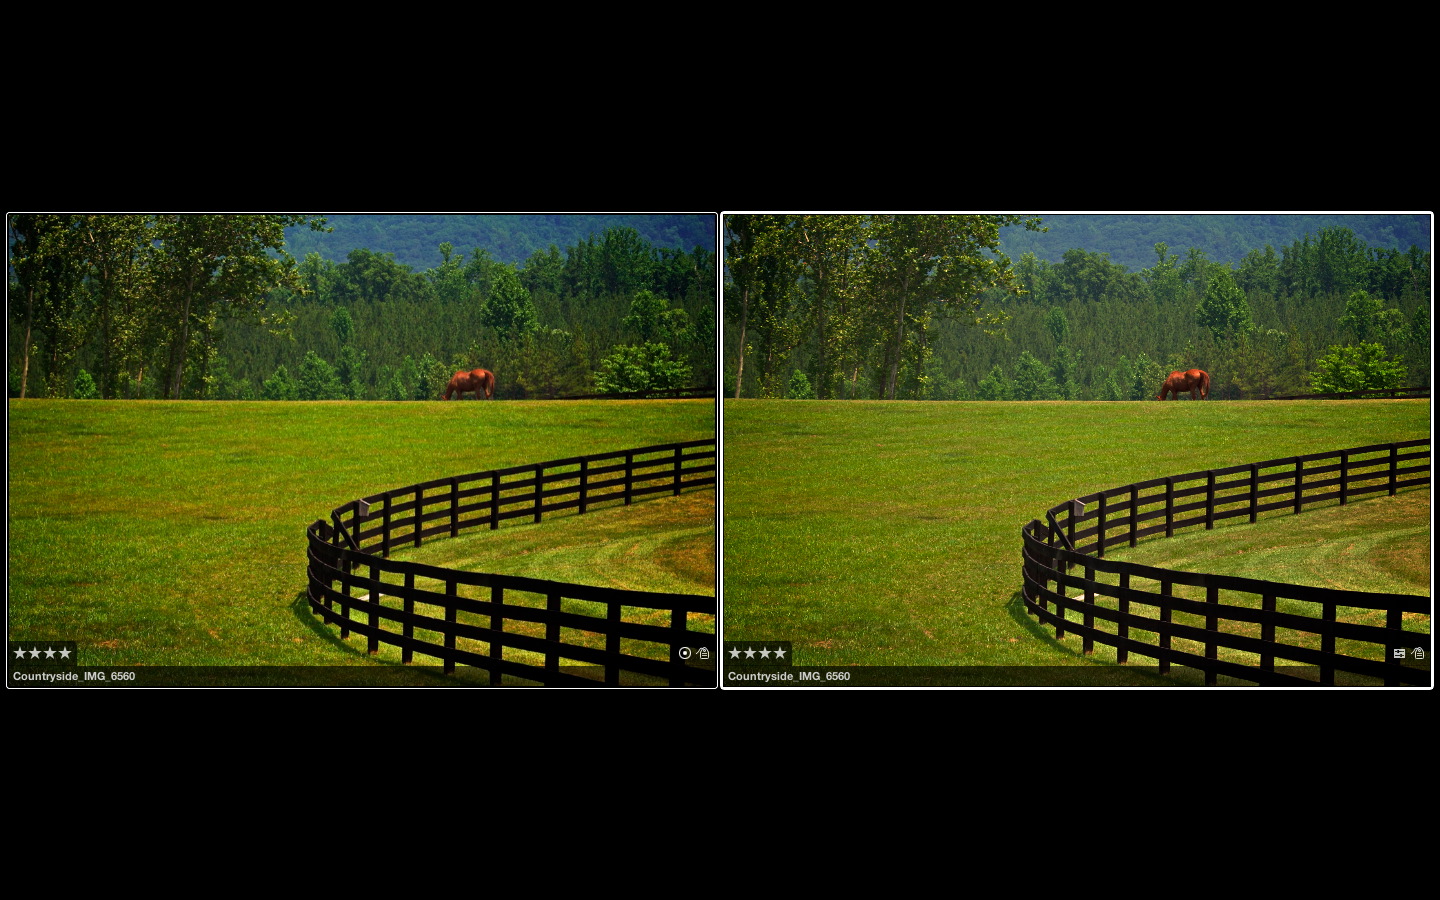
 Side by side comparison in my Aperture library. The Perfect Layers version is on the left.
Working in Perfect Layers is fairly intuitive if you've worked in Photoshop. If not, you might want to spend some time in the How To section on the onOne site. That should get you up to speed quickly.
Performance was OK, but the plug-in did seem to tax my MacBook Air, which usually handles my photography apps quite well. I also think onOne needs to add a "Save" and "Cancel" buttons to the interface. Once you're finished with the work, your only options are to go to the menu, or just close the window and wait for the dialog box that asks you if you want to save. Seems like an overlooked detail to me.
Perfect Layers isn't for you're everyday photos. This plug-in is for those special shots that you want to get just right, or for building composite images. You pay the typical round tripping price when you use this app. My original horse shot is 27 MBs in the Aperture library. The Perfect Layers version is 411 MBs. As I always say in my workshops, you want to use the native Aperture tools as much as possible, and save plug-ins for only when you need them.
For photographers who don't want to make the full investment for Photoshop CS5 but wants the ability to work with layers in Lightroom or Aperture, Perfect Layers represents an alternative. Keep in mind that Photoshop Elements also has layers capability, however. You can roundtrip from Aperture to CS5 or Elements, or use a plug-in. It really depends on which tool you like the best. And since there is a 30-day free trial of Perfect Layers, you might want to give it a look.
For the time being, I'm going to continue to test Perfect Layers in Aperture. I like the interface and the convenience. And I'm curious to see how often I choose this tool over the other options. I'll keep you posted.
The Digital Story on Facebook -- discussion, outstanding images from the TDS community, and inside information. Join our celebration of great photography!