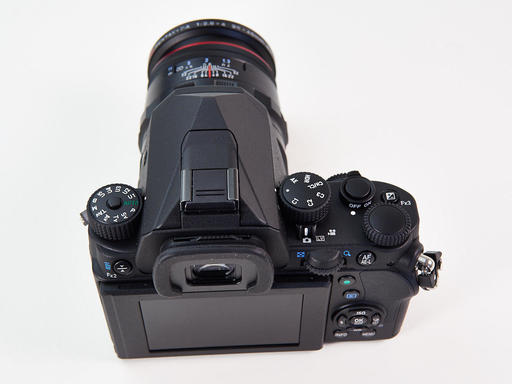
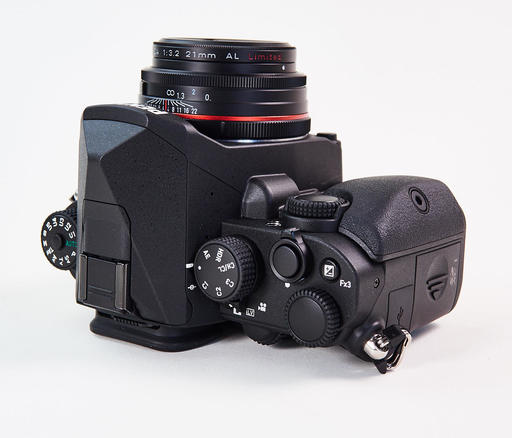
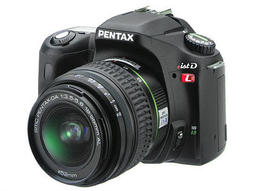
The Pentax KP DSLR back panel is well designed. It isn't intimidating - just a few buttons on the right side of the 3" articulated LCD - but it provides an impressive amount of control.
The 4-Way Controller
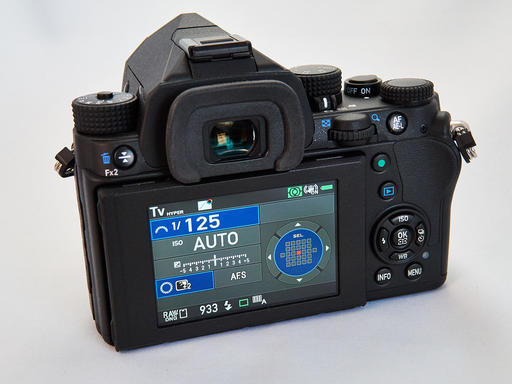 Illustration 1 - 4-Way Controller in AF Point Selection Mode.
When you turn on the camera, the LCD lights up with a bold, easy to read display. Shutter speed, aperture, ISO and the other usual suspects are shown. But you'll also notice a graphic illustration of the 4-Way Controller and OK button that's directly to the right of the LCD.
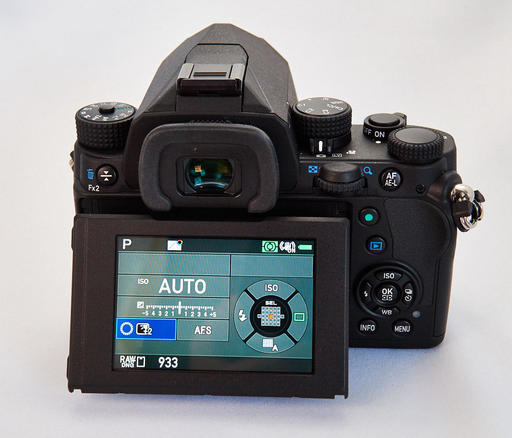 Illustration 2 - 4-Way Controller in ISO-Drive-WB-Flash mode.
Why would you need that illustration? The physical version is right next to it. But there's more than meets the eye. The 4-Way has two modes. And the LCD shows you which one is active. In Illustration 2, you see that you can control the ISO, drive option, white balance, and flash with the four buttons of the controller. Press and hold down the OK button, and you can change modes to the AF selection point by using the four buttons to navigate (Illustration 1). As you do so, the AF point is also highlighted in the viewfinder. This gives you complete and flexible control over the autofocus.
To set this up, go to Menu > Tab 1 >AF with Viewfinder > AF Active Area and choose SEL. (You can alternatively let the camera choose the AF point for you by choosing Auto 27 or Auto 9. But I prefer to control the AF point myself.)
You can toggle back and forth between modes for the 4-Way controller by pressing and holding the OK button. They're all straightforward, however, I do want to mention my favorite White Balance setting: Multi Auto White Balance. It is to the right of AWB in the WB menu, and it measures mixed lighting and gives you an intelligent setting. I love it, and it works.
The Info and Menu Buttons
Press the Info button, and s grid of options appears on the screen (Illustration 3). Navigate to the one you want via the 4-Way controller and press the OK to reveal its details. The Pentax KP does not have a touch screen, so you use buttons to navigate.
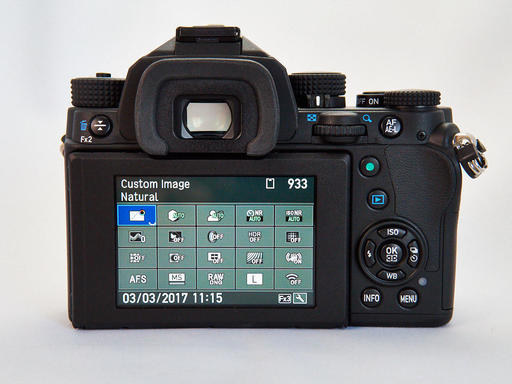 Illustration 3 - Information screen when you press the Info button.
Press the Menu button, and you have a variety of settings to choose from. They are organized via a tabbed interface displayed on the top of the screen (Illustration 4).
 Illustration 4 - Menu Screen
Here are some of my favorite menu settings:
- Camera Tab 1: Custom Image - a wonderful variety of profiles here that are customizable. My default is Natural with just a slight Sharpness boost.
- Camera Tab 1: Program Line - I absolutely love this option. I like shooting in Program mode as my default. And this control let's me customize the program. How smart is that? Currently, I'm using MFT, which leans towards the sharpest aperture setting on each lens based on its MFT data.
- Camera Tab 3: Clarity - I've never seen this before as a capture setting, but I like it.
- Camera Tab 5: Button Customization - Being an Olympus mirrorless shooter for all of these years, I need to have control over the programming of my buttons.
- Camera Tab 5: Memory - What settings do you want the camera to remember (and not remember) when you turn it off? Here's where you select those. BTW: Clarity isn't selected by default, so you may want to turn that on here if you're using it.
- Camera Tab 5: Save User Mode - I have U1-U5 programmed on the Mode dial. This is where I set that up.
- Wrench Tab 4: Copyright Information - You have to do this!
- Custom Tab 2: AWB in Tungsten Light - This is a fantastic way to automatically correct for those hideous orangish tones.
- Custom Tab 4: AF Fine Adjustment - I used this to specifically calibrate my 20-40mm Pentax zoom, and I improved its performance.
Other Buttons and Dials
In the upper left corner is Fx2, which is programmed for the electronic level by default. You toggle it on and off here. The level is visible in both the viewfinder and on the LCD.
The rear e-Dail is to the right of the viewfinder. In Program mode, it is used to shift the aperture setting. But it changes functionality based on the other settings.The AF/AE-L button is programmable via the Button Customization menu (Camera Tab 5), and can be used in a variety of ways, including exposure lock.
The green button is a reset button. Depending on what you're doing, such as Composition Adjustment (Camera Tab 4), it can be used to zero out your settings in that particular function. It's very handy.
And finally, the standard playback button with its familiar sideways triangle icon works exactly as you would expect.
Final Thoughts
I have really enjoyed getting to know the back panel of this camera. The graphics on the LCD are easy to read and attractive, the menu is nicely organized, and many of the settings are quite clever.
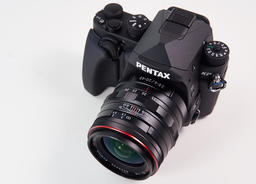
The Pentax KP DSLR is shipping now for $1,099.
More Articles About the Pentax KP
Pentax KP Review - Part One - Top Deck - An overview of the Mode dial, Function dial, and other controls on the top panel of the camera.
Pentax KP Review - Part Three - Image Quality - I programmed the KP to do the heavy lifting so I could focus on composition. Here's how the photos look.
You can share your thoughts at the TDS Facebook page, where I'll post this story for discussion.