This is The Digital Story Podcast #733, April 7, 2020. Today's theme is "Flashback! Tom Hogarty Talks Lightroom 3 at PPE 2009." I'm Derrick Story.
Opening Monologue
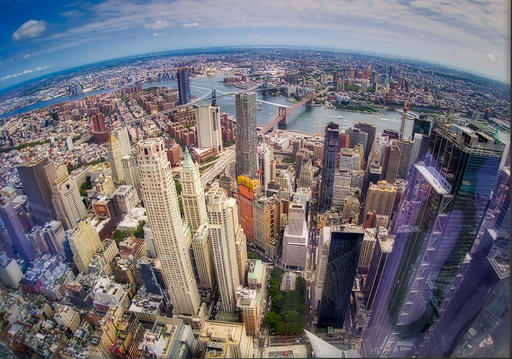
Jacob Javits Center has been the home for Photo Plus Expo as long as I can remember. It's a convention center filled with fond memories for me. Right now, it's serving as a makeshift hospital for COVID-19 patients. But a decade ago, I interviewed Tom Hogarty there talking about the Public Beta for Lightroom 3. It's an interesting conversation for many reasons, and it's the feature story for today's TDS Photography Podcast. I hope you enjoy the show.
Flashback! Tom Hogarty Talks Lightroom 3 at PPE 2009
In October of 2009, I sat down in New York with Tom at a table in the dining area of Javits. Tom Hogarty is the senior director of product management for all things photography at Adobe. We hadn't scheduled the interview. But I saw him at the show and asked if he'd chat with me about the Lightroom 3 Pubic Beta. He cheerfully agreed.
2009 was quite a time in the world of photography. Headliners at the event were the Canon 1D Mark IV and the Nikon D3S. Lightroom and Aperture were battling it out on the software front. And I was working in the Lowepro booth.
Adobe was very excited about the upcoming release of Lightroom 3. And I think you can hear that in Tom's voice as we talk. So sit back and enjoy this slice of life from New York, 2009.
Do You Have a Film Camera that Needs a Good Home?
Over the last year, I've received donations from TDS members who have film cameras that need a good home. What I do is inspect the items, repair and clean as I can, then list them in TheFilmCameraShop where I can find a good home for them. If you're interested in donating, please use the Contact Form on TheNimblePhotographer site. And thanks for you consideration!
Kenny Rogers: The Photographer
You can read the entire story (and see the pictures) on Fstoppers.
If you have an ear for music or you're tuned into pop culture, you're likely aware that Kenny Rogers passed away last week. Did you know that he was also an avid photographer? Did you know that Rogers was inducted into the International Photography Hall of Fame and Museum?
Rogers studied photography with the likes of George Hurrell, Yousuf Karsh (one of the most highly regarded portrait photographers of all time, just in case you're looking for credentials), and John Sexton (a lauded landscape photographer who was once Ansel Adams' assistant, if you're still looking for credentials).
A quote from Rogers: "I think art, if you're capable of one art, you understand - you know, the difference between a snapshot and a photograph is where you take it from. A snapshot of the Golden Gate Bridge is wonderful, but if you're a photographer you get down on the side and you find a way to give it some lines, and some movement, and that's the difference."
Update for the TDS 2020 Photography Workshop Season
Those of you on the registration list for the Humboldt Redwoods Workshop, I touched base with the Redwood Riverwalk Hotel, the site of our HQ. The good news is that they're still open. But only guests within Humboldt County can currently stay there.
I'm going to check in with them again later this month to get the latest information. I will send out an update note to everyone on the registration list this week with my basic game plan and the options you'll have. So keep an eye out for that note.
If you have questions about Humboldt or the other workshops, feel free to drop me a line using the Contact Form on www.thenimblephotographer.com.
The summer and fall workshops are looking less tentative at the moment. If you're interested in either, jump over to our 2020 Workshops Signup Page and place a $100 deposit to secure your place. Only participants on the Reserve List who have placed a deposit will be eligible to register for a workshop. If you have questions or need more information, fill out the "Send Me Info!" request form. I'll get back to you asap.
- Humboldt Redwoods and Coast Workshop - May 12-14, 2020 - 0 Seats Remaining -- Our home base for this experience is in the hospitable town of Fortuna that's on the banks of the Eel River. From there we explore the magnificent redwood groves of Humboldt County and the rugged coastline of Northern California. This workshop explores three distinct ecosystems in a satisfying 3-day event. Limited to just 9 participants, you can reserve your spot and learn more about this event here.
- Lassen Volcanic Park Photo Workshop - July 16-18, 2020 - 2 Seats Remaining -- We'll convene at a spacious cabin at Lake Almanor that serves as our HQ. From there we explore the stunning Lassen landscape, peaceful shores of Lake Almanor, and the magnificent mountain night skies. This hands-on photo workshop is limited to 8 participants and is a wonderful blending of experience, camaraderie, and artistry. Limited to just 8 participants, you can reserve your spot and learn more about this event here.
- The Eastern Sierra Photography Workshop - Oct. 1-3, 2020 - 2 Seats Remaining - Our event is headquartered at the Silver Maple Inn in Bridgeport, CA - gateway to Bodie, Mono Lake, and June Lake. We'll take advantage of the magical morning light to photograph some of the most unique landscape in North America. We'll photograph the sparkling night skies of the Sierra and explore rustic urban environments. Limited to just 9 participants, you can reserve your spot and learn more about this event here.
Updates and Such
Inner Circle Members: A big thanks to those who support our podcast and our efforts!
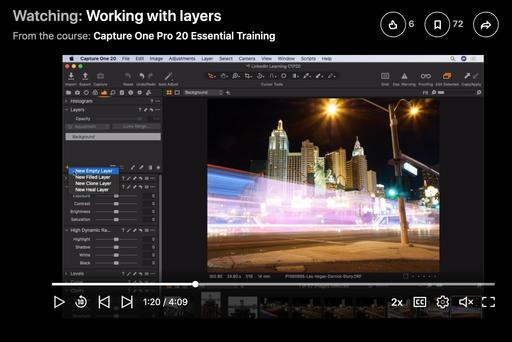
How to Watch Photos for macOS Catalina and iPadOS - Learn everything you need to know about Photos for the Mac and iPad by checking out my latest course on LinkedIn Learning and on lynda.com. This course is perfect for Mac and iPad based photographers who shoot with iPhone, Mirrorless, and DSLR cameras. It covers both photography and movies. And if I say so myself, it's a lot of fun.
B&H and Amazon tiles on www.thedigitalstory. If you click on them first, you're helping to support this podcast. (The Digital Story is supported by its audience. When you purchase through links on our site, we may earn an affiliate commission.) And speaking of supporting this show, and big thanks to our Patreon Inner Circle members:
Affiliate Links - The links to some products in this podcast contain an affiliate code that credits The Digital Story for any purchases made from B&H Photo and Amazon via that click-through. Depending on the purchase, we may receive some financial compensation.
And finally, be sure to visit our friends at Red River Paper for all of your inkjet supply needs.
See you next week!
More Ways to Participate
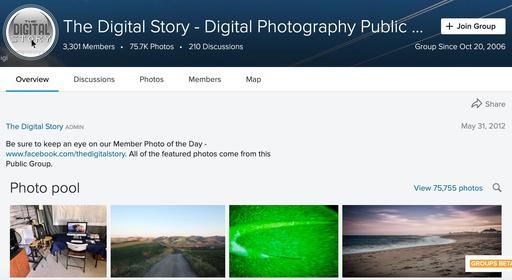
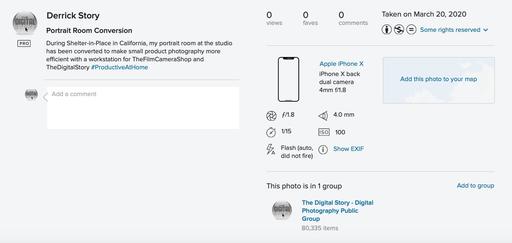
Want to share photos and talk with other members in our virtual camera club? Check out our Flickr Public Group. And from those images, I choose the TDS Member Photo of the Day.
Podcast Sponsors
Red River Paper - Keep up with the world of inkjet printing, and win free paper, by liking Red River Paper on Facebook.
The Nimbleosity Report
Do you want to keep up with the best content from The Digital Story and The Nimble Photographer? Sign up for The Nimbleosity Report, and receive highlights twice-a-month in a single page newsletter. Be a part of our community!
Want to Comment on this Post?
You can share your thoughts at the TDS Facebook page, where I'll post this story for discussion.