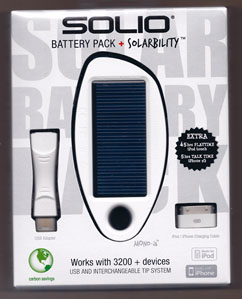
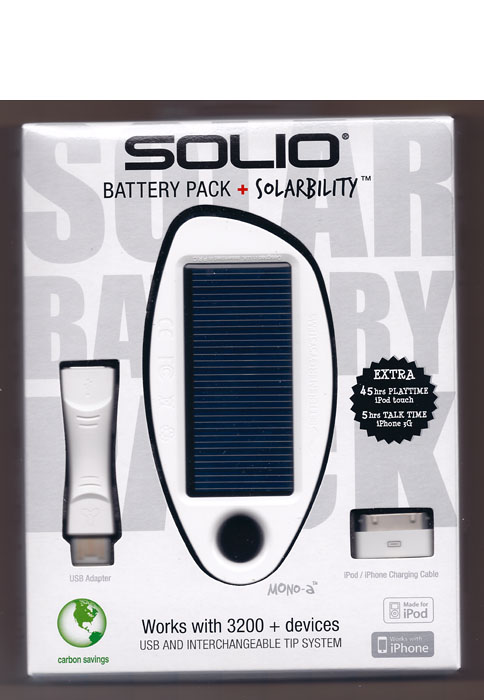
Recently in Photography

  Page 306 of 381 in Photography  

OttLites for Small Product Shots

OttLites are awesome! They offer full spectrum lighting that more accurately replicates natural outdoor lighting. It's perfect for people like myself who may need to take product shots, but don't own a lot of lighting equipment.

Right photo is with OttLite, left image with regular lamp.

In the past, if I needed to photograph a project for a magazine submission, it had to be done outside using natural light to capture true colors and accurately show what the project looked like. But what if it's raining, or the sun has already set? (Like so many people in my line of work, I tend to burn the midnight oil, which isn't very good lighting for photography.)

If something is photographed under a regular tungsten bulb, a yellowish-orange tint is cast over the object. Shooting the same object under my OttLite gives me the cleaner results of full spectrum lighting. Rain or shine, day or night, I achieve more accurate outdoor lighting each time I shoot indoors.

OttLites come in a variety of styles ranging from floor to desk lamps. The bulbs are easily replaceable, but that's something you won't need to do for quite a while. The low heat, low glare, OttLite bulbs and tubes are rated to last 8,000 to 10,000 hours! Wow! Talk about an enlightening experience.

Zeiss Lens on Olympus E-P1? Oh Yeah!

The Olympus PEN E-P1 is a versatile camera that can accept Leica, Nikon, and Zeiss lenses with the right adapter. I have a small cache of Zeiss prime lenses in the Contax M mount that are part of my Contax RX kit. Since I don't shoot very much film these days, I've been looking for a way to put this wonderful glass to work. I read about the Novoflex Four Thirds adapters, but I could not find the Contax mount anywhere (the Leica version seems more plentiful here in the States).


Carl Zeiss 50mm f/1.7 Contax MM mount on an Olympus E-P1 using a Rayqual CY to M 4/3 adapter. Photo by Derrick Story


The Search for a Contax Adapter

After scouring the Web for any adapter that would work, I found a great site called Japan Exposures that had all sorts of photographic exotica, including Rayqual Micro Four Thirds adapters for Contax M and Nikon F mounts. I purchased the Contax mount for 18,700 Yen, and they shipped it to me within a few days. I had a very good customer experience with them.

Mounting the Lens on the E-P1

The Rayqual mount is excellent. There's no wiggle at all. It's finely machined and has a solid feel. The first lens I tested on the E-P1 was the Zeiss 50mm f/1.7 MM. The set up is easy. You mount the adapter on the body, then attach the lens to the adapter. Everything clicks into place. There are no electronic contacts on the adapter, so you work in aperture priority mode. Focus with the lens wide open, then if you need too, stop down to make the exposure. The E-P1 sets the appropriate shutter speed for you. It worked great. If you have lots of light, then you can focus stopped down. Although I must admit, what I wanted to do was shoot wide open most of the time taking advantage of the unique qualities of the Zeiss Planar lens.


Top view of Carl Zeiss 50mm f/1.7 Contax MM mount on an Olympus E-P1 showing the Rayqual CY to M 4/3 adapter. Photo by Derrick Story


You can configure the E-P1 for manual focus-assist giving you 7X magnification with just a push of the OK button. I love this mode and use it to get the focus just right, then back off to normal view and take the picture. Focusing on the 3" LCD was easier than I expected. Working with the silky smooth focusing ring and the click-stop aperture ring on the Zeiss Planar provided a truly classic photographic experience.

Picture Quality

As far as picture quality, my favorite lens was the Zeiss Distagon 35mm f/2.8. The shots were beautiful at every aperture setting. Next, I also liked the 50mm f/1.7 and the 85mm f/2.8. They were a little softer on the edges than the 35mm, but still quite good. I was disappointed with both the Zeiss 135mm f/2.8 and 200mm f/3.5 telephotos. They weren't as sharp on the E-P1 as they are on the Contax bodies. It seemed to me that the E-P1 performs better with the wider and standard lenses than with the longer focal lengths. I will continue to test and report more on this.


Existing light shot using the Carl Zeiss 50mm f/1.7 Contax MM mount on an Olympus E-P1. The ISO was set to 1600, aperture to f/1.7, and was able to get a shutter speed of 1/30th even in this very, very low light. Photo by Derrick Story


Final Thoughts

Shooting with the Contax lenses on the Olympus E-P1 is a brand new experience. It's so unique, it's almost hard to describe. I'm once again focusing the camera myself, yet I have a big 3" LCD with digital focusing assist to provide a new twist on the process. The camera looks good with any of the Zeiss lenses mounted, and the shooting is outright fun. Most of the camera functions work just fine, including flash, image stabilization, and even movie mode. There are a few gaps in the metadata because the camera can't report aperture or focal length, but you get ISO, white balance, shutter speed, etc. The shots look different than with any other lens/camera combination.

For the time being, I'm going to work with these lenses on the E-P1 and see how it affects my photography. I'm already feeling more creative every time I pick it up. I'll publish a collection on our Flickr site soon.


twitter.jpg Follow me on Twitter

-


Both the just-announced PowerShot G11 and the PowerShot S90 only capture in Standard Definition video (640x480). What? In the whacky world of hardware engineering, where we gain a high-sensitivity 10 MP sensor with DIGIC 4 image processing providing better noise reduction, being referred to as a "Dual Anti-Noise System," we don't get what Canon is pushing everywhere else: HD video.

It reminds me of the time a few years back when RAW was the premium feature photographers sought. Suddenly we saw RAW support dropped from high-end compacts, such as the Canon G series, and only available in DSLRs. Now we have RAW in the S90 and G11 (RAW returned to the G series with the G9), but HD video is omitted... even though we get HDMI output on the G11, not to mention the Vari-angle LCD that's perfect for video capture.

There might be an overriding technical reason for no HD video on these new cameras. And I would love to hear it. Because right now it feels a little like a sales and marketing decision. I hope it isn't.


twitter.jpg Follow me on Twitter

-


Want to create professional looking art notecards from your own images? In this podcast I explain the techniques I wrote about in the article Professional Photo Art Notecards Using Aperture and Red River Paper. These products, based on your photography, look great. I hope you give them a try.

Listen to the Podcast

You can also download the podcast here (30 minutes). Or better yet, subscribe to the podcast in iTunes.

Monthly Photo Assignment

Transport is the August 2009 Photo Assignment. Think both literally (car, bike, bus, etc) and figuratively. You can read more about how to submit on our Member Participation page. Deadline for entry is August 31, 2009.

More Ways to Participate

Want to share photos and talk with other members in our virtual camera club? Check out our Flickr Public Group. It's a blast!


Sample notecard before folding. Red River paper is scored in the middle so it's easy to fold and get a professional looking card. Click to enlarge image.


twitter.jpg Follow me on Twitter

-


Podcast Sponsors

SiteGrinder lets you take ownership of your websites. Effortlessly output pages right from Photoshop.

Red River Paper -- Try the $7.99 Sample Kit.

Add Magic to Your Slideshows -- FotoMagico presentations are so amazing that your audience will be asking how you did it.


Technorati Tags: , , , , ,

eye_fi_pro.png

I've been testing the new Eye-Fi Pro card (and will report on it soon), but I still have an older Eye-Fi Explore card too. For those of you who also have older cards, I want to remind you that there's probably a firmware update waiting (especially if you haven't used the card in a while). For my Explore card, the update provided me with "selective transfer," a function I had wanted for a long time.

Basically it works like this: After the firmware update, leave the card connected to the computer and go to the Settings tab in Eye-Fi Manager. Click on Upload Settings, and change the preference from Automatic to Upload Selected. Save your settings and unmount the card. Now, with the card back in the camera, initiate uploads by marking the images you want to transfer with the Protect key. Only those photos will be transferred via Eye-Fi Manager.

After you're done with the Eye-Fi transfers, you may want to Unprotect your pictures. Some photo applications won't let you image edit protected pictures...


twitter.jpg Follow me on Twitter

-


Want to view your Flickr images a new way? Check out Flickroom. This Adobe AIR application not only provides that beautiful charcoal colored interface that makes your photos pop, the Flickroom team has also included a host of useful features such as instant notifications for any activity on your photostream, upload photos by just drag-and-drop, add comments, mark faves, add notes, tweet about your photos, and chat with other Flickroom users.

I haven't replaced viewing Flickr with their traditional browser, but I do like Flickroom for "really looking at my photos online." The cleaner interface lets me see my shots differently than I do on Flickr. I also use Flickroom for looking at my site the way the public sees it since it doesn't display images I mark as private.

There wasn't much information about the folks behind Flickroom on their site, so I wrote them and asked about their story. They replied:

Flickr Essential Training

"Ours is a small startup company which has some very talented Flash/Flex/AIR developers and testers. We have decent experience in creating applications (for clients) based on these technologies. Some of the members of our team are photographers and share their pictures on Flickr. Sometime back they felt that the user interface of Flickr could be enhanced immensely if it were made a desktop application using a technology like Adobe AIR. So that led to the whole idea, and we started working on it. Although the current beta version that is available provides limited functionality, we are working on a lot of desktop-integration features that would make the Flickr experience really seamless. With every update of this application, we hope that the experience of Flickr users would get better and better."

Just in the short time I've been following this story, I have noticed remarkable improvements in the application. So much so, I now feel comfortable recommending it for others too. I have a feeling that within another few updates, Flickroom will become a favorite application among many Flickr users.


twitter.jpg Follow me on Twitter

-


"Ready, Set... Go!" Grab Shot 182

"The picture was taken at our son's school fete back in June," writes Michael Haley. "It's a very English kind of event -- a great fund raising event for the school put on by the parents. All funds from the event are used to fund school outings for the children."

Michael used a Canon 450D with a Canon EF-S 55mm to 250mm F4 - 5.6 IS lens, ISO 200, f5.6, 1/1250, colourspace RGB Adobe 1998.

Photo by Michael Haley. Click on image to zoom to larger size.

If you have a candid you'd like to share, take a look at our Submissions page, then send us your Grab Shot. We'll try to get it published for you on The Digital Story.

And you can view more images from our virtual camera club in the Member Photo Gallery.


twitter.jpg Follow me on Twitter

-


Technorati Tags: , , ,

On June 22, 2009, Kodak published A Tribute to KODACHROME: A Photography Icon. The initial idea for the page was a good one: have top photographers Steve McCurry, Eric Meola, and Peter Guttman share their thoughts and images about the world's most famous film. But now, weeks later, there are also dozens of anecdotes, tributes, and frustrations contributed by photographers who had an affinity for Kodachrome.

It's quite an interesting read. And combined with the great slideshow of Kodachrome images, you really get a sense of this product's place in photographic history.

Here's my own flashback photo: Birthday party in Southern California. I'm the one in the red shirt. Click photo to enlarge.


twitter.jpg Follow me on Twitter

-


Technorati Tags: ,

You can make photo art notecards that won't be just good; they'll be professional too. And I'll show you how. This workflow uses Aperture software, an Epson printer, and Red River paper. It's fast, efficient, and archival. Once you're set up, you can print just a few cards whenever you need them, or for larger runs, spend a rainy afternoon creating entire sets of cards to sell or give as presents. Of course you can make substitutions to this workflow, but if you have the tools listed here, that's where I'd start.

Equipment

  • Quality ink jet printer. I'm using the Epson R2400 for this project.
  • Red River notecard stock. For glossy surface, use 60lb. Pecos River Gloss (#8451) and for matt surface, I recommend Premium Matte C2S (#1567). Both stocks are 7" x 10" and fold down to a 7" x 5" note card.
  • Photo software. I highly recommend Aperture 2 (or later) for this project. Why? Because I create the notecards using Aperture's book making tool. This allows me to design everything precisely as I like, and then it remembers all my settings so I can revisit the project at any time and print more cards that look *exactly* like the original set.
  • Envelopes. You can use what ever you want here, I found Darice 5" x 7" envelopes at the craft store for about 10 cents each.

Designing Your Card

Since I'm using Aperture, all of my images were already organized. I decided to make a themed set of cards featuring my recent shoot at Bodie State Historical Park in Northern California. I highlighted half a dozen shots for this project, then clicked on File > New from Selection > Book. This is the first step to opening the layout tool. Next, in the following dialog box, choose "Custom" from the "Book Type" popup menu. We won't be using any predesigned templates for this project. Click the New Theme button, give it a name, such as "5 x 7 Notecard," and enter the following information:

Page Size - Width: 7", Height: 10", Margins - Top: 5.5", Bottom: 0.5", Inside: 0.5", Outside: 0.5". Then click OK.


The Aperture layout tool. It was originally designed for books, but it's great for notecards too. Click to enlarge image.


Your selected images will be added to the new project you just created, and you'll be greeted with the layout tool interface. Open up Master Pages (Gear icon > Show Master Pages), and click on the 1-up template. Go back to the Gear icon and choose "Show Layout Options." You'll see new dialog boxes appear above the Master pages that allow you to specify settings.

Go back to the Gear menu, choose Add > Photo Box. A placeholder box will appear on your 1-Up Master page. Click on it to select, then add these numbers to the Size & Position box that's above the Master Pages box:

X: 0.50, Y: 0.65, Width: 6.00", Height 4.00", Angle: 0°. You can adjust these settings later to your particular tastes, but this will get you started. Then right-click on the photo placeholder and choose from the popup menu: Photo Box Alignment > Scale to Fit Centered. You've now set up your template. You can add text by choosing Gear > Add > Text box. Type your text in it, then click on the "T" at the top of the interface to format it. You'll probably have to rotate it 180° if you want it to print correctly on the back of the card.

Now go to the Pages box (below Master Pages) click on the 1-Up thumbnail, and drag a photo from the Filmstrip to the empty placeholder in the big browser window. To make sure your Master Page settings are honored, I recommend going back to the Gear icon and choosing: Reapply Master. You've now designed your first notecard. You can add more notecards by going to the + icon and selecting "Add New Page" from its popup menu. I created eight of these 1-Up pages for my Bodie notecard set.

Get Ready to Print

As with any big printing project, make sure your screen is calibrated and your printer is full of ink and ready to go. I choose the R2400 for this project because it handles card stock easily, plus it seems to like Red River paper. To avoid paper feed problems however, I only load one sheet at a time for notecards.

For notecards using the 60lb. Pecos River Gloss, use the following settings in Aperture.


The Aperture Print Dialog. You can save your settings as presets so it's easy to print the job later on. Click to enlarge image.


Select the notecard you want to print, then click the "Print" button in the lower right corner of the Aperture interface. A dialog box will appear with "Custom Book Preset" selected in the left hand column. Make a test printing one card, so I recommend that you use the "From X to X" setting instead of Print All. Next, select your printer from the popup menu. And for paper size, I've had great luck with 8" x 10" sheet fed (even though the paper is really 7" x 10"). I set the ColorSync profile for Epson glossy paper (in this case, SPR2400 PremGlsy Photo.icc), then click the Save As button in the lower left corner to save this preset. Give the preset a descriptive name, such as "R2400 7x10 Notecard Glossy," click OK, then print. Aperture will remember this preset, and you can use over and over again.


Sample notecard before folding. Red River paper is scored in the middle so it's easy to fold and get a professional looking card. Click to enlarge image.

You have other options in this dialog box too, such as setting Black Point (which opens up the shadow areas) or increasing gamma (which brightens up midtones). The nice thing about these adjustments is that you can tweak your output without having to mess with the picture itself. If I do make print adjustments, I note those settings in the description area of the photo so I can use them again next time.

To print matte surfaced cards, I swap out the black cartridges in the R2400, then create a new preset in the Aperture Print dialog box that uses the Enhanced Matte Paper ICC profile. I then load up a sheet of Premium Matte C2S and make a test print. If I'm not satisfied with the initial output, such as the shadow areas rendering just a little too dark, I make a "New Version from Version" by right-clicking on the image. Now I can adjust the image for the matte surface and try another print.

lynda_aperture.png

Since all of my print settings are saved as presets, and my card layouts are saved as templates, I can come back to this project when ever I want to print additional cards. If you use Aperture's Vault, it will save your settings to a backup drive.

Final Touches

Once all the printing was done, it was fun to spread out the cards and choose my favorites. Some images looked better with the glossy surface while others were really nice on matte. I carefully folded the cards along the score, then bundled each one with its matching envelope. I even found 5" x 7" cardboard boxes at the craft store that I could use for packaging sets of notecards.

Obviously there are variations to just about every step in this process. You can use other photo applications or printers. The tools I chose were the result of testing, with these being the easiest and most efficient.

And I have to say, now that the project is over, making custom notecards from my own pictures is very satisfying.


twitter.jpg Follow me on Twitter

-


Technorati Tags: , , , , , , , , ,

Our own Stephanie Scheetz attended the CHA Summer Convention and Tradeshow in Orlando, Florida, and sits down with Derrick to report on interesting things there for photographers and creatives looking for new opportunities. We talk about trends, specific products, and business endeavors that you might be interested in.

Listen to the Podcast

You can also download the podcast here (25 minutes). Or better yet, subscribe to the podcast in iTunes.

Monthly Photo Assignment

Transport is the August 2009 Photo Assignment. Think both literally (car, bike, bus, etc) and figuratively. You can read more about how to submit on our Member Participation page. Deadline for entry is August 31, 2009.

More Ways to Participate

Want to share photos and talk with other members in our virtual camera club? Check out our Flickr Public Group. It's a blast!


twitter.jpg Follow me on Twitter

-


Podcast Sponsors

SiteGrinder lets you take ownership of your websites. Effortlessly output pages right from Photoshop.

Red River Paper -- Try the $7.99 Sample Kit.

Add Magic to Your Slideshows -- FotoMagico presentations are so amazing that your audience will be asking how you did it.


Technorati Tags: , , , , ,